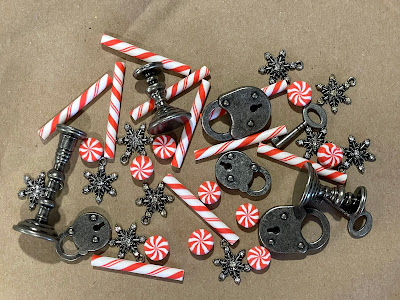
Am I the only Tim Holtz Addict who likes to open up new IdeaOlogy-
just to feel them and ogle the tiny details ?!
The TH Etcetera Tombstone and one package of the TH Paper Dolls Christmas 2022
are scores in pre-Christmas shopping. The second package is NOT a 'mistake'.
I absolutely ADORE these Paper Dolls and you just cannot have too many of them!
The little book is one of the things I spent some crafting time on- I'll be getting
the rest of those items blogged up soon, for viewing. Meanwhile, this one 'larger little' book
was made and set aside just for this very project. The pages can actually turn and are readable.
I'm not a big fan of the scoreboard/cutter shown here, but it's the one I found last year in Florida.
I'm hoping to get Tim Holtz's new 12-inch guillotine cutter for use here.
But we'll see how that goes as I have more work to do than shopping time.
As far as I know: the Ranger TH Distress Embossing POWDER is no longer around.
I totally will be lost when I finally run out of that.... unless Tim Holtz takes mercy on me
and will reintroduce more of it- along with my fave: Grungepaper! (Not shown here.)
Another score: one set was found pre-Christmas shopping and the other was found at TFJBoutique.
While there was a mention on FB (Tim Holtz Addicts group) of using 'stacks' of paper glued
together verses using thin or thick foam for stand-out items, I wondered if doing BOTH would not only give me a clean, 'squared' edge on top, but also have the 'puff' of the foam?? I paired both
(adhered together with Glossy Accents) using some of Tim's new Paperie.
You be the judge and decide from the end result!
The TH Etcetera Tombstone is easy-peasy to put together- the package shows it on the front.
But I was going full out for a front and backside, so I used the extra pieces from the cutout shapes, as well as a couple of the TH Etcetera Bracket Shelf pieces, to make what I wanted.
This stuff is very stiff and very durable, yet can be cut with your TH Scissors and making
a hole for Jump Rings or say...TH Long Fasteners...is easy to do.
This stuff is Etcetera stuff is BRILLIANT, and it's my new obsession!
Slipping in a ribbon for hanging- not just for drying all edges at the same time,
but for later display as well.
Glossy Accents is used in all the glue processes. I'm heavy-handed with it, but I've
got projects that have lasted sitting out (and being handled and dusted) for over ten years.
I'm a firm believer in that glue!!
The main piece is all put together all around.
Here comes the fun part...
This is really the BACK SIDE, but I am showing it got done FIRST.
Because...
As you can see from the slightly-still-there-glue-marks, the LARIMORE lettering
was accidentally placed onto the FRONT SIDE by mistake.
*sigh*
Embrace your mistakes! I did I wasn't happy about it, but I did it.
Don't worry: those glue marks will just disappear underneath the layers I had planned!
After all my lettering was placed and glued, I used my scissors to scrappy-cut some odd ends of the foam to place around the edges of the Tombstone for faux "cracks" in the stone.
Now it's Gesso time! Coat it all over - front and back, sides, top and bottom.
I used a stiff brush to get in between all the spaces in the letterings. It dried pretty quick.
Some Ranger TH Texture Paste in Opaque Matte, which is not transparent, so it
can be used as a good 'filler' for spaces between the two sides that were still showing.
And here comes the BEST PART: Tim's (new to me- FINALLY!) Grit Paste!!
TH had some new extra-gritty Grit Paste come out over the Fall and Holidays, but I was not able to find any when I wanted it, but did manage to find this over pre-Christmas shopping. I grabbed that jar like my poor life depended on it! The only problem was; it was not as gritty as the other newer paste.
I'd brought my 3 precious jars of Distress Embossing Powder with me for this very project, not knowing if I'd find the new Grit Paste or not, so I got it out wondering....
if I could add some of that to the jar of Paste?? I tried it out on paper first.
And it WORKED! So from then on, I scooped out a gob of Paste with my brush,
put it on my finger and then just gently dipped. The powder and paste just LOVED one another!!
The result was convincing enough to look like the newer Grit Paste, but in Antique Linen spotting.
(My other idea was to go out my front door with a wire strainer and use Florida Gulf SAND
which is really the same Antique Linen shade inland and on shoreline, white.)
I used the brush to get right in there up against the edge where the lettering met the Etcetera board.
I wanted the lettering to stand out, yet look faded by the years.
So having it all blend into the board was my main need here, and it did take some patience
to build that up with the brush without tearing the lettering apart. I hung it to dry a full 24 hrs.
In one of my favorite main inspiration Crafter's blogs, Zoe Hillman - one of
Tim's Makers,
her Tombstone had me totally hooked on the idea to do one with this story the main idea.
(
Click Here to see Zoe's extremely cool Tombstone Tag.)
While the Tombstone Tag was hanging out in the little Florida Craft Room...
I got busy playing with my TH Paper Dolls.
I colored with Ranger TH Distress Crayons, and the cool thing about these is that you can
color hard on these, wipe it all off with a baby wipe, and use another color, or another media.
These Paper Dolls are so versatile!! And yeah- I finally stuck with this green on "me".
After smearing the Distress Crayon color, then going over tiny areas with a waterbrush, then the darker Distress Crayon over it's lighter color, I heat dried all of the Dolls between each layer,
then added edging in TH Distress Oxide Ground Espresso with a Blending Tool.
After the 24 hour drying, this thing really felt like a real Tombstone's surface!
And that's when I looked for my grey-shade of Distress Paint and found I'd packed the METAL
Distress Paint. What's a girl to do?! She bes like TIM: just mix it and play around
till you get what you need and want! So I did and the finished coloring was...
...wait for it...
...PERFECT! (Top part is the final color.)
Time to embellish with the Dolls, book, chain, etc.
I did make a simple pocket for the book to slide right into- easy to get out as interactive!
RESULTS:
Like Ebenezer Scrooge, each year we try to keep our souls fresh with the CHRISTmas spirit.
We are reminded of the world's chains that can hold us down and steal our focus- and our joy.
Spending time with, and teaching my Grandbabies, is VERY IMPORTANT to me- thus "I"
hold the key that unlocks and breaks away the weighted "chains" of the world.
The TH IdeaOlogy gates are pretty OLD,
but The Christmas Carol by Charles Dickens is much older.
(REQUIREMENT for OLD and NEW)
The TH IdeaOlogy Lock & Key Sets are very new- just out in Fall 2021, but
I'm just now getting the chance to FIND any. I actually found one package pre-Christmas shopping,
as these are the absolute Bee's Knees in cuteness !!!
(REQUIREMENT for OLD/NEW)
Getting TH IdeaOlogy Jump Rings through a board??
If it's an ETCETERA THICKBOARD...it's a can do!!
Of course, keeping faith means having faith that GOD's 'got this': every situation, every circumstance
that comes about in the NEW YEAR 2022.
We practice our trust and our patience- especially in these days- with those around us... 24/7/365.
The book is easily taken out and read.
But those TH Thinlits Set Alphanumeric Stretch letters!!!
They make the name LARIMORE so realistic looking that I cropped this and am
adding the resulting pic to my FB cover. It's so CUTE!!!
And now, for the best NEW news of all:
Our younger Red Wing, MinneSNOWta Son, Daughter, and Grandbaby Pecan
are moving to Upstate New York! It's a done deal where he will now be a Nuclear Engineer
at a facility on Lake Ontario. As of this posting (Wednesday; Jan 12), they are in Indiana
for a short visit while waiting on the moving company to get everything to their newly purchased home
in NEW YORK STATE!
As if that's not all...
They called us on Sunday; January 9th to surprise us:
GRANDCHILD #4 is on the way!!!
A Baby made in the OLD year who will be born in the NEW year!
How's that for the final Requirement? :)
Of course, I immediately had to run into my Craft Room to grab my Paper Dolls
to find the more suitable replacement: for Baby Pecan to now be a
BIG BROTHER with a LITTLE BROTHER OR SISTER!!!
An "old" TH Paper Doll represents a new Baby!
where a new theme challenges you to create something artful!
Each Challenge gives you 2 full weeks, and you can enter a photo of your finished piece
which could earn you a blog Badge and some bragging rights!
Each entry is automatically entered for the random draw PRIZE !
Sponsored by
So...Until next time...
Stay Safe &
HAPPY BLOGGING!!


Lyla: welcome to the team! Beautiful inspirational art for your first challenge on the design team!
ReplyDeleteLyla, wow! You have been blessed in the New Year! I'm tickled pink you have joined the team! And congratulations on the new expected Grandbaby! Your tag is really fabulous and I love reading your thought process. Excellent job on the gritty texture and it turned out to look like real carved stone! Bravo!
ReplyDeleteFantastic creation! I love how you altered the base board tag. So creative. Welcome to the team!
ReplyDelete