Year 2013 & Year 2014 2

Year 2013 & Year 2014 2
Showing posts with label Spring. Show all posts

Tuesday, March 7, 2023

The Funkie Junkie Boutique's Inspiration Ave; #6 Spring Frolic... Easter Blessings!


The end of February roared in like an Indiana March, here on the Florida Panhandle. And with it, came warmer air than we've had yet. My palms are reblooming fronds and the Azaelas are full of pink blooms. I say this just for those up north to take heart; Spring IS coming soon! We're staying busy these last weeks here, enjoying the time before we head back up and face the work of opening up the Indiana house and all the spring yardwork there is sure to be waiting for us. Plus, there's four little Blessings up north who are waiting for us to spend time together with them, I love the photos the kids send, and the stories that go along with. There're always shenanigans that go on, such as older Son explained how he was on his phone only 5 minutes and he found Peanut jumping on the trampoline... in his au naturel shell. Jumping along with him was Princess Pistachio- obviously shelled. Pecan learned to cook breakfast, and Princess Rose learned how to blow *raspberries*. (Great Grandpa Rush would be so very proud, lol!) Older Daughter had her 2nd shoulder surgery- after months of extreme pain from a failed 1st surgery. This time, while it's a long healing process, she seems to be finally making some progress. I'm immensely thankful, yet, still praying that she'll be pain free and able to at least not have it keep her from living daily life the way it has been. It's been quite a past year for our girls, as 2022 had some rough times for both of them. Younger Daughter not only went through pregnancy and birth, but they all moved to an entirely new community in a new state, with a new house and job to go with that move. Replacements happen more often with a new house, and they've had their share of those also. Little Pecan seemed to just bloom during all of it, taking everything in stride, and making new friends so easily. The addition of Princess Judith Rose has been the icing on the came as far as that goes; she is a sweet, very happy surprise! There's always the good, the bad, and the ugly in life... just today (of this typing) their younger pup, Penny, was taken to the vet and they were told if she makes it through tonight, they say she'll likely be alright. The older kids went through the loss of their Golden, Macie pup, just last spring at this very time from just about the same thing (suspected Addison's Disease). I'm praying for our Grandpup Penny to be ok, and not have them go through loss. It's the worst part of being a furryparent; having to choose what we wish we didn't have to. Storms blow through our lives, not to test us or torment us, but to help us grow, or bring us what we wouldn't have had otherwise.  As mere humans, it's hard for us to see the big picture. Yet, The LORD knows what is best for every living thing, and we need to trust His answer- no matter what it will be. By the time of this posting, we'll likely have one. All I can do is keep asking! 


It's time for a "Spring Frolic" at Inspiration Ave, and The Funkie Junkie Boutique has Tim Holtz IdeaOlogy that fits the theme perfectly! I couldn't wait to get my hands on a few things that are in stock and get started on this Etcetera Mini Tag which I used as my 'vehicle' to carry some Easter goodies!
Hop on & hang on; it's a scroll down this crafty rabbit hole to see how I made it!

I started with some Tim Holtz Etcetera items,
and some TH IdeaOlogy items- new just for Easter!

Here's a list of product links to help get you started:


I wanted to incorporate some of that *retired* TH paper stack...
and I found a set of unused flowers in my stash
 (probably a dollar store find at some point).
Tim's new products still go very well with any of his past products!

I did my favorite technique of Glossy Accents glue and
burnish the paperie to the Etcetera pieces with my TH Grip Sander.
The shelf is made wider by putting 2 pieces together as one
while using a third for the normal bottom shelf holder piece.
I like to do both sides of my tags, so I made another 'enforcer' for the backside
by tracing the included one made from Etcetera.
I then sanded all the front and side- gently and sparingly;
just enough to have the words show up, but enough to look aged,

After wiping all the sanded bits and dust away with a dry cloth,
I used Walnut Stain Distress Crayon on all the edges and rubbed it
into the sides with my finger. Then heat dried everything.
I scribbled some of the Crayon onto my craft sheet,
sprayed a bit of water onto it, and used a Water Brush Detailer
to get into the areas my fingers couldn't reach into.
Again: heat dried everything.

The Etcetera Cathedral Window pack has 6 cuts inside:
four this smaller size and 2 large sized. I took this pair of smaller,
to stack together making one frame with a plastic (cut piece of trash)
to go in between.

I gave both (laser cut- very clean and crisp cuts) a coat of 
Distress Paint in Picket Fence and allowed that to dry.
I heat dried both frames just to make sure the paint was dry
before I sculped on some TH Opaque Crackle Texture Paste.
This, I let dry completely on its own.
After the crackling appeared once dry, I used a Blending Tool
to rub a bit of TH Vintage Photo Distress Ink on the front bottom edges
for a bit of an aged look.
Then heat dried for the last time (to dry the Distress Ink).
*NOTE: Distressing needs to be done BEFORE adding any plastic
to keep from melting the plastic!

For the clear plastic, I simply dropped a lot of the 2 Alcohol Inks onto the plastic,
and moved it back and forth- allowing the inks to "fight" for their places.
I stood the plastic up onto the bottom end to let the excess inks drop off to the paper toweling.
Then I set the widow down to let it finish drying on its own,

Once the Alcohol Ink was dry, I used Glossy Accents to put the plastic
in between the two Etcetera Cathedral Windows, let it dry,
then shaped the wire stems on these,,, felt??...roses,
and glued them onto the sides.

Now that the entire background was finished, it was time for the cute stuff!
Those TH Tiny Eggs really ARE tiny!
They're so cute and since the package has 50 pieces,
I used 18 for this project and still have plenty leftover!
My own tip for Alcohol Inking these: rub the ink gently with
 the correct felt applicator/Alcohol Ink Tool.
I didn't have mine here with me and paper towels/napkins were
used in a pinch, but not as effective in moho.

After the AI was dry, I used my trusty old toothbrush
to flick TH Distress Paints onto the eggs: Black Soot onto the blues
and Picket Fence onto the pinks.
I heat dried them all very gently- just to keep the paint on.
I did do all sides of the eggs. It was a quick job since they're so tiny!
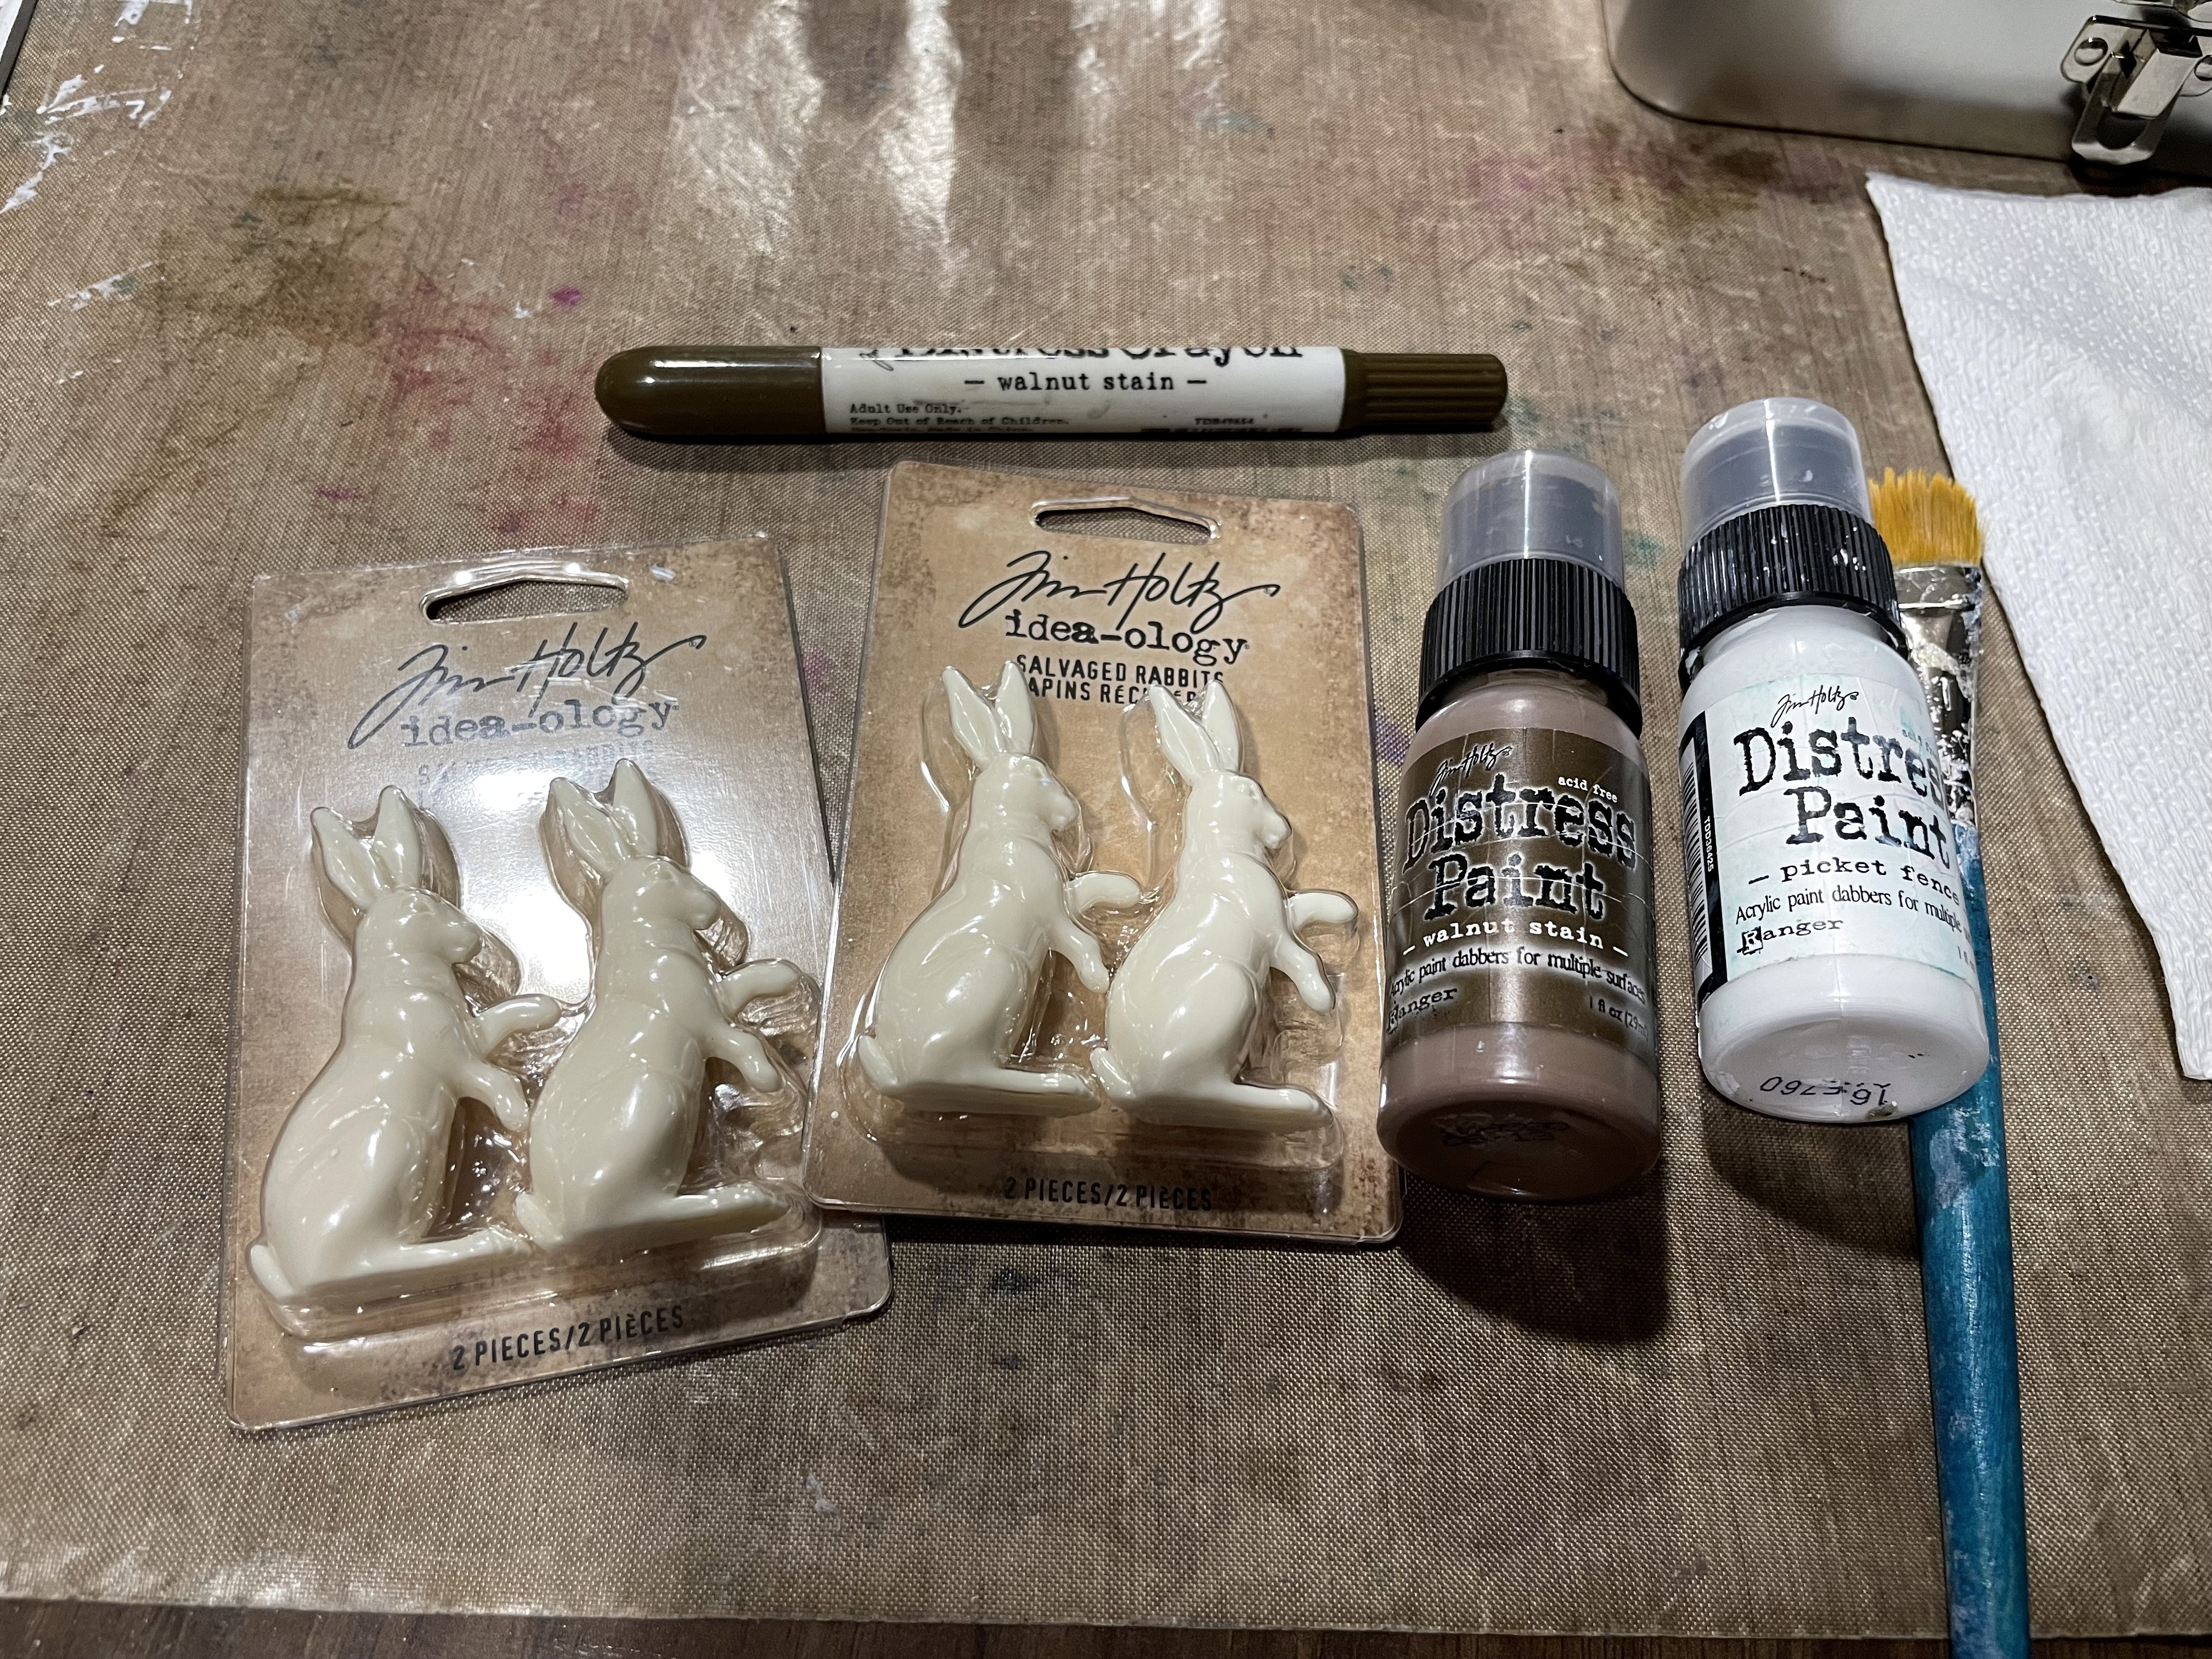
Next: those silly wabbits of Tim's!
These Salvaged Rabbits are the cutest things he's made yet!!
I wanted "chocolate" bunnies but did wonder about making white paws.
I stuck with my original intent: milk chocolate bunnies with nothing but
 Distress Paint Walnut Stain.

This time, I decided to try out the tip on painting IdeaOlogy figurines:
I used my tape runner to add just a tiny strip of tape to a lid (of anything, really),
then topped the Salvaged Rabbits on and it really WAS easier to paint them!!
I didn't need to do anything else to them (other than rip up some
included-in-your-order-freebie-ribbon from The Funkie Junkie Boutique
to use as little scarves to identify each bunny: as each of my Grandbabies)!

For the TH Chip Quote: A bit of color around the sides and
a little "aging"...and that's that.


Check out this adorable hanging display Tag! 


Front


This bit of old stash ribbon made the perfect hanger!

This is Princess Chloe and Big Bubby Peanut!
I did get a bit of glue stuck onto the egg here:
I used my hot glue gun for this since it held fast better.
I hate the glue strings that I always forget to get off before the photos.
A bit of moss from my walks below the Spanish Moss trees;
dried out and then stuffed into the TH IdeaOlogy Barrel,
gave the Tiny Eggs a bit of a lift.
I used some Walnut Stain Distress Crayon rubbed hard into
the grooves then heat dried it. Gave it some more depth.

And here's Princess Rose with Big Bubby Pecan!

Back
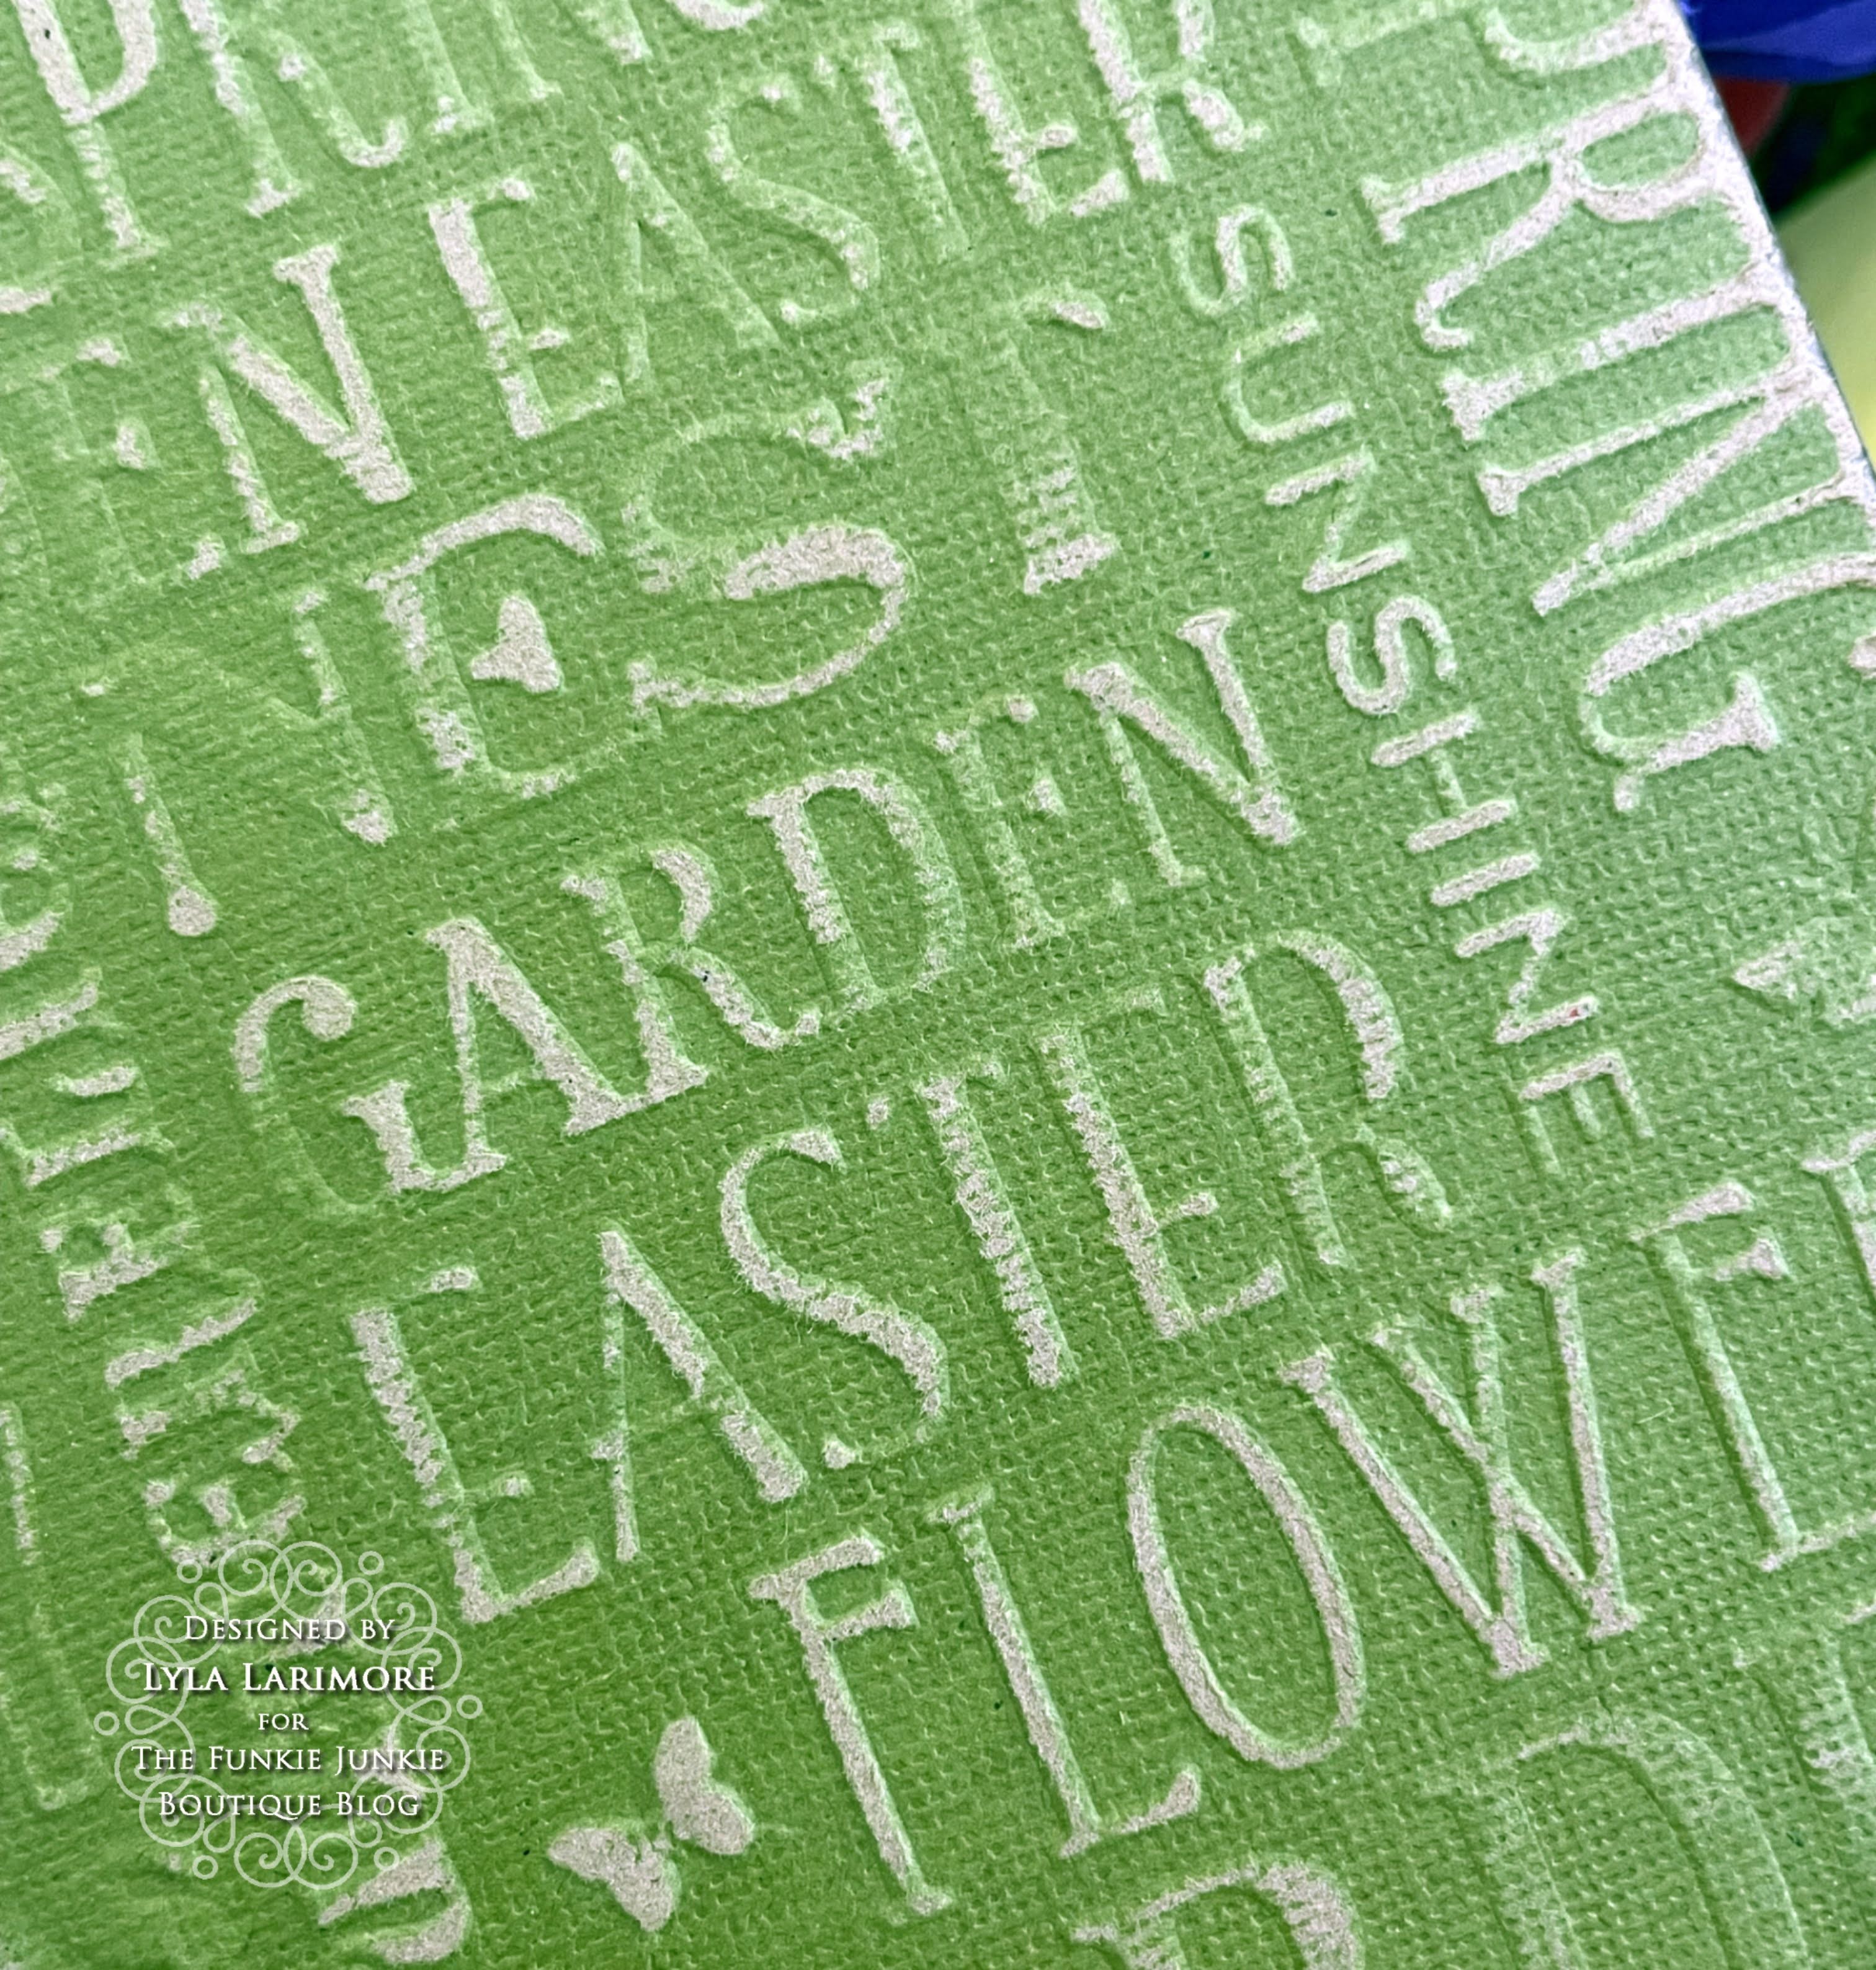
The color changed from better lighting,
but you can see how the wording all applies to SPRING!

Thanks so much for joining me on this Spring Frolic!
As always: be sure to pop back in over at
 Inspiration Ave
for more great projects & tips from the rest of the awesome Design Team from

Until next time...

Stay Safe &
HAPPY BLOGGING!!


Tuesday, May 3, 2022

The Funkie Junkie Boutique Challenge #9; My turn to lead with "Sunday in the Park".... Beasly Park, Emerald Coast, Florida!


     I
'm posting this in just the last couple of hours, since we just got home from Oswego, New York.  I'm taking the lead in this TFJB Challenge "Sunday in the Park" , and I have been looking forward to this since I came aboard The FJB Design Team back in January! I made sure to check the store well beforehand and get the right tools I needed in order to make my plan for this make work. I have some steps you can follow along with and if that's all you want to read- just scroll on down, because as is my usual... I have had a wild life lately...

       What a couple of weeks it has been since my last post...pictures will tell more than I can. The older set of kids and Grandbabies had a very rough week; the cause of my praying for comfort as I typed up that last entry; GrandPuppy Macie, was found to have some kind of cancer, and she just went downhill quickly. They sent them to Purdue where she would have the very best of any Vet care around, yet they were unable to save her after 2 blood transfusions. Perhaps their study of her body will help others. They brought her ashes back home to bury. Peanut and Princess were able to say their goodbyes, and young children heal faster with this, but it was very rough going for our kids. Like the younger set with our first Grandpup ,Baxter (who was put down last year in February)... it was gut-wrenching to have to make that choice for our 2nd Grandpup. She was their first 'baby' as Baxter had been the younger kids' first. I can understand and be grateful for Baxter's long life; as well as my own HunniPi who has been my Hearing Helper for the last 13 years this August. She just passed her 13th Birthday on April 29th. Yet, Macie May was only 5 years old and that is a very short life for a Golden Retriever. BEAR, her younger brother, cried for days and we are praying he doesn't have the same situation down the road.


         And during those 2 weeks we waited to see if Macie was going to be ok or not... one of my many Neices managed to make up a surprise meeting with my Mother and siblings from that side. We'd not seen one another since 2003, and probably not since the 20 years before that. I talk often to them and see my next oldest Bro quite a bit, but it's the first time we've been all together in one place. I have 15 Brothers and Sisters with 3 deceased. Only one is younger than I, yet we just got to meet in 1993.  Yeah... I know; very confusing. I know because I lived it, lol. Yet, I love them ALL dearly and wouldn't trade how my life turned out- I am truly BLESSED!


     There's more going on, but let's get to the fun part first: TFJB Challenge: Sunday in the Park ! I've got two tons of photos to show you how I got the look, so let's just get started!


I began with just these items - and my artist rendering in my sketch book of what I wanted to do.
Later on, as you will notice, I ended up NOT using the older TH Thinlits Tropical. I really wanted that tree, but to keep the perspective correctly done, it just wasn't going to fit into the canvas.
I've had that TH Thinlits Die Paper Village since December and just now got to use it just for this.

The TH Paperie as well as some stash paper and the 8x10 canvas board.

I just SO LOVE that TH Kraft Stock paper!!
I cut out the shapes using 2 'larger houses' and one smaller- these are really TINY, all right.
I then cut them each down to what thickness of house I wanted to pop out from
the canvas board. The taller small house was going to be the first layer on the canvas,
so it would be completely flat using only one side and the roof to pop outward.
The next layer of (larger) house was 1/8 inch thick, and the last larger house was 1/4 inch thick.

After cutting, I sanded them.
I did make the 2 deeper houses just as you would normally- back and front....

...but I mixed up the cutting with my TH Tiny Scissors
by clipping and rearranging so that you could look into the windows and see the back wall.
Both layers of each house were the front of the paperie, not the craft side.

I inked them up and then heat dried before gluing together with Glossy Accents.

Next, I fussy cut some "water" out of the TH Kraft Stock- Cool... a dark blue.
Then I heavily spritzed water onto the paper and 
used Chipped Sapphire Distress Ink onto the raised side of 
a very old TH Embossing Folder Travel Signs to make waves. Then rubbed it in using my finger.
(Making waves...lol!) 

I used some Picket Fence Distress Ink to go all around the edges and
really rub that into the bottom of the water where it would meet the sand.
Heat dry between inks.
Then I applied Glossy Accents heavily on all the edges and hit it wih heat.
Let it BUBBLE! Then do the GA over the entire water piece. And heat heavily on those peaks.
It looks like bubbles of foaming waves. But it's not ready yet... 

... till I tipped the waves with some white gesso.
I went over all the bubbled areas with the gesso also.


Now came the SAND.
I did this from TH Warm Kraft Stock Stack- Warm.
First, I laid the water on top of the Kraft Stock so I could use the corner of my
TH Ink Blending Tool to gently mark out where the sand ended-
using Distress Oxide in Ground Espresso.
I highlighted the front bottom of the sand with DO Antique Linen.
That would be the focal point of my "people".
That dark line you see is where I wanted the waterline to meet the sand.
The water near the shore is usually darker because it's wet.

I got out some stash paper and started stacking up on the main TH Thinlits die The Park.
After I used Glossy Accents to stack about 3 cuts,
I used my TH Tiny Scissors to trim away from the folks that which they wouldn't need
in order to fit into clothes like this...


Use the base you just made to fit the clothes by fussy cutting.

The last part was making the "sky" out of another sheet of the TH Kraft Stock in light blue.
Running a bit of the DI Picket Fence back and forth across the sheet, allowed me to highlight it.

The three parts together really look GOOD- like what you'd see on the Emerald Coast.


This section is highlighting Tim Holtz's newest Thinlits Colorize Die: WOODGRAIN!

There was some discussion on Facebook's Tim Holtz Addicts page on how to save the instructions for the new Colorize line of TH Dies. I put in my 2cents worth and I'll show it here in photos.
To remind myself how the cuts of each die is assembled together, I use my iPhone 12Pro to take screenshots of certain parts that help me where I may be having a bit of trouble after first going through the video in full. I then file those photos with the make I did and I can run back through and reference it when I need to. The plus; I can refer to the photos as I work and not have to replay and replay and replay... you know the deal there. ;)


And, best of all; the dies themselves help you get your cuts into the right order.

Choosing the colors is a new experience, but very EASY to put together!

Here's my idea for this make: using some tossed out onion mesh (ORANGE color!)
to help the cut up Woodgrain look like sand dune barriers. And it worked!

Here's are 2 photos of the tools with some available tool links:


                                                 And HERE is the finished make; 
                                   I'm imagining myself back down in the South,
                                            at Beasly Park on the Emerald Coast!


After I took those photos, I sprinkled some water drops on top of the 
panel and swiped it off quickly- it puffed out some of the sky and sand,
which made it look all the more textured.
See how the light in my Craft Studio shined on the top?
It looks as if the sun is coming up in the morning and they are catching the wind!


Now it's YOUR TURN!
Even if the weather is not allowing you to get outside to a park, we all still have memories
of that place we loved to play in.  So get out your stamps, dies, mixed media or embellishments
that remind you of what you might see on a beautiful sunny day in the park.
Make a Tag, Panel, or even a 3D project and bring the outdoors into your craft space!
Don't forget to upload a photo of your make on
and YOU may win a $25 Gift Certificate from our Sponsor;


I had a WONDERFUL time up in Oswego, New York, spending time with our soon-not-to-be
youngest Grandbaby, Pecan (Jamie)! The kids have a lot of work yet to do on the house, but when
your kids all do everything on their own, it's nice to be able to give them extra help, and take
their kids for a time, so they can rest. I get the bonus end of it: time with my Grandbabies!
We all went to see Fort Ontario while we were there- no time for Niagra Falls just yet. The fort was definitely MY kind of thing! That Primitive Americana style is never going to go out of style in my home! I just LOVE HISTORY and am very lucky that my kids also love seeing how our past was lived.

We back-tracked in order to share Easter together- Jamie and his Memaw!

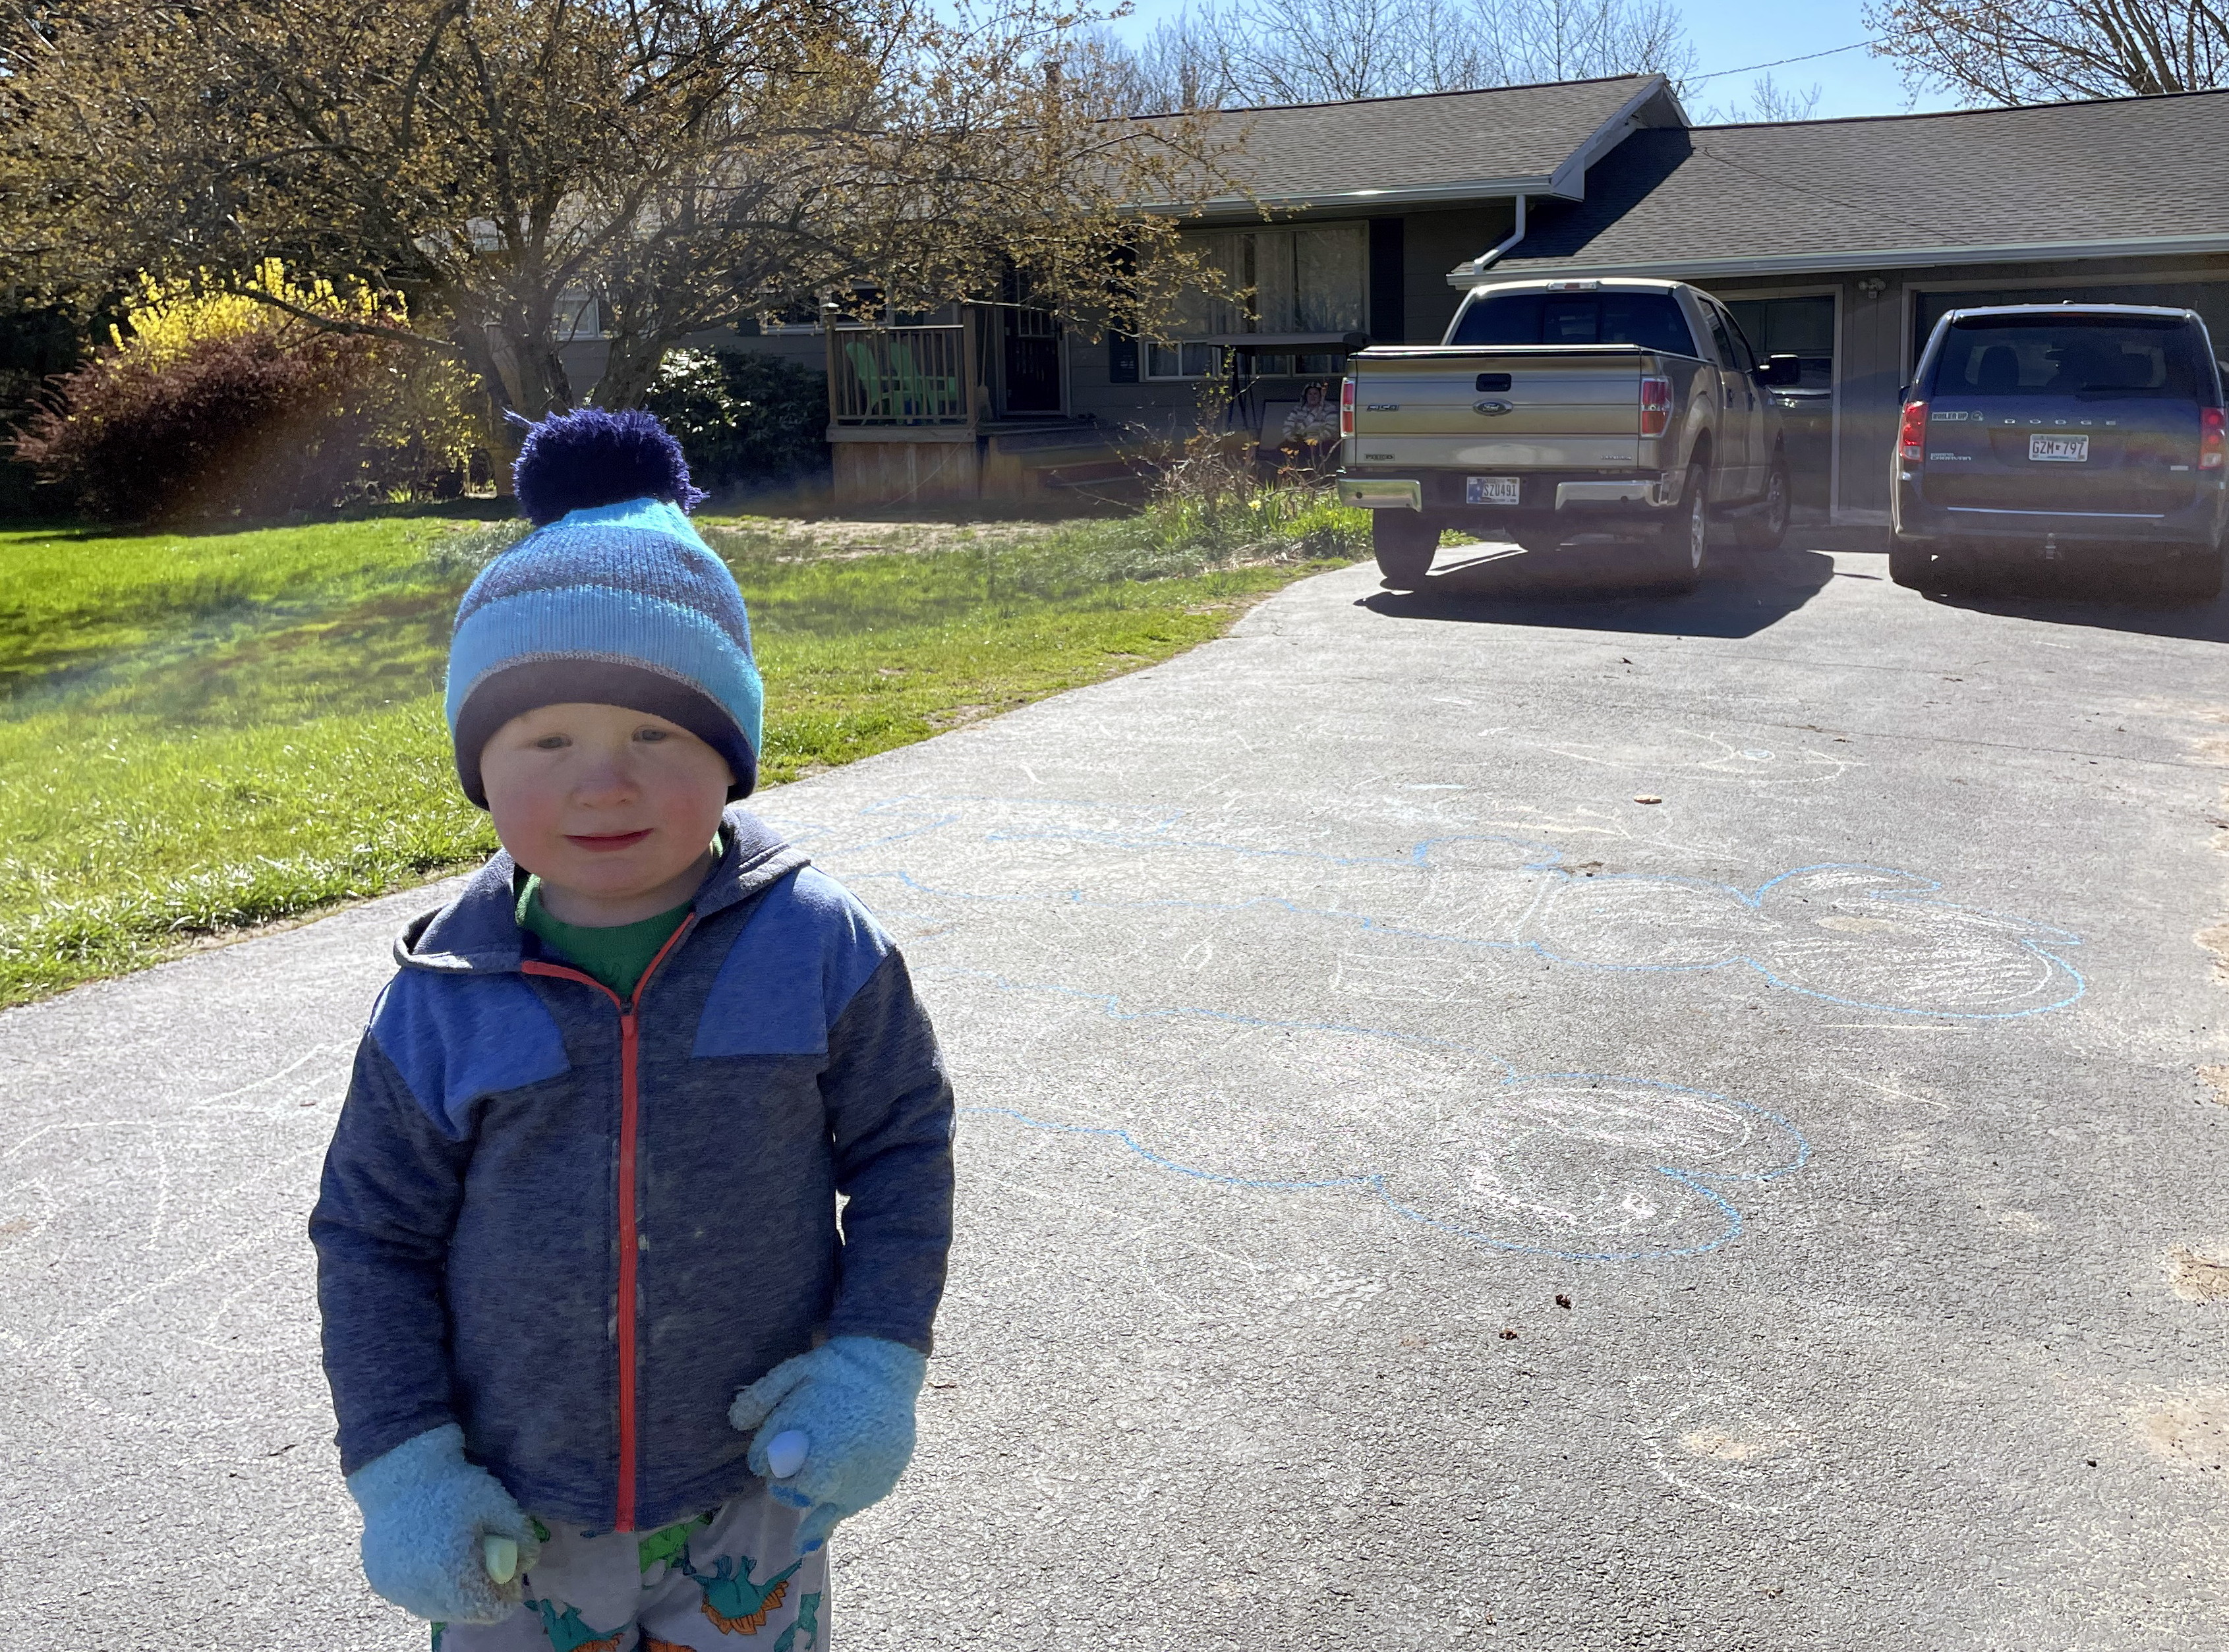
If you look closely, the chalk we did says "Jamie's House in New York!"

Got his first ride on Memaw's toy with Memaw.
Papaw brought it with to help take down trees in the backyard- they have a view of Lake Ontario!

Yep; my younger Son runs this!
(That's STEAM, folks. Chill; I hadda ask that myself, thinking that was pollution! lol)
It's the first time we've ever been able to see what a facility (where he works) looks like this close up.

Fort Ontario- a port city that took in thousands of Jewish refugees during the 1930s/1940s.
The refugees were housed here until they could secure other residence. 

Yeah... I LOVE this!!

This lock was as huge as my hand. 
Like my younger Daughter commented to me: "You're never getting out ALIVE with this!"

The beautiful younger NEW YORKERS!

Oh, yeah... and the Wave-Seeker!

The Baby Jamie Shark; our Wittle Pecan!

Pecan conked out while we ate Coney Dogs on the waterfront.

On our way back to Indiana, we had some GREAT news;
Holli had a 3D Ultrasound -those are cool, or what?!
We got to see our GrandDaughter's face!!
We also were told the name she has now. I'm plumped up my feathers to find out I guessed it!
But it just made sense and sounds so VERY CUTE!
I'll let you know... ;)
The SAD news we got was the death of one of my Nieces, Lyndia. She'd been through the wringer;
giving up her lower leg in order to help save her life over this past winter. I was told she
went into the hospital with blood clotting in the past few days. Since we know what that's like when the ChiefHubby went through it; how life-threatening that can be- prayers immediately were asked
for and went up. But GOD makes the final decision and Lyndia knew this. She was one heck of a brave - and so beautiful!- girl.... woman...Wife... and Mom.
I'll ask that anyone and everyone reading this:
the condolences are appreciated, but even MORE;
PLEASE PRAY FOR LYNDIA'S FAMILY. 
Prayer is powerful and works- she knew this also, and trusted in it. Thank you !!

Until next time...

Stay SAFE &
HAPPY BLOGGING!!