I'm happy to be helping out the TFJB Challenge Blog Design Team as Guest Designer for this Challenge. Suzz is our Hostess as we kick off September with some remnants of our summer.
Labor Day is upon us as Summer 2019 starts to wind down. This time of year always makes me a bit sad because my favorite season is changing. Too soon; I'll have to put away all my Americana bunting for another winter to come. In our home, Primitive Americana fills the walls, décor, and spills over to the outside of our home. I tend to call it "Americana Eclectic" because I have a mixture of things that to others may seem a bit strange. Technology is used so much that hiding it became futile. While I absolutely adore the quilt-covered window frames that display on either side of the large smart TV... the intent to hide is now is sort of useless with an added TV on the other side. We use the setup for music, CC needs for my deafness, and for finding things online- not just for TV viewing. Of course, it's nice to have my LA Dodgers streaming up there (when I can find them)! At first, after both kids had gotten out on their own completely (ANY college life is still "at home" somewhat), I was able to have a "dream home" of all Primitive Americana all throughout the house. I gave the ChiefHubby a choice: knock down the wall between the master bedroom and the second bedroom to make a formal siting room and master. OR I was going to turn the second room into a Craft Studio. He was strongly against changing the house so radically after we'd done the family room build on.
So that's how my Studio came into being, and also how I found Tim Holtz! And, that's how the ChiefHubby came to regret his choice a bit, lol; I have a fortune added to that studio since then. And that "dream home décor" lasted a short 5 years, because the toys and baby things are now filling back up since we became Grandparents. I'm not complaining though, since the oldest genuinely loves waving the USA Flag! It seems our "Peanut" enjoys the old firefighting and Americana surroundings as well as we do.
 I'll back up a bit to where this love first came from... when we first moved out here to 'the boonies' of our county, we purchased home that was just four doors down from where the ChiefHubby's Cousin, Cindy (and her Husband Roy) had purchased theirs shortly before. Cindy had a huge talent for sewing a crocheting that I admittedly often coveted. She always thought I was clean and organized in my home, but her home was filled with handmade things that really belonged in art museums! She loved Americana, and that's where I often saw how she displayed the things she found or made. Soon; it took over my own tastes that had run the designs of 'contemporary' to 'country' to 'whatever works'. I'd have to say that it was Cindy who planted the idea in my head that making and giving gifts was simply a matter of finding out what my own talents were, and I fell back on my childhood of making do with what I had. I was adept at making my own doll houses out of the leftover scraps of cardboard, string, end rolls of tape, markers, and stencils that our parents gathered up at their respective factories that were bound for the trash pile. All I needed was a guide in what DESIGN to build up on in my home...colors, kinds, and shapes. From the time of our wedding, I'd figured out that when receiving gifts, people needed to know what you liked AND how you decorated your living space. I've always appreciated ANY and ALL gifts from anyone and our home has been blessed with many over the years that I treasure. But, at first, it was hard to tell people what I liked because I didn't KNOW what I liked- except for strawberries in the kitchen (copied after my Grandma Raymer for whom I am named). I fell in love with Cindy's choice of the USA colors. And I finally had A PLAN. It took a long time to achieve, but the hunt and work was fun! Cindy helped me find many of the pieces. When Roy and Cindy moved a couple miles away to a larger place, she found room to branch out her sewing into making quilts. And man...was she GOOD! I'm not the only one who thinks so; one of her quilts was published in Quilter's World 2009. She's made me Quilt pieces that are proudly displayed throughout our home- even a couple of my fave TIM HOLTZ (2 shown in upper right photo) MATERIALS!! She tried to get me to quilt, but any kind of seamstress; I am NOT (even though my Mother is a lifelong professional at it). I did love to 'rag' a quilt in layers and my first one was created out of the things I'd learned from Cindy. It wasn't too bad, either, even if it hangs the wrong way simply because I found a hangar I couldn't live without! Let's just say that I'll stick with my 'paper job'.
This Challenge from The Funkie Junkie Boutique Challenge Blog is called "Bits and Bobs", and it's all about scraps, leftovers, bits and pieces of saved items you kept for no real reason. Or it can even be finishing up a project leftover that you never got done. However you create your masterpiece; create it with what you have. Since I am a bonafide "Don't toss that- I'll think of a way to use it!" kind of person; this was right up my scrap-filled way.
I'll back up a bit to where this love first came from... when we first moved out here to 'the boonies' of our county, we purchased home that was just four doors down from where the ChiefHubby's Cousin, Cindy (and her Husband Roy) had purchased theirs shortly before. Cindy had a huge talent for sewing a crocheting that I admittedly often coveted. She always thought I was clean and organized in my home, but her home was filled with handmade things that really belonged in art museums! She loved Americana, and that's where I often saw how she displayed the things she found or made. Soon; it took over my own tastes that had run the designs of 'contemporary' to 'country' to 'whatever works'. I'd have to say that it was Cindy who planted the idea in my head that making and giving gifts was simply a matter of finding out what my own talents were, and I fell back on my childhood of making do with what I had. I was adept at making my own doll houses out of the leftover scraps of cardboard, string, end rolls of tape, markers, and stencils that our parents gathered up at their respective factories that were bound for the trash pile. All I needed was a guide in what DESIGN to build up on in my home...colors, kinds, and shapes. From the time of our wedding, I'd figured out that when receiving gifts, people needed to know what you liked AND how you decorated your living space. I've always appreciated ANY and ALL gifts from anyone and our home has been blessed with many over the years that I treasure. But, at first, it was hard to tell people what I liked because I didn't KNOW what I liked- except for strawberries in the kitchen (copied after my Grandma Raymer for whom I am named). I fell in love with Cindy's choice of the USA colors. And I finally had A PLAN. It took a long time to achieve, but the hunt and work was fun! Cindy helped me find many of the pieces. When Roy and Cindy moved a couple miles away to a larger place, she found room to branch out her sewing into making quilts. And man...was she GOOD! I'm not the only one who thinks so; one of her quilts was published in Quilter's World 2009. She's made me Quilt pieces that are proudly displayed throughout our home- even a couple of my fave TIM HOLTZ (2 shown in upper right photo) MATERIALS!! She tried to get me to quilt, but any kind of seamstress; I am NOT (even though my Mother is a lifelong professional at it). I did love to 'rag' a quilt in layers and my first one was created out of the things I'd learned from Cindy. It wasn't too bad, either, even if it hangs the wrong way simply because I found a hangar I couldn't live without! Let's just say that I'll stick with my 'paper job'.
This Challenge from The Funkie Junkie Boutique Challenge Blog is called "Bits and Bobs", and it's all about scraps, leftovers, bits and pieces of saved items you kept for no real reason. Or it can even be finishing up a project leftover that you never got done. However you create your masterpiece; create it with what you have. Since I am a bonafide "Don't toss that- I'll think of a way to use it!" kind of person; this was right up my scrap-filled way.
It was from the rag quilt I got my inspiration...
I have two tons of cardstocks, from several brands and textures. I try to keep them together and stacked up for ease of finding them. Those TH stacks of paper are a great way to use up all those leftover cut up pieces!!
I like to keep at least one FULL stack of my fave Tim papers. That means watching for
them to go on sale, because who wants to pay full price?!
One stack is always the leftover bits and pieces cut away from whatever I took.
There's another drawer with thicker materials, too.
Then, there are more organized ways of keeping scraps... when I remember!
Basically- anything that is smaller than my fingers can pick up goes into the shopping-bag-lined trash bucket and- when full- gets toted out to the burn bin. Those bags of leftover scraps and trash mail are great fire-starters for when we have a pit fire. Doing our share of the recycling all around.
Trust me: I WANTED to keep it SIMPLE.
I set these things out to remind myself to keep things as simple as possible.
What was begun as just 'a paper quilt' grew into much more
as my Creative Muse took over my body.
LOVE those bits and scraps from the TH paperie collection!!
This one is Correspondence, which is where I began with the paper "quilt".
Since Memoranda is newer; I actually hadn't used as much of it as others yet,
and I was able to find a few larger pieces in there.
I found pieces large enough to make 1 in strips 6 inches long.
This shows just one set, but I had two sets going at the same time,
so you'll notice I interchange the sets in the following photos below.
I scored each lengthwise to leave 1/2 inch in the middle and each side of 1/4in.
After scoring a 1/4 in also on each end, I simply stuck the blue in where I wanted
it to be and then cropped off the top 3 bars to match the length of the lower bars.
You can measure it out by ruler, but it works the same.
Cutting off the corners allow the pieces to fit together-
just like TH Configuration boxes, but shallower in depth.
The full "flag" ready for putting together.... almost!
I made a bottom "tray" for the pieces to fit together into.
It just made it easier to adhere them together.
I first used some Distress Inks and Oxides to shade them to a vintage look.
Also heat dried after distressing at this step.
Here's where the 'ragging' took place- cutting slits all around each piece.
I made it easier on my hands by stacking a few at a time together.
NOW, I was ready...ALMOST!
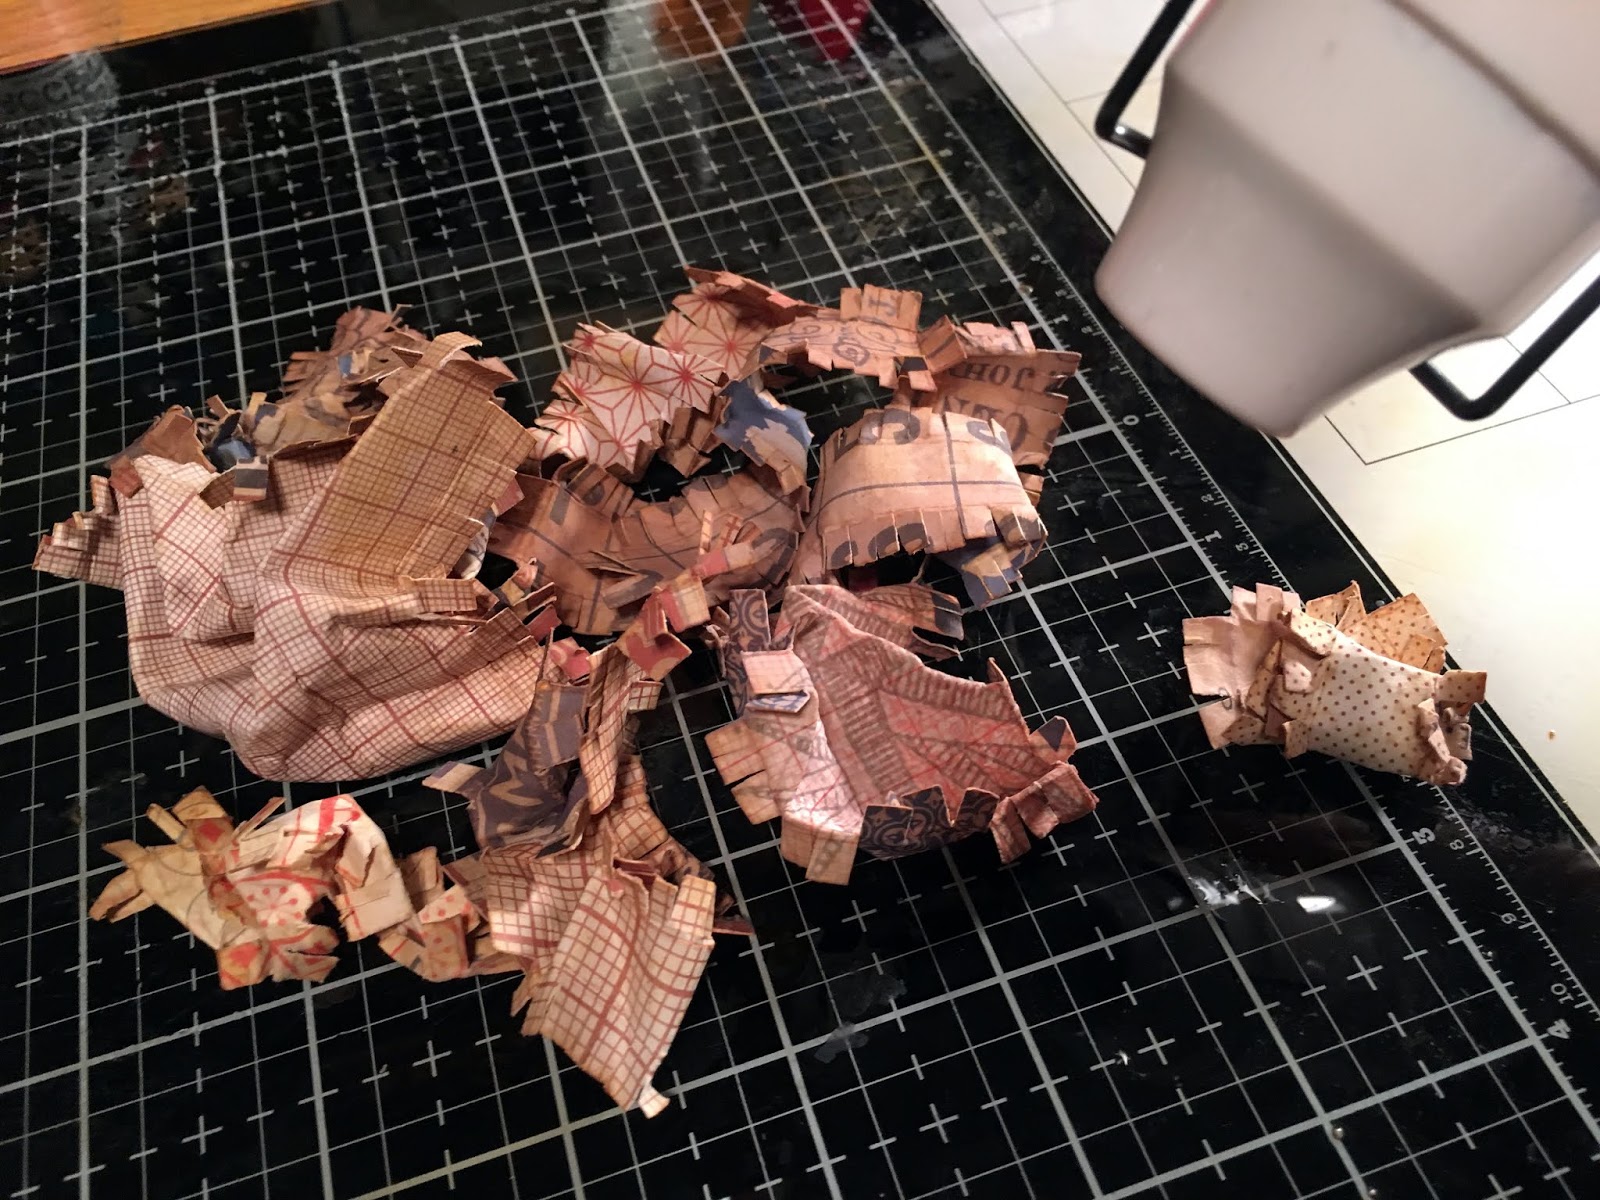
After sprinkling generously with water, I wadded up all the pieces...
On this set; I included the bottom tray piece.
BUT...I ended up putting another backing onto the bottom tray since it was
hard to straighten it back out again as I put the strips down into it. SO...
...with the SECOND set, I didn't wad up the tray. I left it flat but played
around with the edges in sprinkled water, to make the same 'softened' look as the first set.
The second set of strips were much easier to fit into their tray.
I'm going to remember this!
Now, I needed some kind of background- my Muse was running away!!
She found the PERFECT look for a Tag as a background...
using this 12x12 burlap stack.
And THEN... the burlap cried out to my Muse for a colorful but muted edging.
Of course; I hadda please her, so out came the brand new TH Memoranda 12x12 stack.
At this point- having used only 2 full sheets, I won't look for another full stack unless either
I see a bargain I can't pass up...or Tim discontinues it and forces me to make a run for it!
I figured I might as well add a few things that would count as "Bobs" to match all the "Bits"...
So out came the seriously hoarded LAST PACKAGE
(Are you reading this, TIM HOLTZ?!?)
of awesome Grungepaper. ("Ooh"s and "Ahh"s voiced here.)
This is where my keeping every little bit become serious business!
I sprung for cutting 3 layers plus 1 layer of only the thread spool's tops and bottoms.
I ran the uppermost layer of each through my Big Shot using the TH 3D Impresslits Folder Lumber.
Then stacked them all up so that the ends-only pieces were in the middle, & topping
them with the embossed piece. This made the spool ends looked more forward.
Distress Crayon in Walnut Stain was edged all around for some shadow effect.
The TH Dolls all came out to play with my Muse...
and one set called out to be used- if I could find a double in the same size- I did!
The idea of attaching the TH IdeaOlogy Thimble with a TH Longfastener
hit me as I disdained just using Glossy Accents to make it stick.
And then; I got an idea to fill the thimbles, but had no idea what to use as filler.
I took a look back onto the TFJB Challenge Blog page to refresh my memory
of their items to use, then took a look into a few of my long-laid-dormant project boxes on my shelf.
I came upon a box of these little pips that I keep finding every once in a while that fall off
the many wired wreaths that adorn my Primitive Americana décor.
I always put them into that little box thinking that SOMEDAY
I would figure out a use for them. Someday is here!
I also found a set of the TH IdeaOlogy Alpha Parts- Numeric. These were perfect
for adding a touch of celebration for Cindy's upcoming 60th Birthday!
And this is what I came up with:
Fronts of both Tags...
Backs of both Tags
The TH IdeaOlogy abounds! (Cameo Frames, Jump Rings, Tiny Bells, & TH Safety Pins)
I figured: I've got lots of "Bits" in there, but I needed some "Bobs" to make it all complete.
The TH Dolls got a bit of Distress Faded Blue Jeans Marker,
and edged with Distress Regular Ink in Pumice Stone.
The edging of each Tag is just awesome looking to me!
Those little pips are so CUTE!
I even found same sized bits of the Correspondence scraps to flatten out,
score, fold and hang some cuts of "material" that were used to start with.
The cuts all around each piece of the flag add to the overall texture-
using just plain old scrap paper bit and scissors.
Some Distress Inks and Oxides, and an IdeaOlogy Metal Star,
sends the TH paperie over the top.
I kept one Tag for myself...
… and the other will be an early gift to Cindy for her 60th Birthday in November.
The Alpha Parts were given a heavy coat of Distress Paint in Antique Linen,
where I made sure to purchase a FEW bottles since this is one of my favorite TH colors!
Then I sanded and scratched (using TH Sanding Grip and TH Tonic Scratcher).
A bit of heat to help dry a touch of TH Distress Ink in Antique Photo
(be careful of melting the plastic Alpha Parts),
with a heavy coat of Distress Collage Medium in Vintage;
and it's been aged to an old, worn, gummed-up, perfect look that I was pleased with,
and I hope Cindy will be, too.
In February of 2017, Cindy's Husband, Roy, passed away. It was a very sad time for her family, and ours as well. My ChiefHubby grew up with Cindy and her younger brother as
close as siblings to one another, more than 1st Cousins. In turn, when we were searching
for a house, the ChiefHubby and I both felt drawn to moving back out where we both
(unknowingly at the time) grew up. In doing so, the 2 boys Cindy and I each had,
grew up close together as well- just four houses down from each other. Cindy helped
raise Roy's 2 older Sons, and from those- she's got a plethora of Grandchildren and now-
Great Grandchildren. Last Christmas, Cindy took all of Roy's favorite racing t-shirts (NASCAR and local racing) and made them into large, beautiful quilts for each & every single
one of them; to remember their Dad/Grandpa/Great Grandpa Roy with. The photos she showed
tell of the tears shed over these awesome gifts of LOVE.
I, myself, haven't been as great a friend since Roy's passing as Cindy has always been to me. It seems that just when she had time to do more things as she was alone to fill, my own life has gotten as busy as hers once was- with kids that kept her hopping; making things for the Grandbabies popping out every year, and enjoying visits filled with wet diapers and slobbery kisses. I miss our Saturday morning excursions to yard sales and Friday Night talk-as-we-make visits to her house. It just seems like we are in 2 different modes of age right now. But that's what brought me to create these two "makes"- from the memory of all the things she may not realize that I learned from her. And all through those times she COULD HAVE said "Suuuure. You just wait and see; Itoldyaso!", but instead, she'd just smile and nod along. She always was- and still is- the Big Sister I look up to.
THANKS, CINDY!
And now I'll at least make the time to get this to her.
Thanks, everyone, for stopping into my blog for this visit!
If you get the chance- pour out all those leftover bits and bobs and join us over at
and be sure to share your link for a chance to win!
Guest Designing actually gives me a bit of time off in the next few weeks,
but I'll be checking in on the links to see the posted takes on this Challenge!
So, until next time...
Be Safe &
HAPPY BLOGGING!!