Year 2013 & Year 2014 2

Year 2013 & Year 2014 2

Tuesday, July 25, 2023

The Funkie Junkie Boutique's Inspiration Ave... #16; Distressed About Paints... My Happy Place!


  A
s we near the end of July, I see school items hitting all the stores with signs saying "School starts soon!" and I always feel like starting school in August is cheating kids out on their summer. I've said it before thousands of times; there's simply nothing wrong with the old-fashioned summer that runs from Memorial Day to Labor Day and all the days between those 2 holidays belongs strictly to KIDS. Guess it's the kid in me that makes this one time stay-at-home-Mom think that we need to just let kids be kids and The LORD will make everything else fall into the right place. Summer is the time to relax and let go- lax bedtimes and sleeping in, sleep-overs, and late evening lightning bug chases, days of pool time (and no indoor showers or baths with so much chlorine time), picnics, and family gatherings. Those are the things that no amount of money can buy.

The ChiefHubby and I just celebrated our 39th Wedding Anniversary (plus 2 years of dating before that) on July 14th. Since the younger kids had to change their plans on coming to Indiana in July, we decided to take a trip down to the Florida house and relax a bit. Well... that was the PLAN, anyway. It's not like going to a hotel- you have to unpack what you need and set up your house again for use. Throughout our stay, the huge storms just kept rolling through, and if you've not been to sea-level during a storm, you're in for a scare: lightning hits the ground quite often, and quite nearby. So on that first Sunday after worship, we were all standing around and talking, waiting to head over to Maw-Maw Dixon's house for lunch together with the family, when the power went in and out several times before going out altogether. When we got back to our place in the late afternoon, we found ourselves still without power while everyone else was back on. The surge blew out our main component and with it; our main AC and lights. It was in the 90's and Florida monsoons like this are extremely muggy. Oh, joy! It took 3 days for the new component and a huge surge protector to arrive. In the meantime, I went back and forth to the beach on my own, enjoying the huge surf sent in by all the weather off -and on- the coastline. The crowd was there but I managed to get in some really great, powerful waves! Windsurfing on the lake was out- it was too extreme heat to be wearing a life jacket, no matter how cooling the wind was. So I stuck it out , swimming with the sharks and black bears, at the beaches until incoming storms chased me away. (Google shark and black bear sightings at my beach: Destin Beaches.) This led me to the craft I'm sharing with you on this post... from my happy place!


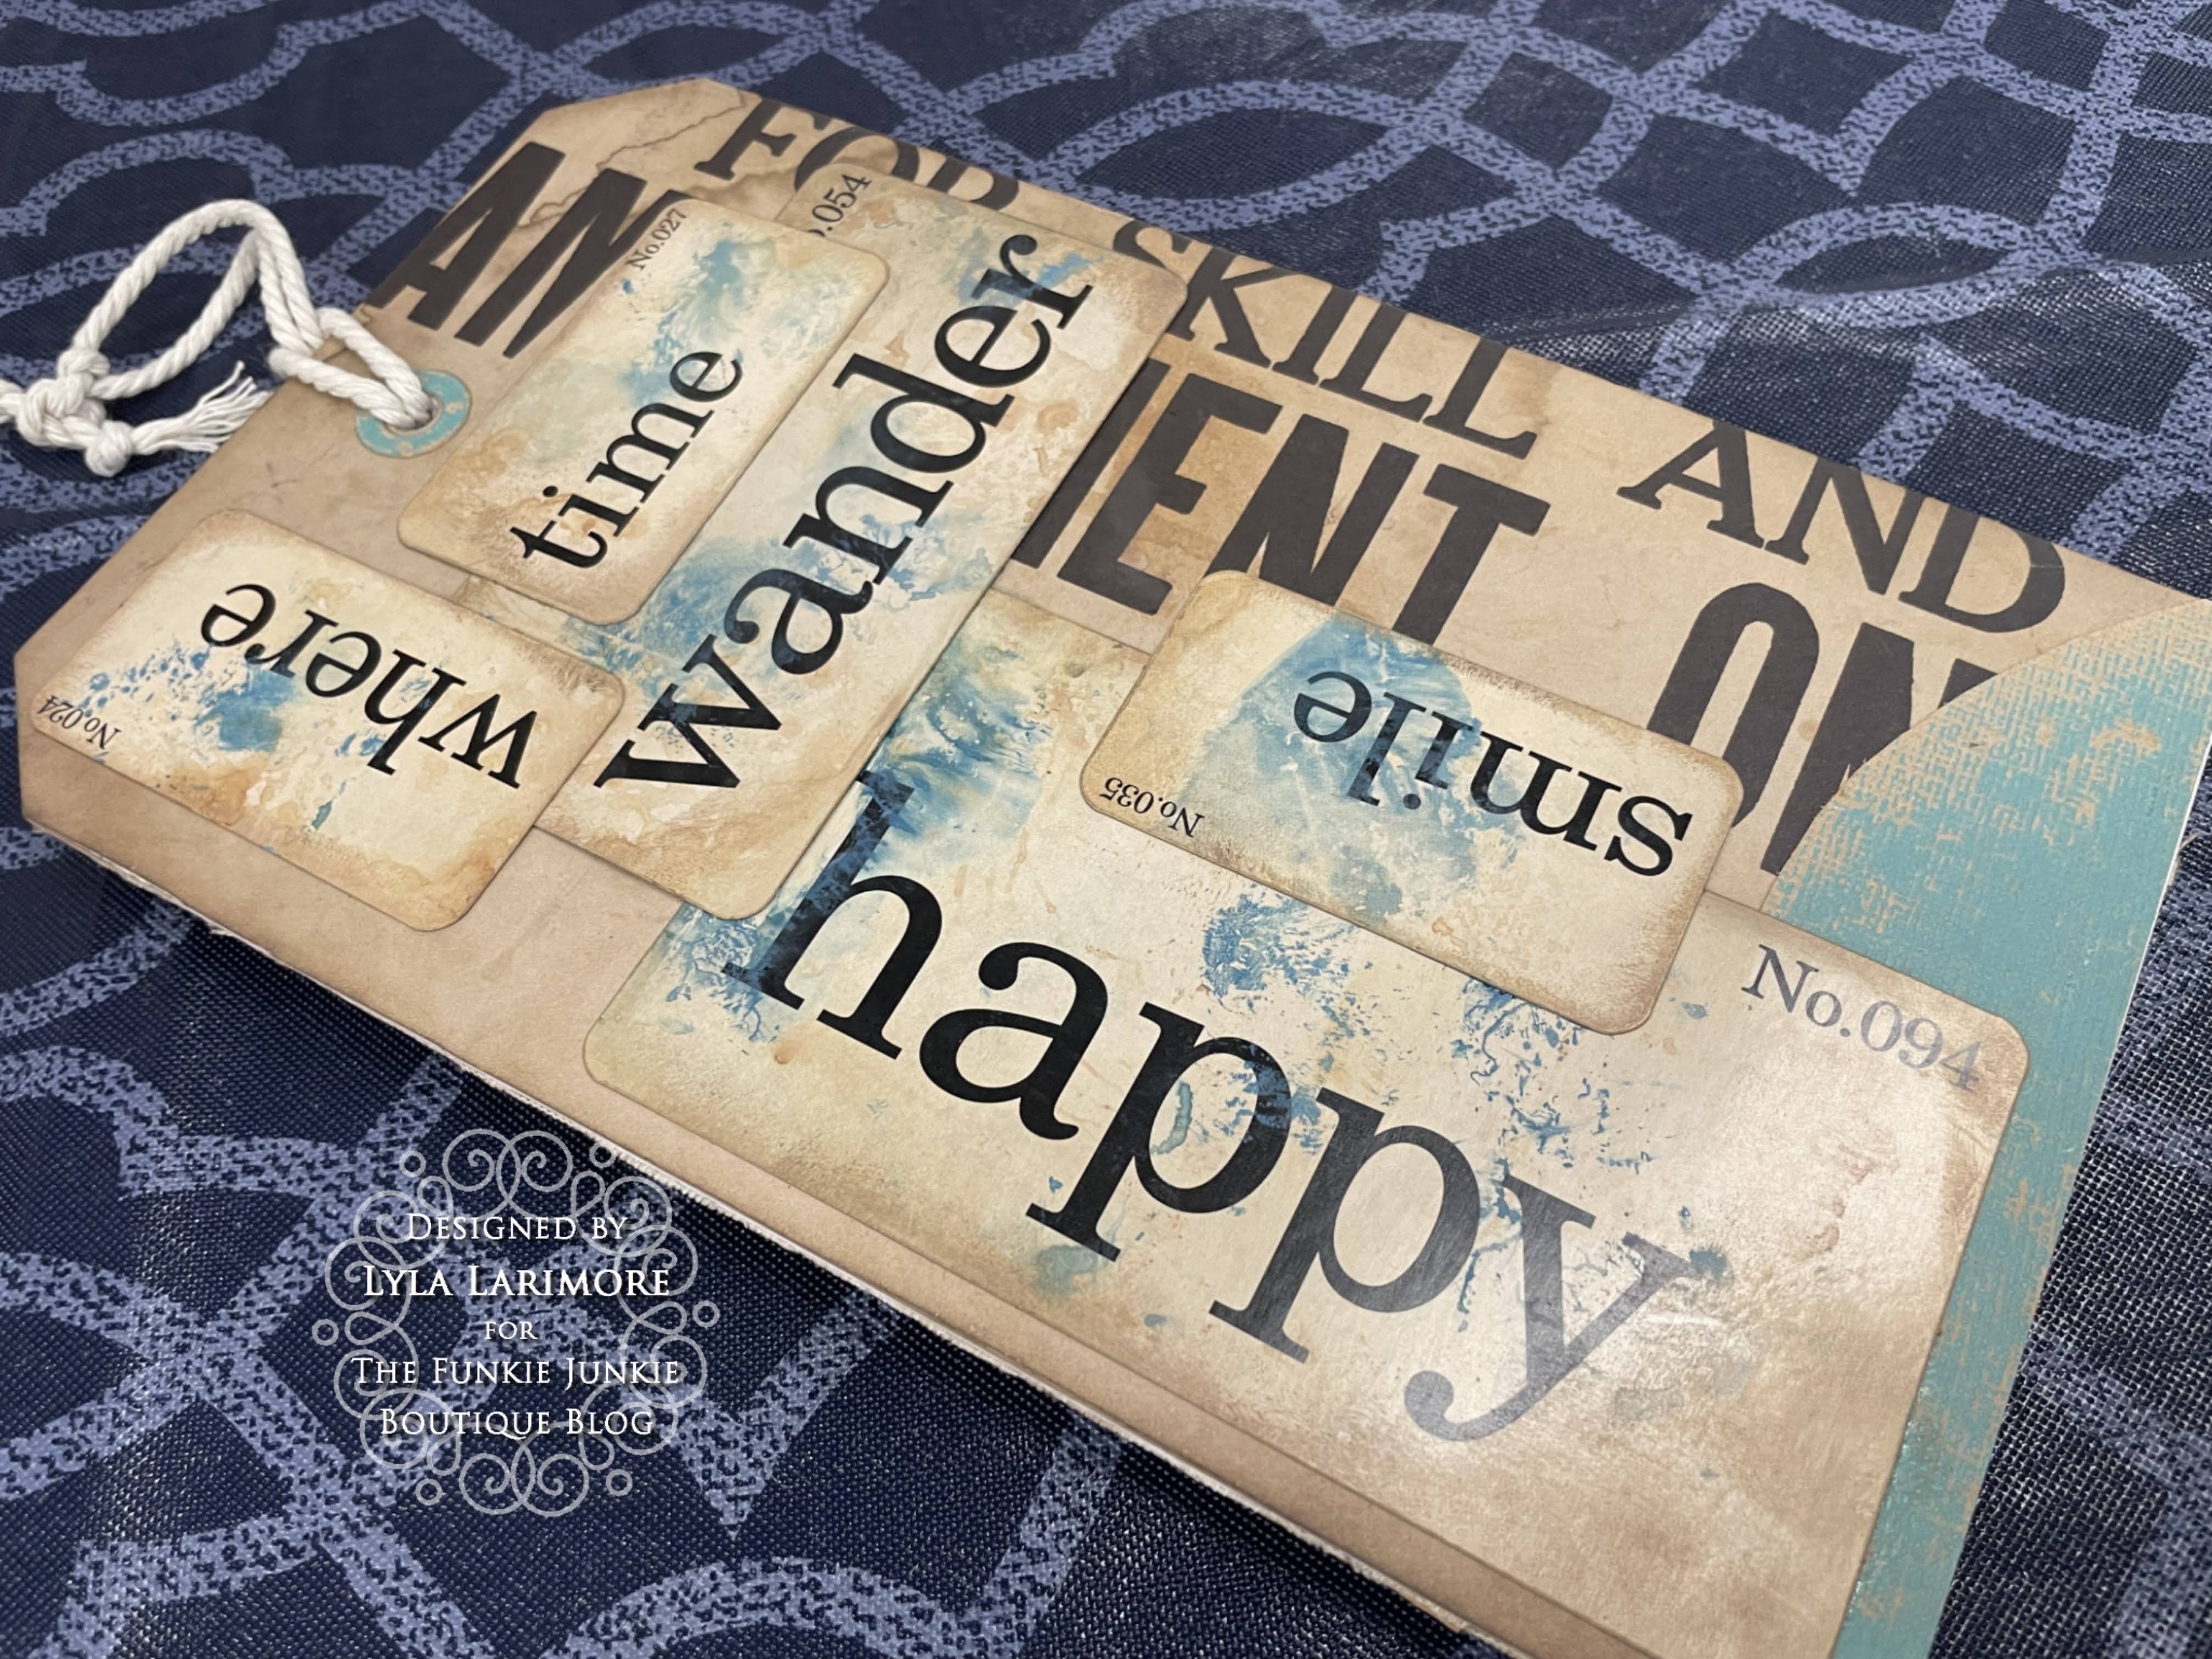
   It's time for another new theme for the next 2 weeks; "Distressed About Paints"! Lyla leading off here once again, and if you'll remember: July is my favorite month and that usually shows up in all my creative makes during this time of year. When Linda, owner of The Funkie Junkie Boutique put out a challenge to the Design Team for using Distress Paints, I was disappointed at first because painting is not one of my best forms of art and the thought crossed my mind that this was going to be a total flop from me. But as I went through my drawer of Tim Holtz items, I realized that I use Distress Paints quite a lot more than I thought. I took that revelation further with the idea that this project didn't need to be solely Distress Paints, but the use of any DP mixed in with any type of paste medium, certainly brings any plain product up to a new level. Let's roll on and see where this project ended up! 


We'll start with that helpful list of links so you can create your own make:


First up: using my TH Media Trimmer to cut some matboard into a Tag-shape.
I cut 2 of these; once for a front and one for a back, as is my usual.

Since I wanted to use 2 pieces from the TH Facades, I took the larger piece for measuring the size
of Tag I wanted. The Facade pieces would both stand out- giving me 3 'levels'.

I was super lucky to find some very old TH Adheasive Deco Sheets deep in my stash, when I was cleaning out my plastic drawers a few weeks ago! I set them aside just for this project because the adhesive-backed cloth reminded me of tough canvas I use to hold my beach stuff. I used some small-diameter rope and scrap TH Kraftstock paperie- sanded-  for some added charm.
This would be the FRONT side of my Tag.

Oh my! The TH Backdrops Vol.4 paperie is going fast from my stash: I LOVE it so much!
It created some wording for the BACK of the Tag without adding more to the 'levels' I already had planned. This was perfected with some Oxide Inking and water spray play- till I was happy.

Then I went to work on the main upper decks, so to speak.
I used some TH Ranger Opaque Grit Paste for the 'sand' and some TH Opaque Texture Paste for 
the middle water and some 'clouds' up above those.
You'll notice I put both TH Facade pieces situated together and being textured together.
They will not be on the same level when I put the Tag altogether.
(In the materials pics way up above, I show Seasonal Crypt and Grave grit pastes. 
I ended up not using those simply because the Emerald Coast sand is not that dark.
"my" beaches are literally the whitest sand you will see in the entire USA!)

Here comes the main theme: DISTRESS PAINTS!
While I am definitely not a painter... by far, folks.... I did remember some of Bob Ross's strokes
from his show and got waaay outta my box with this! I brushed a coat of DP Salty Ocean all
over the "ocean" and "sky" areas, giving some swoosh marks onto the ocean and some
straight line streaks in the sky. Simple enough. Then after heat drying that, I took my
craft toothbrush and lightly brush stroked DP Picket Fence back and forth over the water, but heavier all over the sky.
Then used the same toothbursh to 'dot paint' all over the sand. The Opaque Texture Paste is not the same white shade as the Picket Fence Distress Paint, so it gave it a speckle appearance. 

After rinsing out the toothbrush, I used it to make swooshes and streaks in the ocean with
some Prize Ribbon Distress Paint and added darker aspects to the ocean, heat dried, then topped some 'white caps' on the swooshes for some bubbles on the wave tops. I hope you'll be able to see it !

Ah, but I needed some more depth to the sand and shiney to the water:
TH Lost Shadow Distress Oxide all around the bottom edge of the sand, 
and Glossy Accents all over on  top of the water filled those needs nicely.

Cutting out some layers for the palm tree:
4 layers of Neutral Kraftstock brown for the trunk and one brown branch,
2 layers each of Cool Kraftstock's greens for the palm toppers.
I did front and back of these so the middle stock color meets;
edging all the layers with Forest Moss Distress Ink
and Distress Oxides in Ground Espresso and Vintage Photo.
Layered by the trunk in the very middle and then the dull green on both sides (sandwiching the trunk)
and then topping both outer layers with the last brighter green gives a realistic look to a palm tree. 

Time to put all the Facade pieces together to the Tag base.
Tim, you really shouldda come out with extra pieces a loooong time ago,
Folks, the time has come and they're out at The Funkie Junkie Boutique!!!

The last part was cutting out lettering for the title to My Happy Place, and we're done!


Please allow me to introduce you to "My Happy Place"!

FRONT

Look at the layers you can do with Facades!


A couple of star fish (happy ones like the ChiefHubby and I) from stash sitting in the sand.


This was the perfect space for some scrap TH Kraftstock paperie and TH Flashcards!


That brings us once again to another end to this first posting of our newest theme,
"Distressed About Paints" and you'll need to pop back in to Inspiration Ave for more
great makes on this theme from my fellow Design Teammates!

And speaking of "new"... if you haven't clicked on those helpful product links yet,
you'll want to pop in ASAP to The Funkie Junkie Boutique to check out all the
brand new TIM HOLTZ HALLOWEEN PRODUCTS!
EEK; they're positively delightfully frightful!!
Grab 'em while you can! These are the best prices you'll find!

Until next time...

Stay Safe &
HAPPY BLOGGING!!


Tuesday, July 11, 2023

The Funkie Junkie Boutique's Inspiration Ave #15...SummerFun... The One That Got Away!


  I'm getting some chillaxing done, right now, while we're back in our Florida place for a couple of weeks. But what a whirlwind that led up to our leaving,,,

   We had a great 4th of July holiday with all our Besties gathered at our Indiana place for a Fish Fry. Our older kids brought the older Grandbabies, and we met back up with them down at their town for spectacular fireworks show. Peanut can see the fireworks better now without squinting now: having gotten his first eyeglasses just a couple weeks ago. The younger kids made sure to send and post the younger Grandbabies having fun at the Oswego, NY July 4th Parade, and the picnic they had with their family/friends. Since they couldn't make it back to Indiana as previously planned, we decided to take that time to run down for a bit of a vacation. Or so that was the plan... a huge storm caused an electrical surge that shorted out the main component of our house. Thankfully, we have a Bestie who is an Electrician (as is our own older Son), and that comes in handy; very much! Everyone came over and helped get us rigged up, but it's sloooooow going until the new component gets here on Wednesday the 12th. The new surge protector got here today. Here I was all geared up with my crafting done an entire 2 weeks ago, thinking this time I'd have it all ready. Riiiiiight. Here I am typing this up LATE again. I did manage to get quite a lot done up in Indiana before we left, including: getting my sailboat out and getting another Big Shot ordered. It's actually a Foldaway so I can take it south (and any other direction) with me. I am SO in LOVE with the Big Shot Plus, and I have a Tim Holtz Vagabond for all my heavy-duty (or 100plus cuts) needs. The Vagabond is a great backup as well. I was sad to get down here and just throw out my 15-year-old black Big Shot machine; simply because they will no longer send replacement parts! I went through replacement gears & another time was the handle pin, and Sizzix was beyond helpful, but now they are opting not to replace parts for our own 'protection'. That makes me sad. I'm tearing that old one apart for any usuable pieces and parts.

                                Meanwhile, summer is in full FUN swing!


   Summer Fun is a perfect theme not only for TFJB's Inspiration Ave, but it certainly describes my own life right now; the fun times can go up and down, and I've had many ups and downs so far this summer. One of the upsides of wildfire smoke and intense heat (without both main ACs going right now due to a recent storm blowing through and knocking out our main electrical box) is having time for crafting! So, for the next 2 weeks, our Design Team will be posting their takes on Summer Fun. Let's float on down and see where the summer months have taken me... so far!


I'll start out with a helpful list of links for you:

Tim Holtz Thinlits Dies- Garden Greens (older set)
SA Tim Holtz Stamp Set CMS304 Sea Life (older set)


The first thing I did was to grab my set of  Tim Holtz Kraft Stock Papers in Warm and Cool
to die cut the 'ocean life' in greens and reds/corals, then set those aside.

Next, I got out my very old (and one of my first) TH Bigz XL Tag and Bookplates Die
 to cut a few tags from the Cio Bella leftover sheets. (Sorry, but that is looooong retired.)
There's a CLEARANCE SALE on this set, and if you love Summer...you'll love this paper.
Grab some while it lasts!

On the Tag's background, which already had some cool ocean plants, I wanted
some more background plants, so I stamped and embossed these out of
TH Sea Life Stamp Set and used some clear embossing powder- just lightly.ff
It would give me 3 "layers" of plant life: the paper's, my embossed, and the die cuts.

Then I took out my big OLD TH Distress Archive Inks (this was a long ago yard sale find)
and stamped some fish onto TH Cool Kraft Stock Paper.
The Funkie Junkie Boutique now has a nice large selection of Distress Archival Inks
and Archival Ink Refills (those would also refill this pad).

I added the Distress Oxide Uncharted Mariner to my TH 3D Folder Mosiac...

... and 'wet down' my fish with the TH (water) Sprayer,
then heat dried after embossing. I then inked all around the edges of each fish,
and reheat-died again...

... before adding some eyeballs to them with Glossy Accents.
The balls were simple little round black beads from my stash drawer.

Then I trimmed the Garden Greens die cuts to look different from one another,
and used some DO Vintage Photo and some DI in Forest Moss and Rusty Hinge
around the edges for some depth to the paper.

Scor Tape came in handy with adding the mesh onion bag to the matboard
(which I die cut with my Bigz XL Tag die) stretching it around the
die cut tag and then putting the backs of two  matboard tags facing together.
That mesh gave my tag even more texture!

I used an Easter Egg Coloring Kit's copper metal 'spoon' dipper for my hook!
Who knew?!
And THAT is why we crafters look at something that's normally tossed 
into the recycle, knowing we just might do something with it; someday!
I cut the long legs on the Large Fasteners (say that 3x really fast, lol)
to wrap them easily without the legs sticking out, for some "split buck shot sinkers".

Here's the Summer Fun: The One That Got Away!


FRONT

I made the "worm" from a twisted paper bag handle!
Simply keep twisting and adding Distress Oxide Ink in Vintage Photo
until it folds the way you want. I added a touch of red from one of my Ink Blenders
hanging on the Spinner on my desk- which may or may not have been Fired Brick-
for a slight touch of red for this "red worm".
Hemp string and a couple of TH Large Fasteners made the "fishline and sinkers".


See how curvy that fish is? I added pop-dot tape under him and
doubled it up in the middle for him to look like he's 3D.

This fish totally missed his opportunity to take my bait!!!

BACK

Ditto on the pop-dots under these "large-mouth bass" which was my best catch this summer!

All packaged up, just like the real ones in my freezer, awaiting another Fish Fry with our Besties!

Thanks so very much for joining me!
Take a trip into The Funkie Junkie Boutique and you'll find all your favorite
Summer crafting needs... and a lot of you Summer crafting WANTS!

Please don't forget to come back every couple of days for the next two weeks
and join my Design Teammates for more adventures in


Until next time...

Stay Safe &
HAPPY BLOGGING!!