

Honestly, when The Funkie Junkie Boutique Challenge Blog announced the theme for this one; I knew there would be MANY things I wanted to do - or more aptly put; Redo. After all, everyone just loves a 'Do-Over' and it's only a repeat of previous fun, right? But what if there's something you never seemed to get right, and you just wanted ONE more chance... or two. Or three. I've included at least 2 techniques in this project that I really enjoy doing. And, let's be fair here; the one thing I really hated doing was going to either make- or break- this project with my constant failure to make it turn out right. So lets jump right in and see what happened...

I started by getting out everything I knew I'd want to use for the background
I've been wanting a do-over on.

This time around...I really REALLY worked that ink in!
I took my time and just kept blending the colors I wanted and
worked in a shape of a highlighted area to look like ground-meets-sky.
Think "Joshua Tree National Park at dusk".

Then I took an old toothbrush and slowly worked on spraying the top to middle sections.

Next was trimming away the excess to form a large Tag.
Then using a TH Stencil- Dot Fade- to add a little bit of highlights,
and used the TH Spritzer to lightly spray some Distress Black Soot Marker around.

Edging the Tag with the TH Distresser and then giving it a depth with some
TH Distress Regular Ink in Black Soot.

Some TH Paperie in Correspondence made a good background trim-
as well as support cardstock backing.

A Bestie (who is an extremely talented painter), suggested adding some highlight in white paint,
so I used a bit of TH Distress Paint in Picket Fence with a tiny headed paintbrush.

After Distress Inking and heating, I kept crumpling, sprinkling water, and reinking,
until I got the desired look I wanted- on BOTH sides of the paperie.
This side would be the FRONT trim around the Tag...

...and this was planned for the BACKSIDE of the entire Tag.

I gathered everything I thought out in my head as to what was going to be the theme.

I began with the main feature- the MOON.
Inking, embossing, drying, until it was perfect- in MY eyes, anyway.

Then, it was taking the TH Dolls out to play again.

This is what happens when you put all your TH Dolls away,
and keep feeling throughout the day that SOMETHING is in your shoe,
but each time you take it off, you find nothing.
Because she finally fell off my foot and I was able to catch her and put her back
into the package from which she'd escaped.
I sincerely hope she didn't get upset at the ones I ultimately chose... & go after them.
Luckily for those chosen; they have copies LARGER than her! lol!!

After putting some sets of TH Transparent Wings to a few 'kids' TH Dolls,
I chose a young couple just married- and added some bits of color to the flowers
with Distress Markers (Spun Sugar, Peeled Paint, Barn Red, and Mowed Lawn).
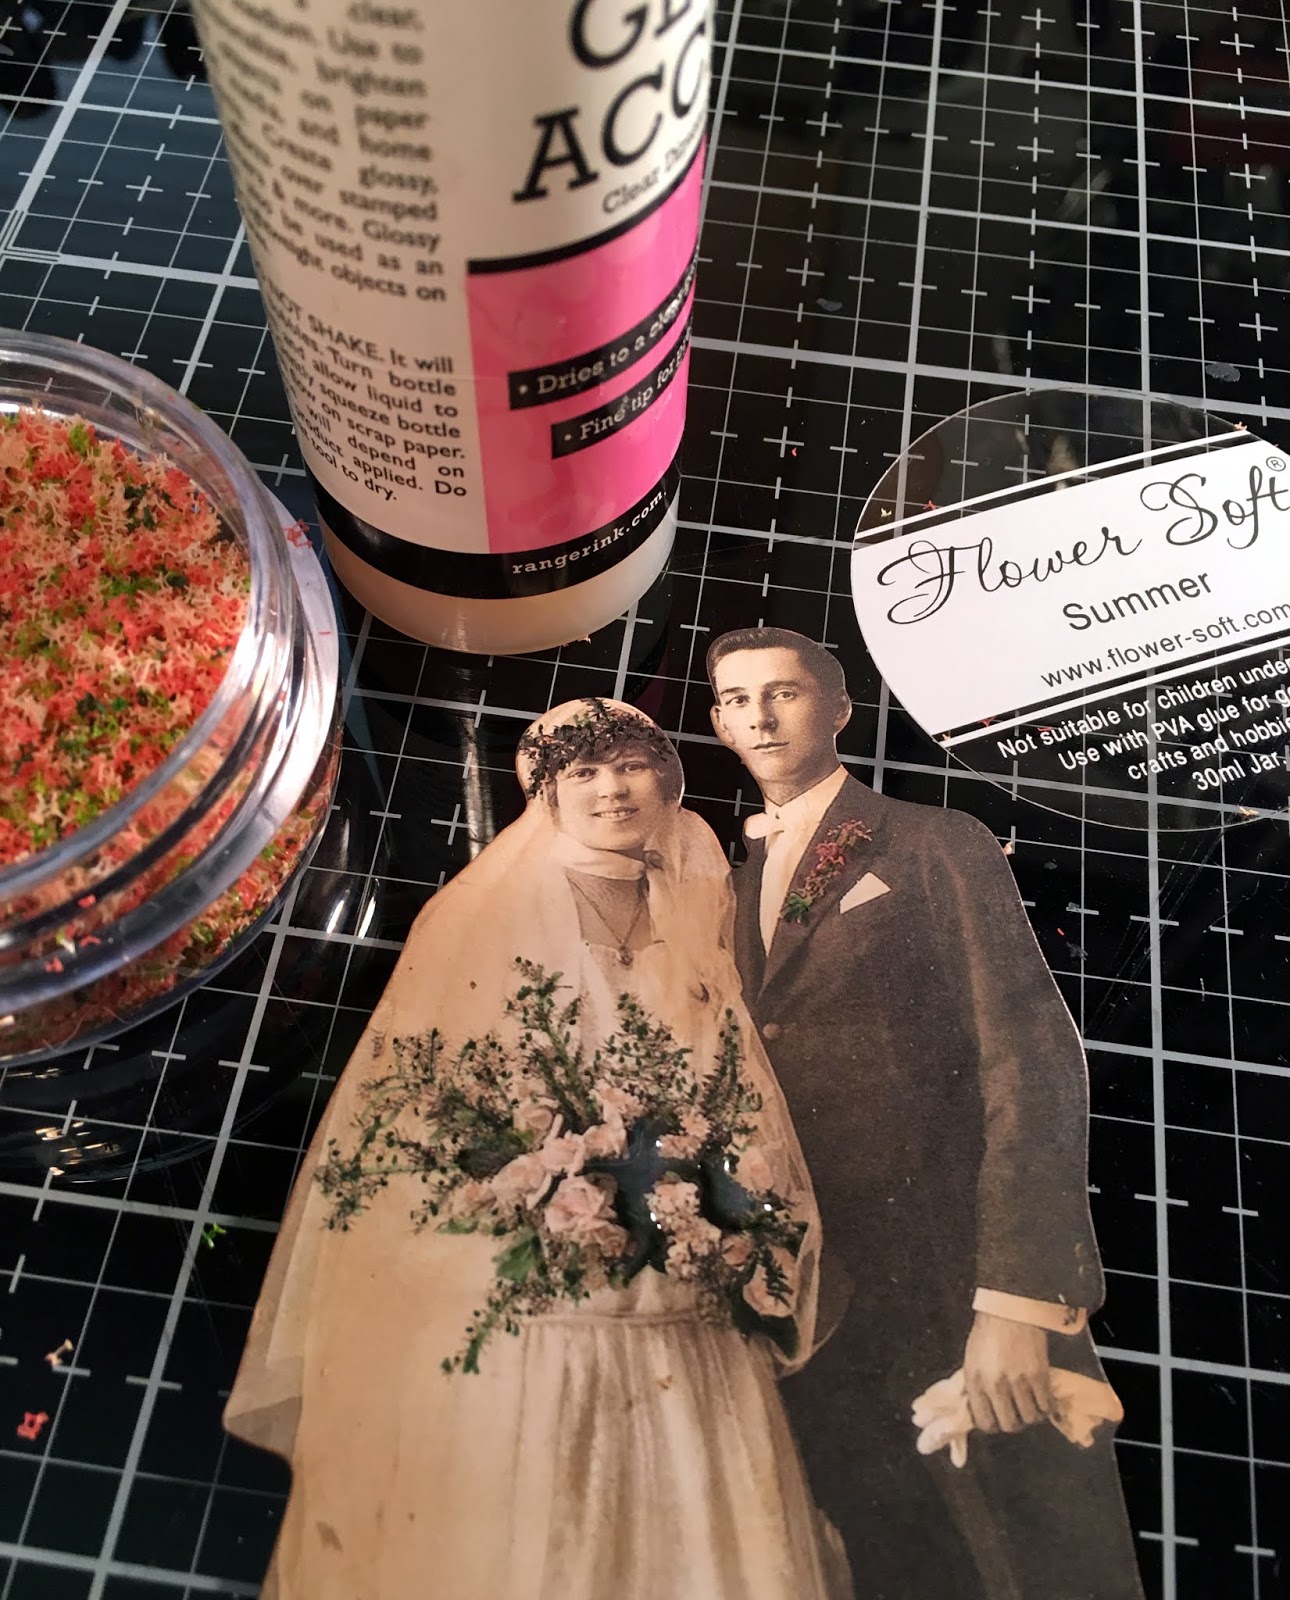
And I wanted to use some Flower Soft I got earlier this spring on a Destash.
(THANKS 7 Crafty Sisters !!! LOVE you gals!!)

THEN I finally got ready for the MAIN (dreaded!) EVENT;
Tim Holtz's Chalk Embossing Technique.
Back in 2014, during the making of that Tag; I actually gave up
and just used white embossing. But- like any perfectionist- it stuck in my mind.

Starting out, I cut 4 pieces of black cardstock, thinking I'd get a good one by the 4th try.
Hahahahahahahahaha !! Right.
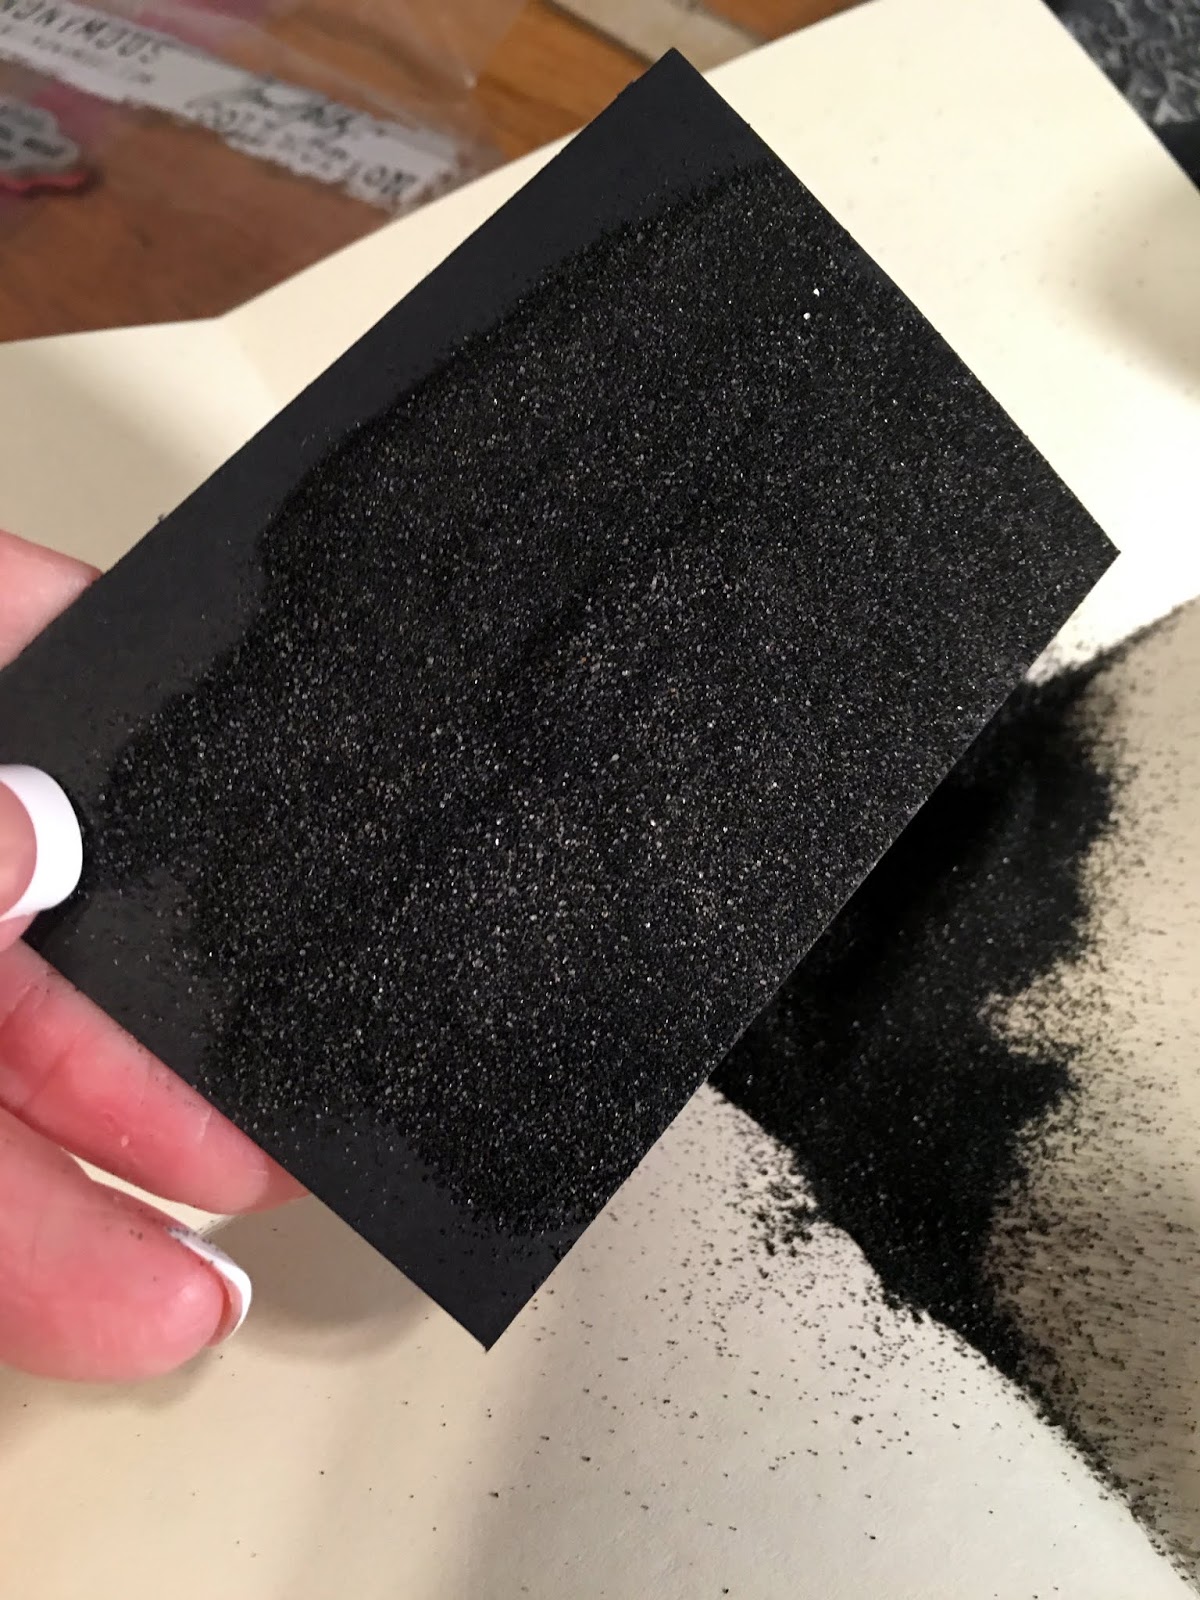
I did this step EIGHT TIMES until I got one I thought was going to work out ok.

Again- I did this step also 8 times...

… and each time, I THOUGHT I got it right.

But along the way, I learned a couple of things:
1) keeping the stamp clean is an easier way to avoid a messy looking blob...

… and much like humans- stamp pads aren't perfect either.
2- A big lesson was learning to LOOK at the shape of my pads in order to make sure the ink
was correctly covering all of the stamp's face. That helped a lot!
It was important to get the right amount of ink in order for the
TH Distress Embossing Powder to stick.
3- get the TIM HOLTZ DISTRESS POWDER!
I found that most of my problem was from the "other" powders- they just weren't the same.

Out of 8 tries, I let the ChiefHubby choose which looked best.
He chose the same one I thought was best- the very last one.

It was time to add a few touches of more Do Over... a leftover TH Faceted Heart
became a faux rusty heart.

And some TH Crinkle Ribbon (SCORE!!) treasure found at Tuesday Morning...

...along with HUGE TREASURES of TH Assemblage (SCORE!!!) found their
way into my cart veeeery quickly!
I had a good idea I was going to use at least one of these on THIS very project!

And lastly; one more Do Over on the backside:
Cutting out a silhouette using a photo.

I actually found a color cut of one I did earlier and thought I'd go ahead and use it
as a "then" in color up against the silhouette of a black "now".

The idea came together in a pretty cool way.
The babies have grown- all three with the last in utero-
but this Memaw has managed to lose 25 pounds since this photo.
Doctor's orders, with another 18 pounds to go. Fun. But I feel better!
Here's the end result:

FRONT

BACK

Transparent Wings got them up there!

Rusty faux Faceted Heart...
with that TH Crinkle Ribbon; yesssss!

That Assemblage was perfect to show off
"The Cutest Grandbabies in the WORLD"!

Texture on the moon is dope!

My fave IdeaOlogy: TH Heart Charms.
And a camera charm- clearance deal from The Funkie Junkie Boutique!

That sweet seal again.

Flower Soft just ROCKS!!

Not too shabby a job!
I figured out how to just GENTLY rub the chalk, not SCRUB!
The fun of an interactive flap on a Tag...
And that's a wrap for this Challenge!
Big THANKS to TFJB Challenge Blog Design Team for the
beautiful inspiration they always have, and for the work they put into it all!
Another THANKS to
for sponsoring the Gift Certificate drawings each time!
I've been asked WHY I only follow one Challenge Blog/
The answer is simple:
I found it at a time when I was ready to 'go public' with my crafting.
The site was helpful and the people were all VERY ENCOURAGING!
I have since made many friends through The Funkie Junkie Boutique and Blog,
and following just the one has been more than enough for me.
I am very blessed to be able to do just that, and it's been all GOOD!
BE SURE: to check back in on
Thursday; August 29th,
when I will be Guest Designer for
TFJB Challenge #19!
Until then...
Be Safe &
HAPPY BLOGGING!
3 comments:
Lyla, this is one wonderful tag to celebrate your growing family! I love that you hung in there and mastered that dreadful chalk technique (that didn't work out too well for me!). The background for your Paper Doll family is exquisite, and your use the Flower Soft is genius! I'm tickled pink you played along in our Let's Do It Again challenge at The Funkie Junkie Boutique Blog and thank you for being such a loyal follower! We appreciate you! And big congrats on losing the weight--not an easy thing to do! Keep up the good work, you!
What a gorgeous family! They surely are a credit to you both Lyla. And your tag is testament to your persistence - the starlit background is a triumph and eighth time certainly worked a charm with the chalkboard words! I love how it has all come together. Thank you for joining us at The Funkie Junkie Boutique blog xx
Congratulations on being the lucky winner at The Funkie Junkie Boutique blog! Have fun shopping! Hugs!
Post a Comment