I'm back to the crafting board, even though time has been short- as usual. Seems like the older I get, the more arms and hands I need to keep up with everything. Making time for everything that needs to be done, as well as enjoying the end of the summer, seems to mesh together each day. But, I'm thankful for this busy life, humbly mundane- such as it is; when the other side of the world has more urgent need of time right now. I'm a firm believer that GOD is in total control of everything that goes on. There is a reason for everything under the sun, and nothing happens without GOD's allowance. Humans have free will and often choose to hurt others. So when it comes to Afghanistan- my prayers are constantly going up! We've personally known folks who have served overseas in that area, and we currently know others who in turn, have people they know who are trapped there as it stands right now. There will be time later, for peeling layers back to see the entire picture (which I doubt we ever really will see it all), but at this point, we need to be encouraging to all our US Military who are literally HEROES and making the difference between life and death nearly every second. The images of Saigon's airlifts and eventual fall in early 1975 that played out on black and white tv, stayed in my mind and in my heart. No matter what the argument is: our soldiers should never have been treated so badly upon returning. My heart goes out to them all during the ending of this 20 year war, as they simply try to do the best they can to save lives and come back home safely themselves. I just feel the need to say this, hoping the chaos can be contained and we won't be reliving another September 11th- ever again.
I just missed the last Simon Says Stamp Monday Challenge (Heat Embossing), but I'm getting this entry in just before the deadline- SSS Monday Challenge: Dry Embossing. Basically, it's using your embossing folders, and mine are usually all Tim Holtz with a few stray brands tucked in. My Tim Holtz 3D Embosslit Folders are among my fave embossers, so I chose one to do this project I'd had in the back of my mind all this summer, but never got the chance to begin it. It's pretty easy and straight forward in the photos but I've typed where needed, jic. So, here's what went down...
I purchased the wooden letter at a department store, but you can find letters
of wood from Hobby Lobby, JoAnn Fabrics, or just about anyplace these days,
since they are pretty popular.
The rest of the items are what I THOUGHT I might use- later, I nixed the idea of the
TH Globe Thinlit Die, and I ended up not using the TH Distress Embossing Powder
at all. I previously thought of using it around the edges to 'rust' (distress) the wood.
Here's what I really ended up using.
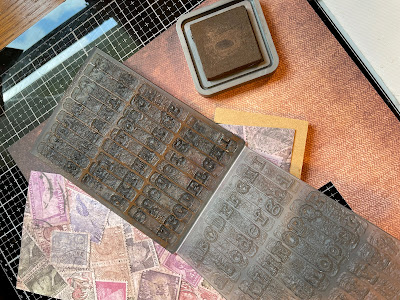
I started with my TH 3D Embossing Folder Typewriter.
While this is "dry" embossing, you actually do need to spritz a bit of water
into the folder so that the cardstock will 'stretch' without tearing.
I'm using Tim Holtz "Destinations" 12x12 cardstock.
I used TH Distress Oxide Ink- in Ground Espresso- rubbed onto the top side of the folder, to
add dimension to my letters, since I wanted to break up the paper's background a bit.
The DO Ink adds a bit of stretch since it is 'wet' until it's heat- dried.
Here, you can see how I cut the paper apart so it would fit through the Big Shot.
I wanted to keep the sides plain, so I painted the entire letter with Black Soot.
Here; I'm rearranging the lettering- A to Z downward on the front side,
and Z to A downward on the backside.
After using Glossy Accents to adhere the embossed paper to the lettering on both sides...
...I trimmed away the excess.....
... then burnished it on all edges with the sanding grip.
I did heat dry the entire letter- so the spritz of water/DO Ink would be dry
and no tearing would happen.
I then used Distress Oxide Ink in Vintage Photo to highlight the tops of the
embossed lettering. And heat dried again.
I really AGONIZED over what IdeaOlogy to put on this thing!
I wanted it to be "me" like my other letters. (You'll see later on.)
But even though it was all sweet-looking...
I ended up doing the same thing I did in the first place:
DRY EMBOSSING my own letters!
This was the fun part!
I've SO want4ed to try this since I first saw the 3D Folder when it came out!!!
And here was finally my chance!
I accidentally added my bit of DO ink (again in Ground Espresso)
onto the bottom of the folder and ended up with it on the backside of my lettering...
OH MY!! Now THAT is YUMMY TEXTURE!!!
I'm going to need to try that backwards thing one of these days!
But for this one, I wanted the front way.
I edged each lettering in Ground Espresso, so they would blend right into the background.
And then...
these TWO NEW TIM HOLTZ PAINT COLORS
came in a HAPPY MAIL PACKAGE from
and I again agonized over which color to use!!!
So, of course, I had to try out BOTH
the TH colors:
Salvaged Patina and the just-released Prize Ribbon.
Guess which one I chose...it was at the very top of the page... do you remember??
Oh, YES; I DID!!
I've been keeping that ribbon since the first Fat Quarters came out from
Tim's line of Eclectic Elements... and the time is here to use it.
I did make a couple stitches all the way through and then wrapped around it,
tying several tiny knots and then adding a dot of GA to secure it-
in case of dusting could loosen the ribbon later on.
As it stands- I haven't sealed the letter at all,
but I may give it a spray of clear seal later.
And THIS is what I ended up with...
The FRONT
Yes, that Black Soot Paint blotch was a mistake.
But I am definitely embracing it because it's still cute like this!
The BACK
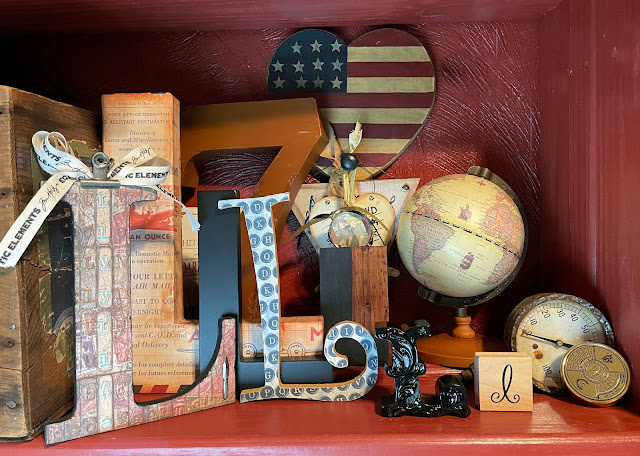
Here's how I displayed it.
Now you can see why the Tim ribbon works here- it actually mimics Tim's T letters
that decorate his studio for inspiration. I felt like this was a perfect touch
that matches the quilted items gifted to me by my Bestie (Cousin) who sewed
them using Tim's Eclectic Elements! The Fat Quarters set was an extra gift
from her that was tucked into her quilted star for me.
I may rearrange this after next dusting.... at some point...lol!
I want to get in a quick, but hearty, THANK YOU! to those who are still stopping by!!'
I really appreciate all the views, comments, and likes, and it keeps me inspired!!
*NEWSFLASH*NEWSFLASH*NEWSFLASH*
I will be GUEST DESIGNING for Simon Says Stamp Monday Challenge Blog
for the month of OCTOBER !!
Sooooo EXCITED !!!! And hope to have YOU join in !!!
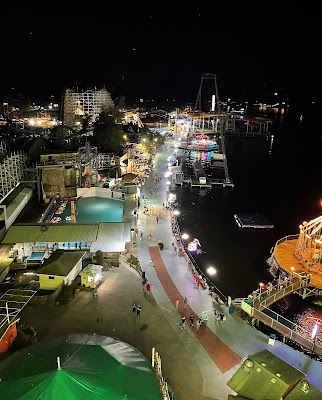
I'm leaving you with a few pics of the ChiefHubby and I-
we visited the place where we spent a lot of our youth, and years visiting with
our Grandparents- a place called Indiana Beach on Lake Shaffer.
Most of our family own boats and we went through several different boats
skiing, fishing, boating, jetskiing, floating, paddling, and
generally goofing off on this particular lake in Monticello, Indiana.
Some very precious memories.
The ChiefHubby won 2 tickets to the Beach so we spent the evening together-
just like we did every June 16th- our original first date.
I had some fun with the iPhone 12Pro and came up with these...
The Shaffer Queen (from the SkyRide).
Missed the waves on that water!
I couldn't get enough of the Farris wheel lights...even when a few sticks were out.
Until next time...
Stay Safe &
HAPPY BLOGGING!!


No comments:
Post a Comment