
Spring is finally here! But with it, it's time to be heading back to Indiana. This is our last week here in sunshine, beach, and saltwater, but we made the most of our time by getting quite a LOT done this past 4 months, and we also managed to have fun with those we love; bonus! I'm sort of dreading getting back to Indiana, because most folks will think that we've simply 'lollygagged' all our time away down here. In reality; we'll be heading back to pick up the same kind of work we've been doing here- just a larger house in a different climate. Fun. I'm ready for a vacation! LOL!
The new Challenge is out over at The Funkie Junkie Boutique with Teri hosting this one. She's challenging us to "get out those gears" and make something Industrial! I'm choosing Tim Holtz products, as is my usual, but the other DT Ladies have some awesome inspiration makes that include many other products- I took a peek, and I am so excited over them all! I just happen to be totally ready for this kind of challenge, simply because of what we've been doing for the 4 months of time here in Florida. I've included over 50 photos on this, so I'll keep the chatter to a min and let the pics do the talking! Let's go!
Be sure to watch for LINKS to the products found at

I started with just an idea and these things.
The bottom junk is actually from our newly built decking and Laundry Room
for the Florida home. I wanted to incorporate as much of it as I could.
The handle came from the redone cabinets, wiring from the electrical, wrench from
the new bench, lightbulb replacement was for the fridge (of course...*sigh*) in the house.
Untold pieces of glass, screws galore, as well as an actual car spring
(the ChiefHubby had to help me dig that up!)
found in the ground all around us as he built the first deck alone.
Thus it continued as we got hours and hours of help from our
WONDERFUL friends who are loved as our FAMILY
in finishing what is now a full decking with shelves, steps, and cubbies for tools & shoes...
a full Bath and Laundry Room- with storage and even room for a small freezer!

Here are some more main things I used- some may be older and no longer available,
but there are still many other choices to be had that are similar!
Tim Holtz Cling Stamp Set - The Professor
Tim Holtz Sizzix Alterations Bigz Dies - Steampunk Parts and Voltage
Tim Holtz Sizzix Thinlits Die Sets - Faceted Heart, Gearhead, Stitched Slots
Tim Holtz Tonic Studios 7in Kushgrip Scissors with Cap are my FAVE go-to Scissors you see in
most all of my photos for materials used!
People often ask what I use to keep my things together- my answer is always;
Tim Holtz IdeaOlogy Long Fasteners - for all the heavy IdeaOlogy/metal objects/gears.
They are extra long brads with rounded heads that can be smooshed to look like nail heads,
and they really hold things together. Great to use with Matboard or thicker layers together!
Ranger Glossy Accents is a fast-drying, extremely strong liquid adhesive that holds in
seconds and yet is still moveable. I keep extra bottles of this in my Studio so I never run out.
While the cost looks expensive....the 2 fluid oz bottles go a looooooong way on many large projects!
My 10+ years of projects can attest to how well this stuff holds things together: my Grandbabies can
touch the interactive makes and I'm not cringing & hoping they won't break!


Tim Holtz Palette Knives (set of 2) - shown used in another photo, but not shown here
Tim Holtz Ranger Distress Crayons - Walnut Stain
Tim Holtz Ranger Alcohol Inks - Ground Espresso
Tim Holtz Ranger Distress Embossing Powder- Vintage Photo (sadly; no longer available)

I chose a favorite page from Tim's 12x12 Destinations Paperie to cover my canvas panel.


Then used Tim Holtz Grit Paste- 3oz Opaque along with
one of the Tim Holtz Stencil; Bricked around the edges of my papered panel.

I painted in between the bricks for that 'cement filler' look.

The Funkie Junkie Boutique FUN MAIL!!
My main supplies I used are linked to where you can find it at TFJB:
Tim Holtz IdeaOlogy Tiny Lights (shown in another photo)
All other items seen here are just a sneak peek for you
on more to come from me, SOON!
Meanwhile...
The Funkie Junkie Boutique is geared up with all NEW TIM HOLTZ products!
You must go see!!


I played around with both the new set and the older TH IdeaOlogy Gadget Gears set I had in stash.


So....
thinking that all the stuff I wanted to put onto the FRONT
only got me thinking I needed a firmer BACK.
(*sigh*) You know me: I just had to take it further.

That BACK gave me the idea to use the old cabinet handle and some of the wiring
to not only brace up the front, but also add another feature to the entire thing.

I needed a middle piece between the newly papered-over 2nd canvas panel,
so I got out a stiff cardboard from my stash. You can see where I penciled in the
place I wanted the wiring to run.


I've been told (many times over) how I wrap like my Grandma Raymer.
Yep; and it STAYS. Permanently.


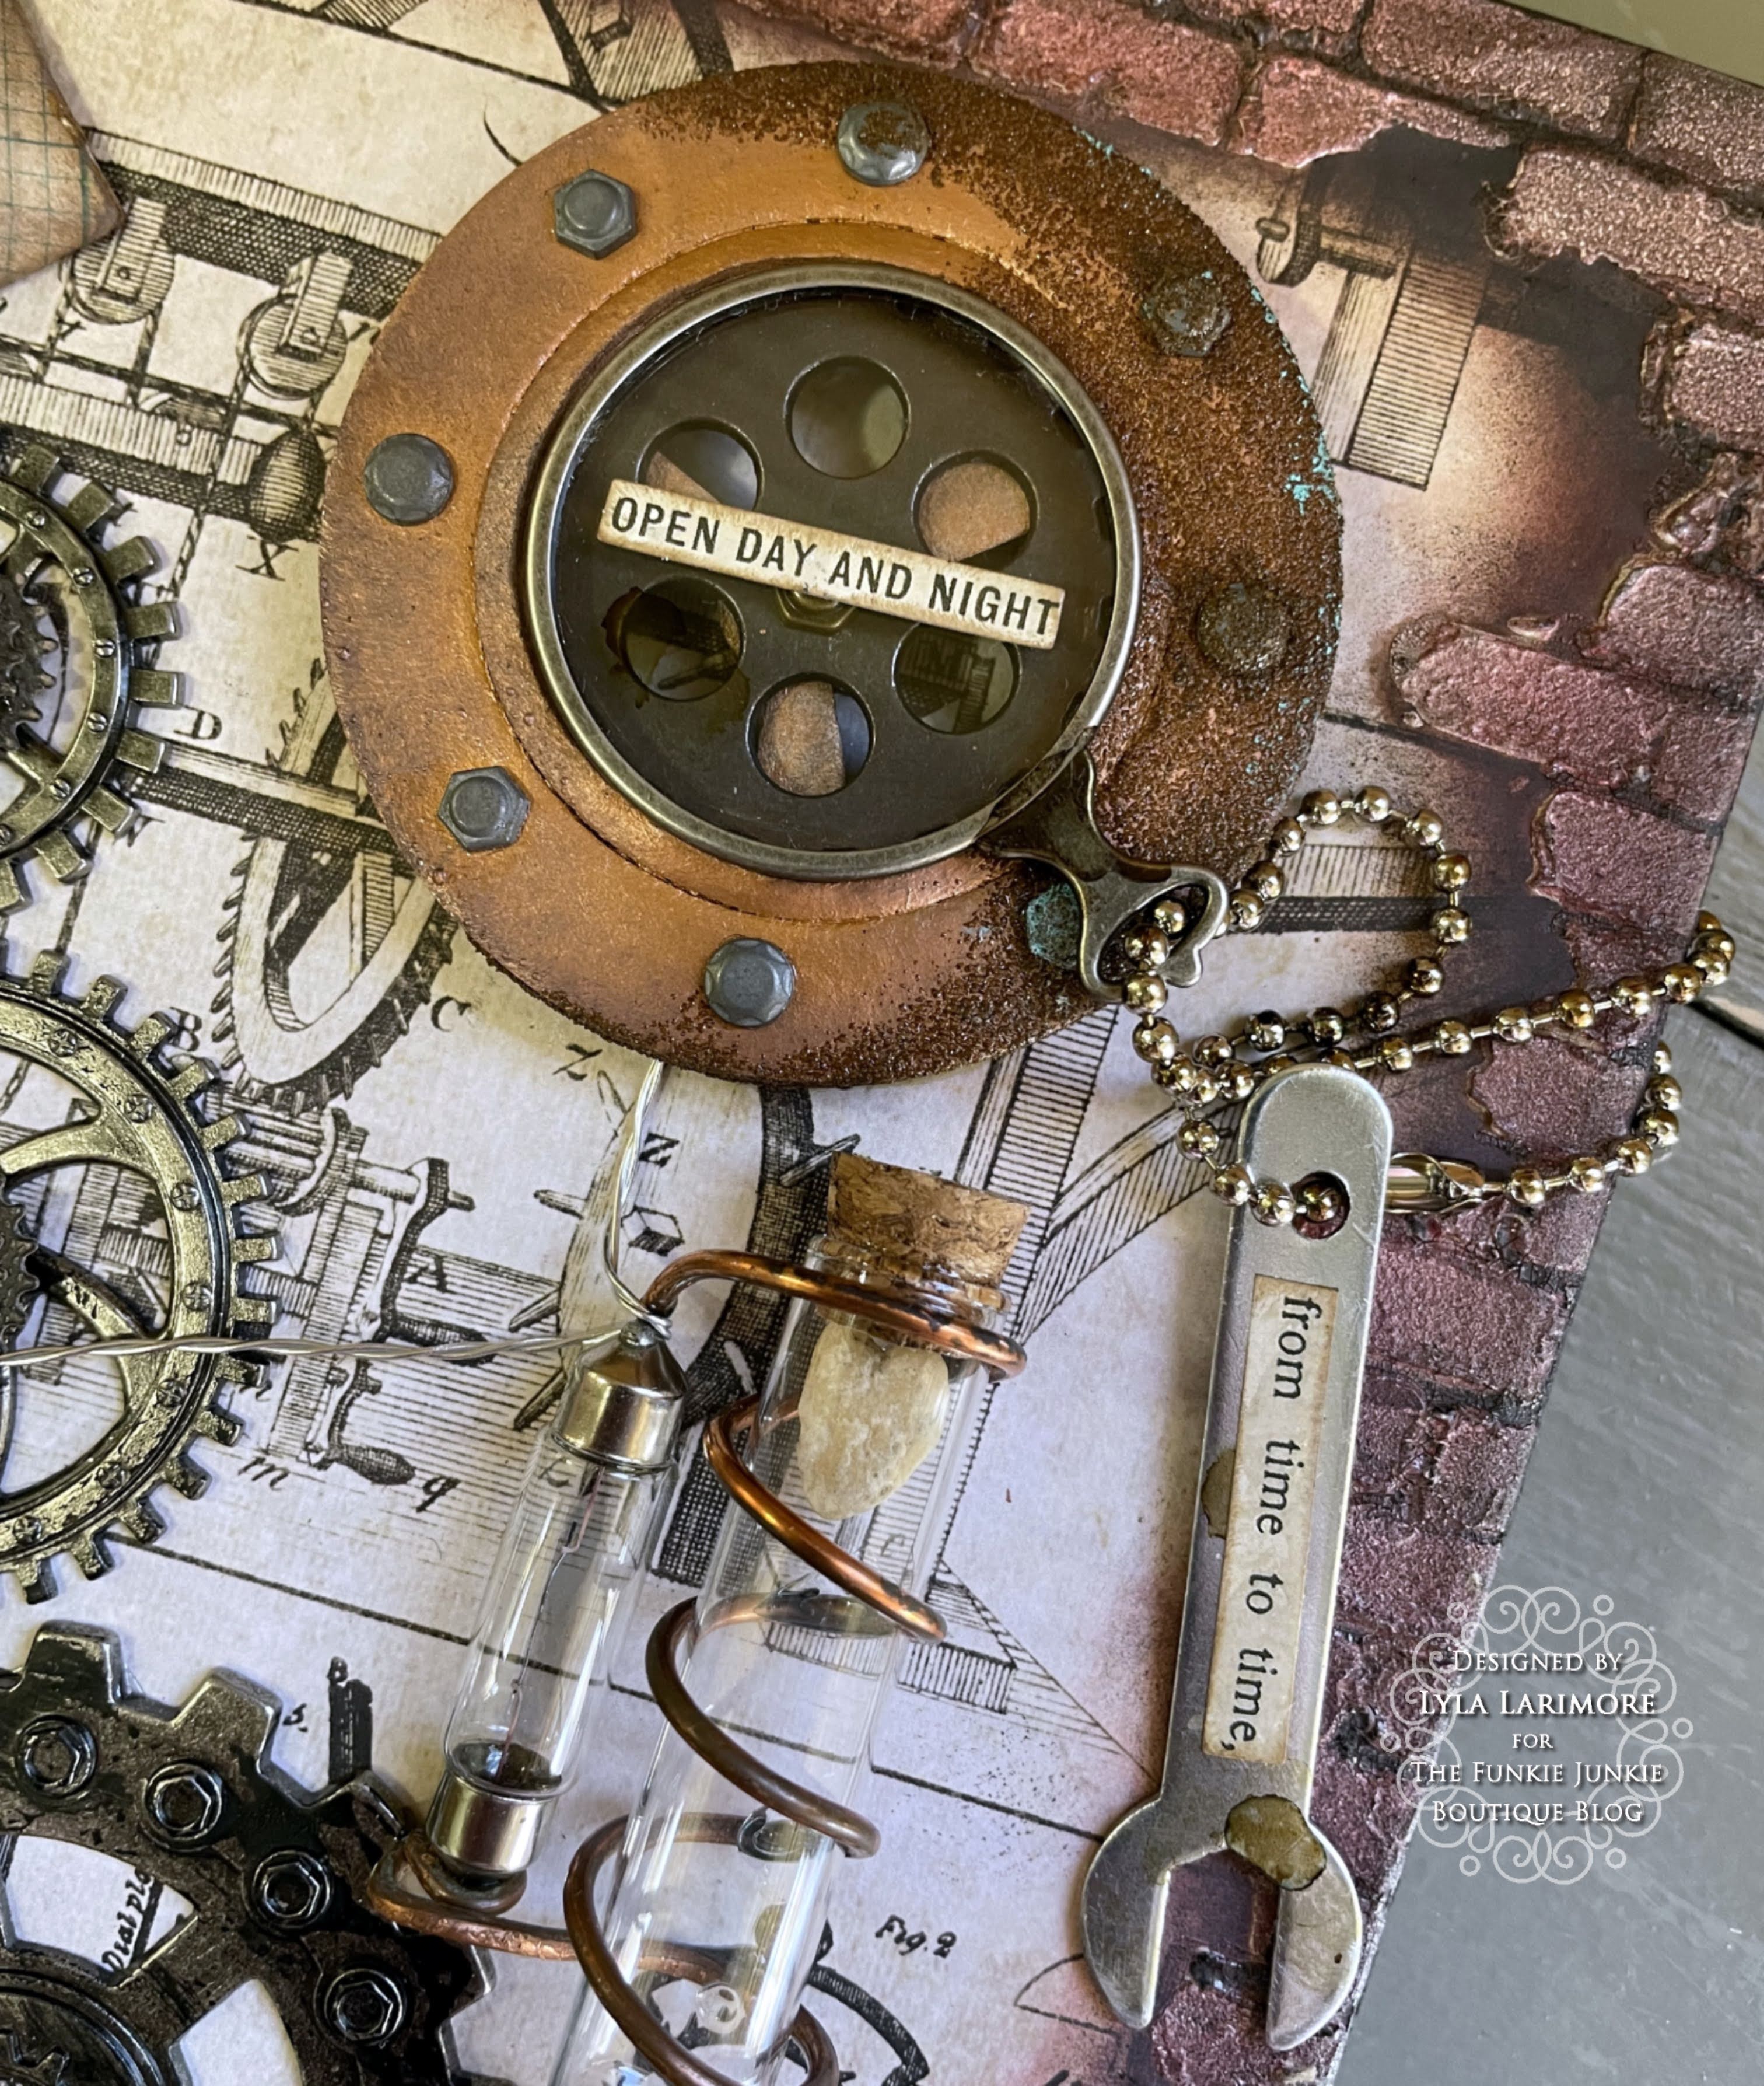
This is the finished Bricking before adding anything else.
My idea was that you are looking into a room where the outer brick wall was broken into.
The "mind-bender" is taken from the movie "Inception" where the newly recruited girl "makes"
steps that they are walking continually upward, yet find themselves at the bottom of the steps.
So, as I build on top of this "inside room", you'll be looking IN while being able to
feel solid things coming OUT at you- outside the wall you're looking into.

Making the fan and the voltage gauge.

I decided to use a TH IdeaOlogy Gear for the fan.
Again- Glossy Accents really holds!

We purchased new iPhone 12 Pros for each of us last January, and went through the entire 2021
with what we thought were cracked fronts. Silly me: I forgot that I put protectors on the glasses,
so changing those out proved that neither glass fronts were broken afterall.
The very cool protectors made cracking but stayed together in one piece...
and gave me an idea to use it for my faux glass on the voltage gauge. :) It worked!


Now that I had a Backside.... I just had to decorate that and make it look like a factory:
yes, I have clocked in making Levelor Blind braces for over 3 years.
The ChiefHubby clocked in at Subaru Automotive for over 30 years.
And frankly, those guys pictured here look a LOT like the bosses I had.

How to get this TH IdeaOlogy fixed up Time Piece to stick to the (retired) Pocketwatch Charm?

Poke some stash wire through the page on both sides of the PW
crisscrossed as shown.

Crisscross on the backside of the cardstock and tape over- or add Glossy Accents over it.

Then I stuck in some Sizzix Double Sided Sticky Foam into the wiring.
The TH Long Fastener went from the front of the TimePiece to the back- into another piece of foam.
It stuck VERY WELL.

I used some of the matching Tim Holtz Ranger Distress Oxide Ink Pad Salvaged Patina
to add a stamp to the back of the "time cards".
And Here's the FRONT...


Be sure to see the very last photo at the bottom of this blogpost...
The heart has a surprise!

And the BACK...


Check out the HEART: it lights up!
Yep; she's "Up and Running"!
I hope you're inspired by one or more of the techniques I've used in this make!
Now, it's YOUR TURN!
Just sit down and play with your craft tools and some paper, and media...
and don't forget to add some kind of INDUSTRIAL gears or grunge in your make!
Then share it on
Winners earn Badges (Top 3 Picks)
1 Overall Winner gets a Guest Designer spot for a future Challenge
and all entries following the rules get into the $25 GC from
Where my inspiration for this make came from:

We'd spent our first Florida winter in the Camp's original Director home
(which had been built by our Dixon family- Keith and Beth).
After searching homes, ideas, land/building. we were blessed with this offer inside


My "Craft Studio" in Florida:
This is just after we first arrived this winter, It's gotten much more filled since. :)
I sewed curtains for the above bed/storage (outisde kitchen is behind this wall),
and for the bed/storage above full-size fold-out bed on the opposite side.
Pop in all that stuff behind those curtains and I actually have plenty of room!
Yet; the ChiefHubby still asks why I keep using all the table space out in the kitchen area, too. lol!


The "curtain" is actually an unbleached muslin panel I sewed all around the edges
to keep from fraying, and then used a ribbon leftover from a Christmas gift;
trippling it over and sewing it as a tether tie. The panel easily drops down- for MERMAIDS.


Cleaning up this end took time on just about every day of March, and the finds we made along
the way are kind of funny. I'm telling you; there's a CAR buried out there someplace, and when I find it, I'm gonna dig it up. I'm gonna put a nice sign on it and plant flowers in it.
And it's going to look sweet! :)
I want to take a hunk of space here to send a HUGE SHOUTOUT of
THANK YOU SO VERY MUCH!!
to all the guys who came to help us with the building of
the Laundry/Bath, the decking, roofing, and all the plumbing & electrical, and gas work.
It took quite a LOT of planning and maneuvering to make it all happen.
Not to mention all the Cyprus wood 'donated' (actually, Lyla requisitioned it all)
that was leftover from the building of First Christian Church of DeFunkiak Springs-
our Home-Church-Away-From-Home Church.
Randy Chestnut (Camp Director),
Rick Chestnut, John Dixon, Phil Steele, Sean- who built our golfcart port,
and Gene "the Digger Man",
not to miss thanking their wives- for letting us borrow their men so many times!
You've all helped make this Home Away-From-Home into HOME.
And we look forward to finally just....working...?? LOL!
I'm going to miss those days when I got away while all you men were busy! ;)

March 17th- spent St. Paddy's Day along the shore:
Yes, we really are Living Under Christ's Kindness!


The ocean is one of GOD's most powerful physical creations on Earth,
and on every day, she gives up different types of gifts; some days it's mullosks,
other days, it's jellyfish. Most days, it can be broken shells and pieces of sand dollars.
For 4 months. I spent a good couple of hours each trip to the shoreline,
trying to find enough Puka shells (shells that have naturally formed holes in them
which can be used for necklace making) for my Indiana Sunday School PreK- 1st Gr Class.
In all those months, I found about 6 or 7.
On my St. Patrick's Day visit... the entire coastline was filled with Pukas and sorting
through them on the beach was a lot of fun in the sun for me!
It was especially nice to have teen girls on their Spring Break,
coming up to ask me how to find "jewelry shells",
and I was more than happy to share mine and show them how to look for the holes.
There's MORE yet to come later this week;
I'll be doing my first Saturday Showcase for The Funkie Junkie Boutique!
Stay tuned!
Until then...
Stay Safe &
HAPPY BLOGGING!

2 comments:
Fantastic creation! Love all of the metal embellishments from Idea-ology. So many wonderful gears!
Ok, this is the third time I've come a-knocking, and for some reason, can't seem to get a comment to 'stick'. I really don't know which to WOW about first--your wonderful industrial make or your home away from home! Let's talk about that amazing grungy brickwork! Holy cow! If I hadn't seen your hand painting it, I was sure it was real brick. And that 'cement filler' between the bricks is called mortar, I think. You kill me! The crackled gauge is another thing that looks so realistic. Oh, yes, I could really go on and on. Let's just summarize and say you have knocked this out of the industrial grunge park and then some!
Your home away from home is quite remarkable, and looks like it has all the comforts. I'm a little green with envy over your studio away from studio, since I don't have the 'studio' to start with. Great to see where all the magic in FL is coming from!
Post a Comment