Year 2013 & Year 2014 2

Year 2013 & Year 2014 2

Tuesday, July 12, 2022

The Funkie Junkie Boutique Challenge #14; Moving Parts... Baa, Baa, The Found Sheep!


     As I ended the last blogpost with; we attended "America", the 70's band, in Lafayette, (Indiana) with our Besties and I really enjoyed it. It was a Bucket Lister item for me- since I was a little girl and first hearing "Sister Golden Hair". They played just about everything as they ran through all their albums over the years. A truly enjoyable evening- hot though it was for others!  July 4th roared past in a frenzy, as we were blessed to be able to keep all three of our Grandbabies with us here in our home. The younger couple Kids were back in Indiana for a short week of surprise vacation before Nuclear Engineering Son reported back for some intensive training up in New York. Older Son was off also, so we had a great family day on Saturday the 2nd and then all of our Besties, as well as all of our Kids/Grands again, on Monday the 4th. My favorite holiday with all my favorite people- you can't get more blessed than that! And I am so very thankful! Funny; I always had a hard time getting our own 2 boys to pose for anything, and when it came to picking out the best photos, I notice the Apples don't fall very far from their Trees. Starting with trying to get that first one of the 3 together on July 4th before the fireworks began... only mine. Oh, GOD bless me; only my Peanut can keep doing that, lol! From there, it was a trip back to Lafayette for Columbian Park: same place the new Ball Park is, as well as Water Park, an awesome Zoo, and not only SIA-donated play parks all around, but a train ride as well. (The Carousel was not in operation.) The three babies absolutely love animals- the oldest wants to be a Farmer. They totally enjoyed the Zoo, and the little Pygmy Goats totally enjoyed jumping up into Pawpaws lap, lol! The intense heat over those days made us get in plenty of time in the pool at home with our 3 "fishies" who can't get enough of the water. The last thing we did was get to have lunch with ChiefHubby's Dad- retired FF of 30 years. Last chance for Memaw to snap one more good pic...or not. But they're all mine, and I love it!


    When this newest challenge leader came up with the theme of Moving Parts, I thought it was a great idea and automatically started piling up my TH Gear and TH Gears 2 dies, as well as lots of IdeaOlogy items, and thought this was my chance to make a killer shaker card! While I was at it, I started working on the next Sunday School Lesson for my PreK-1st Class. To test my idea of a candy holder, I got out the die for it and the pattern (I keep one in every die just for quick looks). I used some temporary tape and stuck the candy I chose (puffy "cotton" candy) inside. As if the crinkling was not enough (I can feel the "noise" I just know it's going to make in Church (which comes after Sunday School), the shaking of the candy inside was DEFINITELY going to make NOISE. That would annoy my ChiefHubby to no end and that was not good. Last time he was annoyed by my choice of treat: Peanut had his packet of trail mix falling out, but each time he bent over to get what fell out, his packet ended upside down in his hands and spilling more out. It was a never-ending process that seemed to have everyone around us snickering well into the sermon. So that's why I was testing this idea out a bit. However,... while shaking it, I happened to glance over at my pile of Tim Holtz stuff and had one of those moments of 'breaking the 4th wall' while shooting a film- you know; the character looks directly at the camera in a "DUH!" moment. Why not use THIS as my "Shaker" for this theme?!?!

I started off with the basic things I thought I might use.

In order to get the Bible Verse or wording needed, I use my computer.
I have made up 52 Lessons that coordinate with the "101 Favorite Stories from the Bible"
(by Ura Miller) which is our PreK-1st main Bible. It has one page with the story and verses
found from The BIBLE, as well as one page for a photo matching the story. Very simple!

how I was done with the TH Black Kraft Stock for a while. 
I lied.
The leftover pieces from that project proved to be just enough for this project!
I was able to cut "legs" for all my sheep- using one of the label dies included with the pillow cut.
Note: This TH Alterations Pillow Box Die is off the Movers and Shapers sets and is retired. 

My TH Scissor 7 inch Snips  (and Shears and Mini Snips)
are my go-to scissors for all my Sunday School Lessons.
They're a VERY important tool all around in my life!

Next, I die cut the Pillows using the middle Circle from the 3-set of Movers and Shapers Circles.
This allows a window to appear as the Pillow is cut.

Here is the correct placing (worded side up and at top with Circle on bottom end)
to get the words into the INSIDE of the pillow box. 

I save the Tim Trash- wrappings from Tim Holtz products purchased at
 in this case, I used a large celophane wrapper and cut it into 12 squares
then rounded the edges of those squares by fussy cutting with my TH Sheers.

I save all my tape ends from other projects and it's usually enough for the things I need
for Sunday School Lessons. This is a plain double-sided score tape.

The assembly line begins.
I've been ordered to cut down on my beloved Diet Coke to one can a day.
By this time; I was dying for one!


Just follow the SHEEP!


But wait; there's MORE to this Lesson...


I really should have been done with ALL the Lessons by now, but thanks to Covid19, I still have 
about 6 or 7 left to make entirely. The rest are all finished and can be found in my 4 file boxes. Each Lesson is complete with printed sheets to copy off and cut, fold, assemble as needed before 
teaching the lesson to kids ages 3 to 7. I teach cutting, but it depends on how much time we have.
Each child has their own tool caddy, filled with washable markers sets and colored pencil sets. Each also has a tablet "Bible Journal" for their verse from the last Sunday
to begin by pasting into their Journals as I hash over what it was about & ask questions if they remember. Then we begin the new lesson. I always have games, and am totally hands-on
so, they can actually touch, feel, try-out, and learn firsthand. 
I take this 'job' seriously and am very aware I will be judged for my teaching.
As long as GOD supplies what I need (by supplying my ChiefHubby), I'll keep doing HIS work!

"Goliath" the 9-foot giant whom David fought, just went to a week of Camp with the ChiefHubby.
We went table-less for the lesson in this photo, and
there are more things on the wall than this photo taken in 2021 (Jonah and the Whale).
I have anywhere from 4 to 10 kids in my class, including my 2 oldest Grandbabies.
We've had a busy 2022!


Tools, such as dies, glues, scissors, and work surfaces are important no matter what you
are crafting; a card for adults, or pillow box candy holders for kids!
Here's a list of links for tools I used on this project, 
and most others, on a weekly basis in my Sunday School Lessons:


Once again, it's YOUR TURN!
Keep it as simple as you like, or as complicated as you like.
The most important part is to keep it YOU:
Your artwork is unique and special- unlike anyone else's!
Be sure to follow the rules for this 


Sponsored by


I look forward to seeing YOUR PROJECT !

Until next time... 

Stay Safe &
HAPPY BLOGGING!!


Friday, July 1, 2022

The Funkie Junkie Boutique's Saturday Showcase: Box Hardware and Charms... Ahoy! It's a Treasure Chest, Maties!


    Happy Independence Day weekend! It's Lyla here, and I'm taking you with me on a treasure hunt! So many times, when I'm shopping for craft items, I get all the 'big stuff' and often forget to get the smaller items needed to go along with it. So on the most recent order from The Funkie Junkie Boutique, I took a stroll through all of Linda's line of 'littles'; closures/locks, brackets, and charms. I found some really cool items that were perfect for what I had in mind. Arrrrr you ready, Matie? Then let's go!

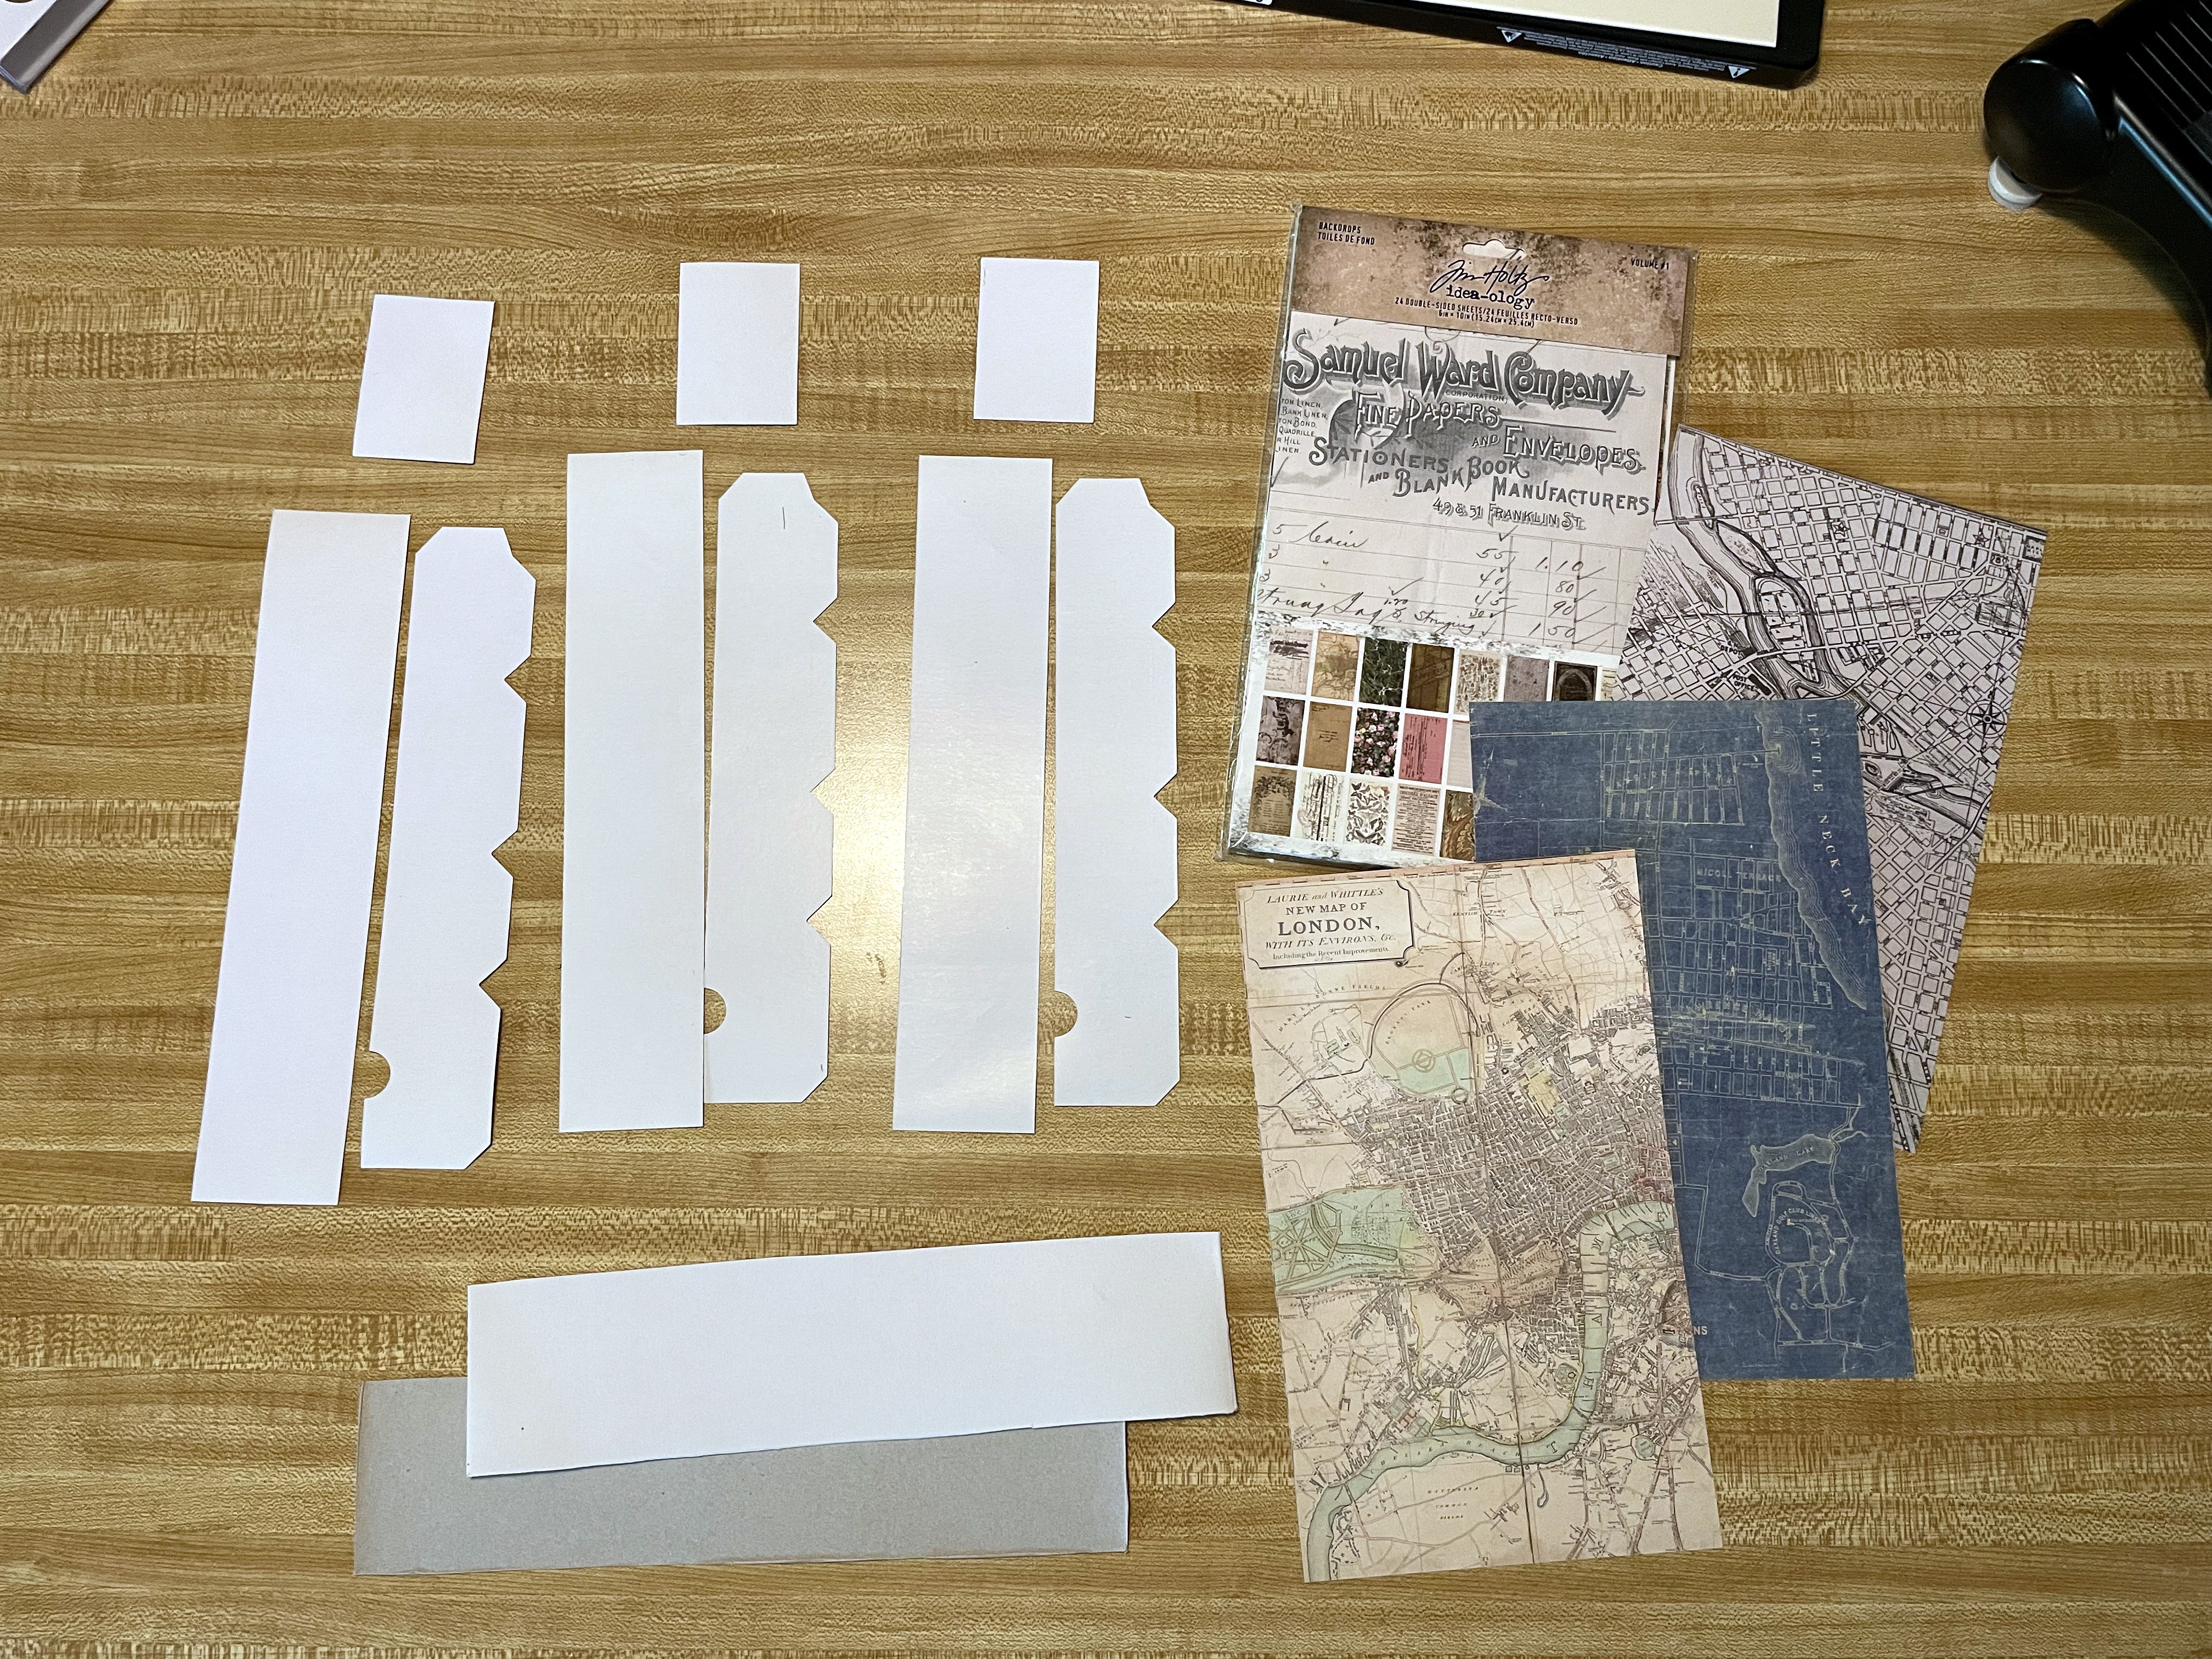
I began with some small Christmas boxes (they're always too small for anything),
some Tim Holtz Black Kraft Stock, and some linen colored Matboard.
These Eileen Hull dies are older and have been discontinued. 
I found them last fall (2021) via a friend.

I didn't need the entire box, so I took off the edges and between all 3 box lids/bottoms,
I had more than enough to cut everything needed for the smaller "matchbox" set of 3
that would go into the larger box.

You'll also need the Extra Large Cutting Plates for these dies, as well.

I wanted the inside box set to have patterned paper and found Tim's new 
Backdrops Volume 1 that I had yet to open. I chose maps out of it.

By folding in the excess of the wider TH Backdrops paper, I could carefully
cut both sides needed for the entire matchbox drawer that would be covering for the 
Christmas box ugly grey sides. Leaving the white for the other side.

My choice of Black Kraft Stock for the larger box that would become the treasure chest,
gave me a lot of scraps leftover for the bottoms of the matchboxes.
I was using the older 8x8, but Tim came out with a newer size as well.

Here I am putting them together using Glossy Accents,
and aging them a bit with some TH Distress Oxide in Vintage Photo, then heat dried.
I sanded the Blackout after scoring in half inches.
There will be A LOT of sanding...
and A LOT of scoring for this box.
Let's just say that I am done with Black Kraft Stock for a while, lol!

Cutting the larger box and putting it together was easy-peasy!
The only difference was that I ditched the square top of this box and used the base
to measure out a longer (but same width) lid that would round over the top.
That meant cutting two sides that would also round.
You can see here that I have made a mistake: The sides are too short and wouldn't cover completely.
So that's a do over.... shown down later.

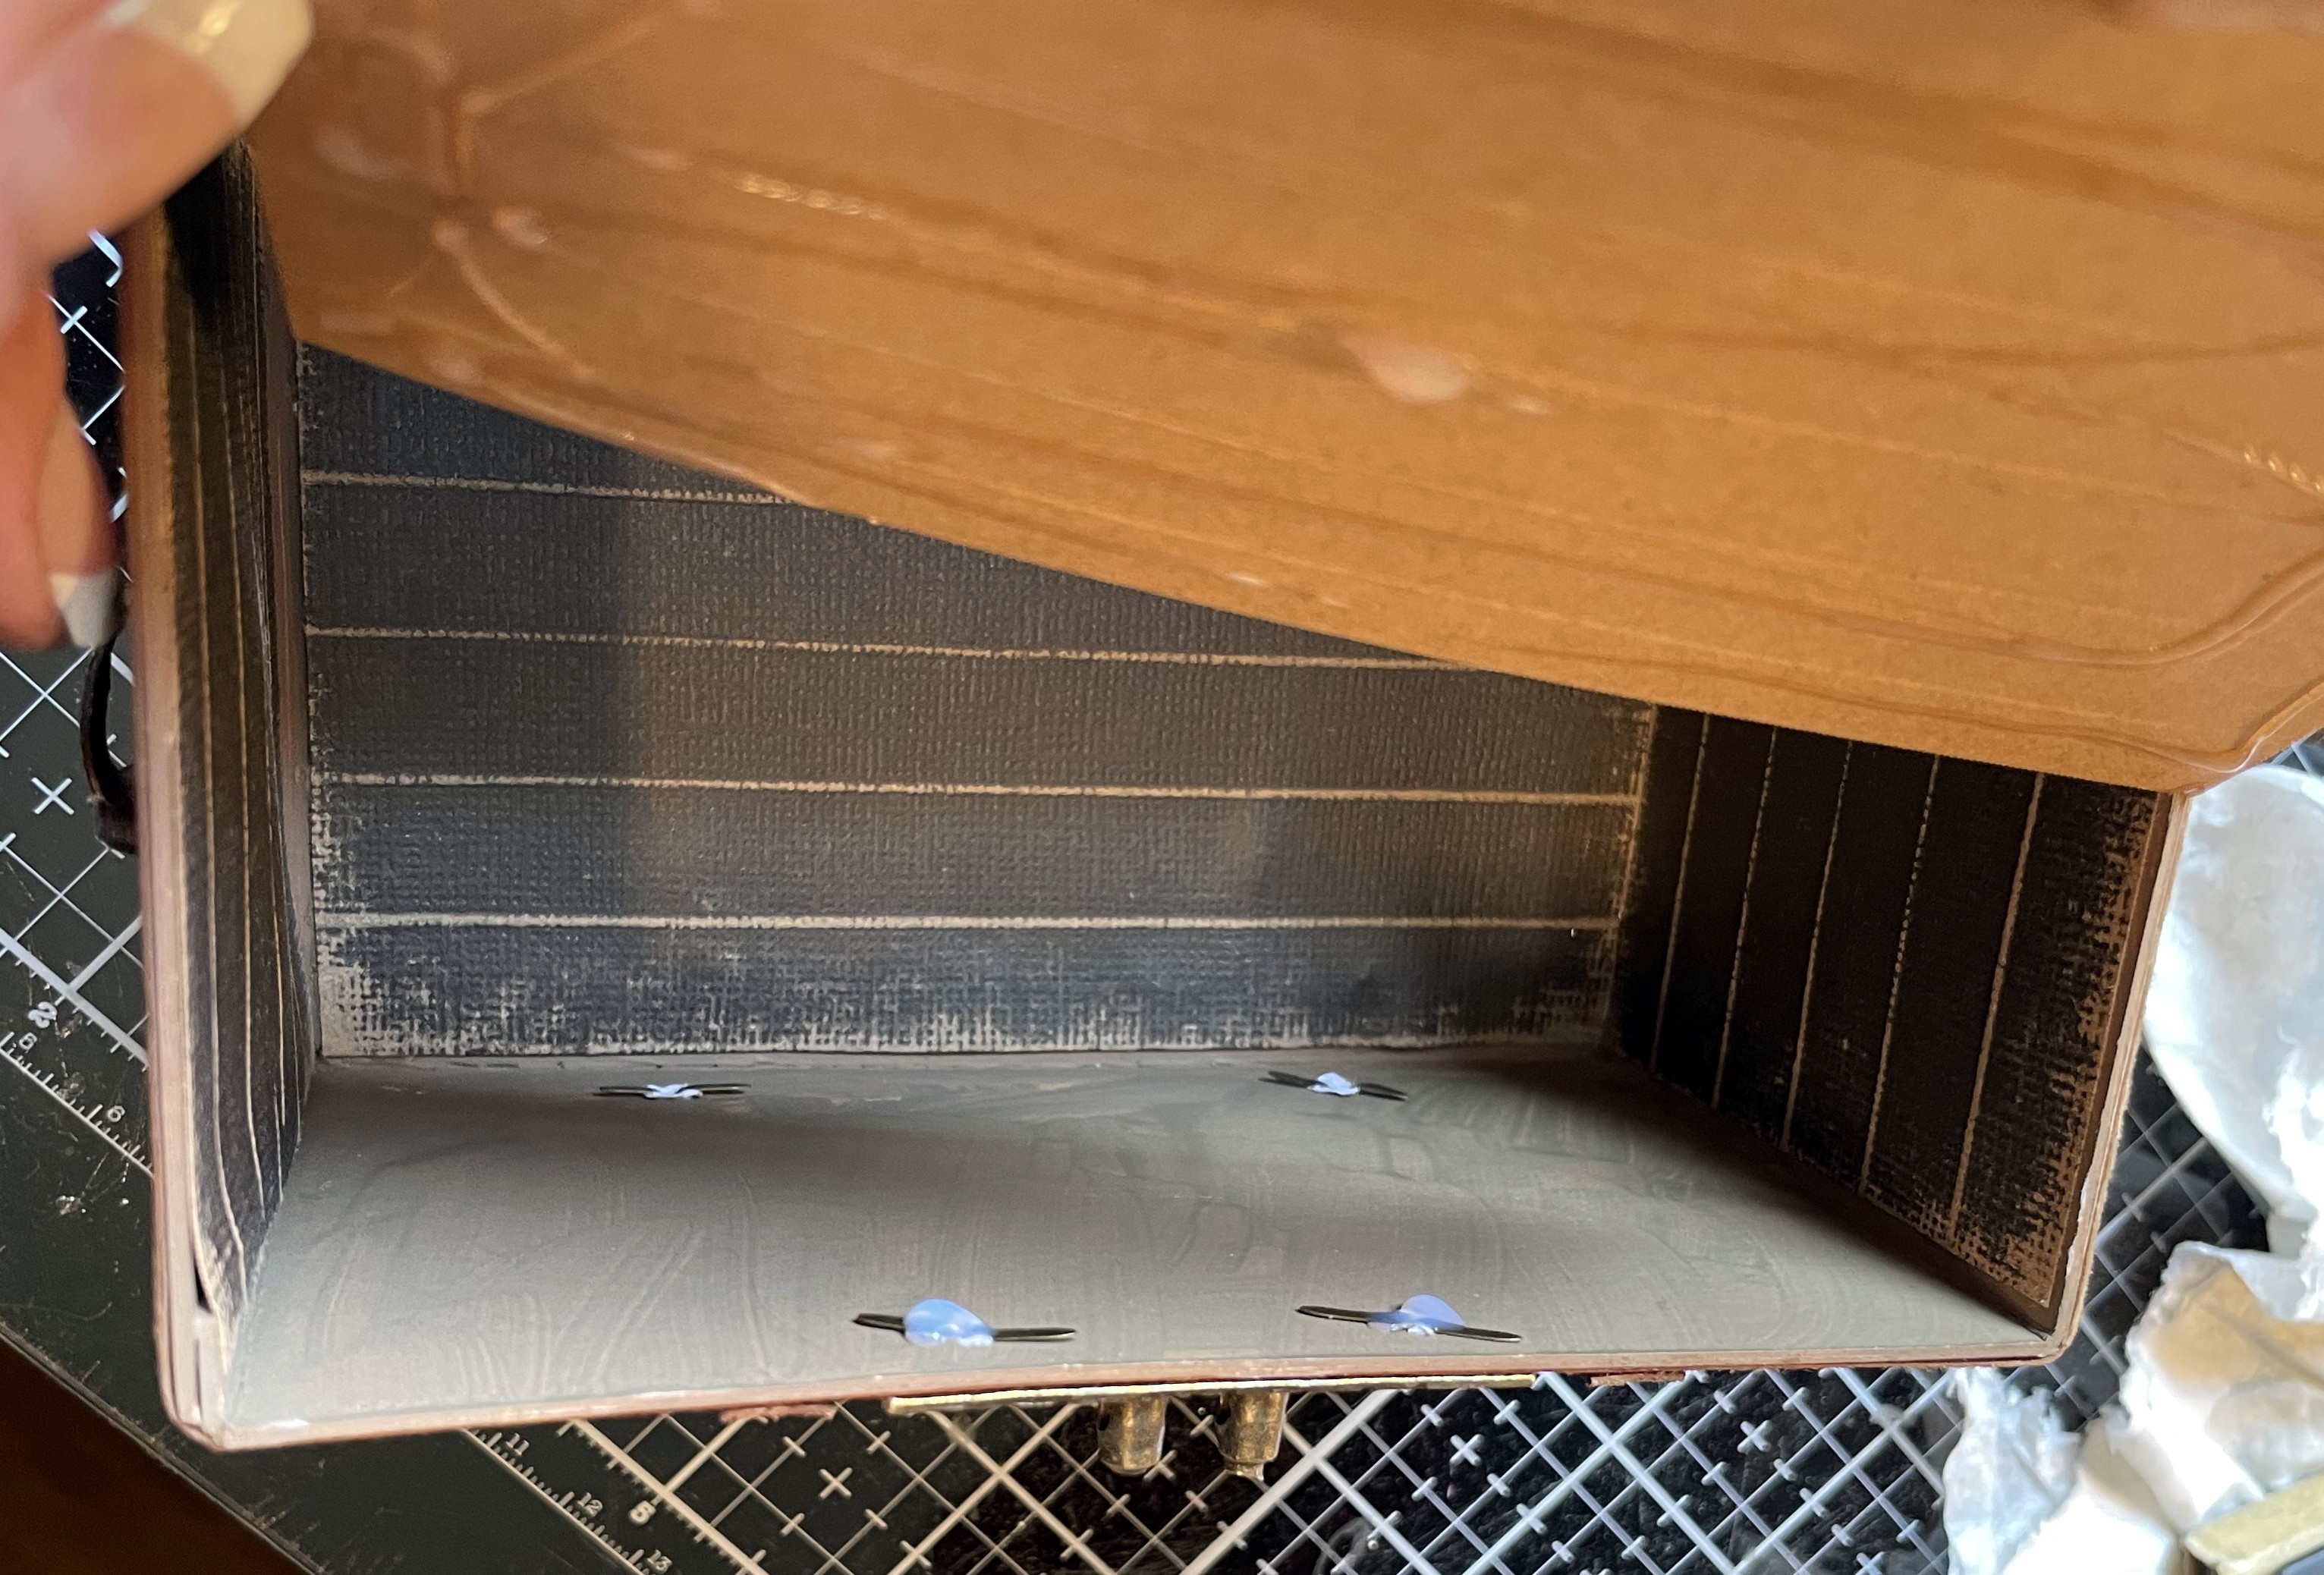
Meanwhile, I've painted the INSIDE Matboard that is the main bottom box,
as well as all the top edging and outside corners.
You'll see why later.
That's TH Distress Paint in Walnut Stain.

I dug out of my stash drawer, some larger sheets of plain stock.
It just happened to be the same color as the TH Black Kraft Stock side.
Since that was going to be a main color from sanding the black...
I wanted to cover the Matboard with it. So another set of sides die cut as well as 
tracing the bottom and cutting the corners to go over the bottom and around the outside.

Measuring out the sides, fronts, bottom, and lid...
x2 for those... 

...and sanding all of it.

I also marked little "nails" by just scrubbing a bit with the TH IdeaOlogy Remnant Rub Tool.

By tracing around one of my circle thin dies, I was able to redo those sides for the lid.

Now it was coming together nicely!
The flat top on the box made it look like a ship's crate, and exactly the look I was gunning for!

To get those sides in, I actually just eye-balled the measuring.
For some reason, that's always been really easy for me- leveling things and spacing the middle.

Here, I show how I used those Matboard edges to help hold the sides in firm before folding
over the Black Kraft Stock edging to it. Then covering those with a full Blackout side piece.

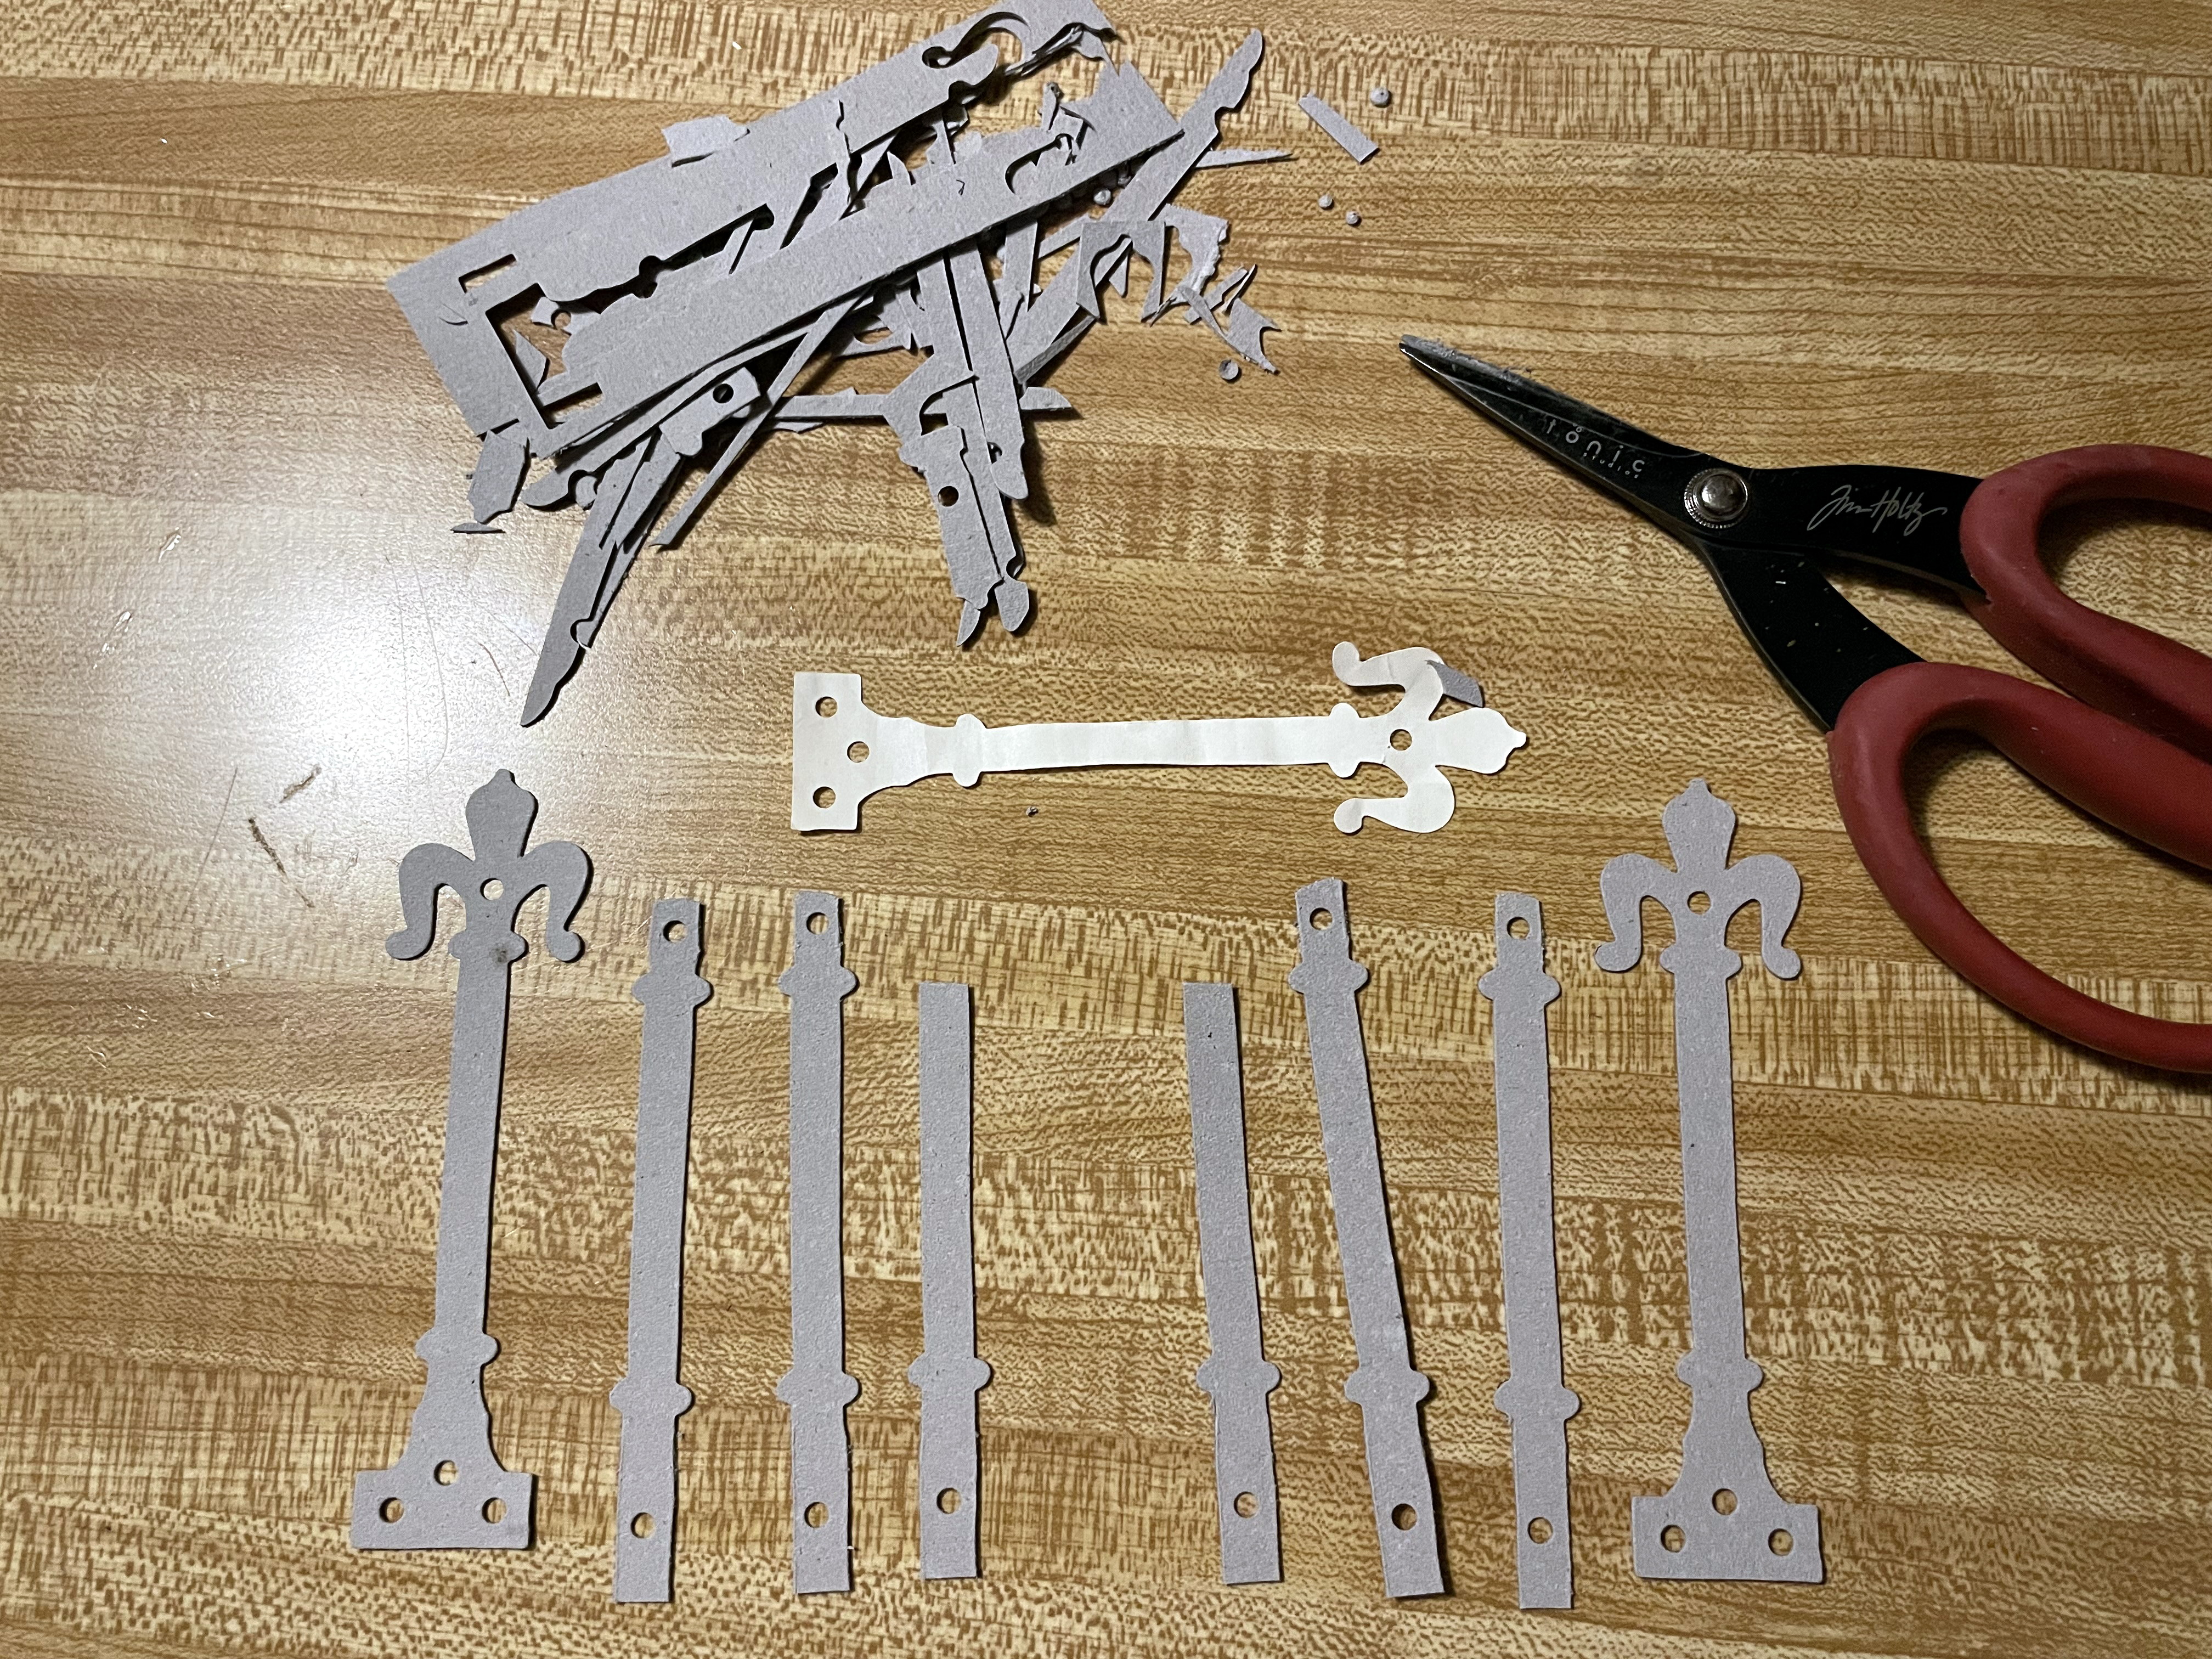
Getting out another long Retired TH fave die: Hardware Findings,
and two sheets left of that hoarded and carefully-doled-out TH GrungePaper!
I'm getting desperate now: Tim, get that stuff manufactured again, PLEASE!

Cutting down the actual die cut so that the "leather" will go all the way around, top to bottom.
Yikes; the scraps! I can't bear to watch as they go into the trash!

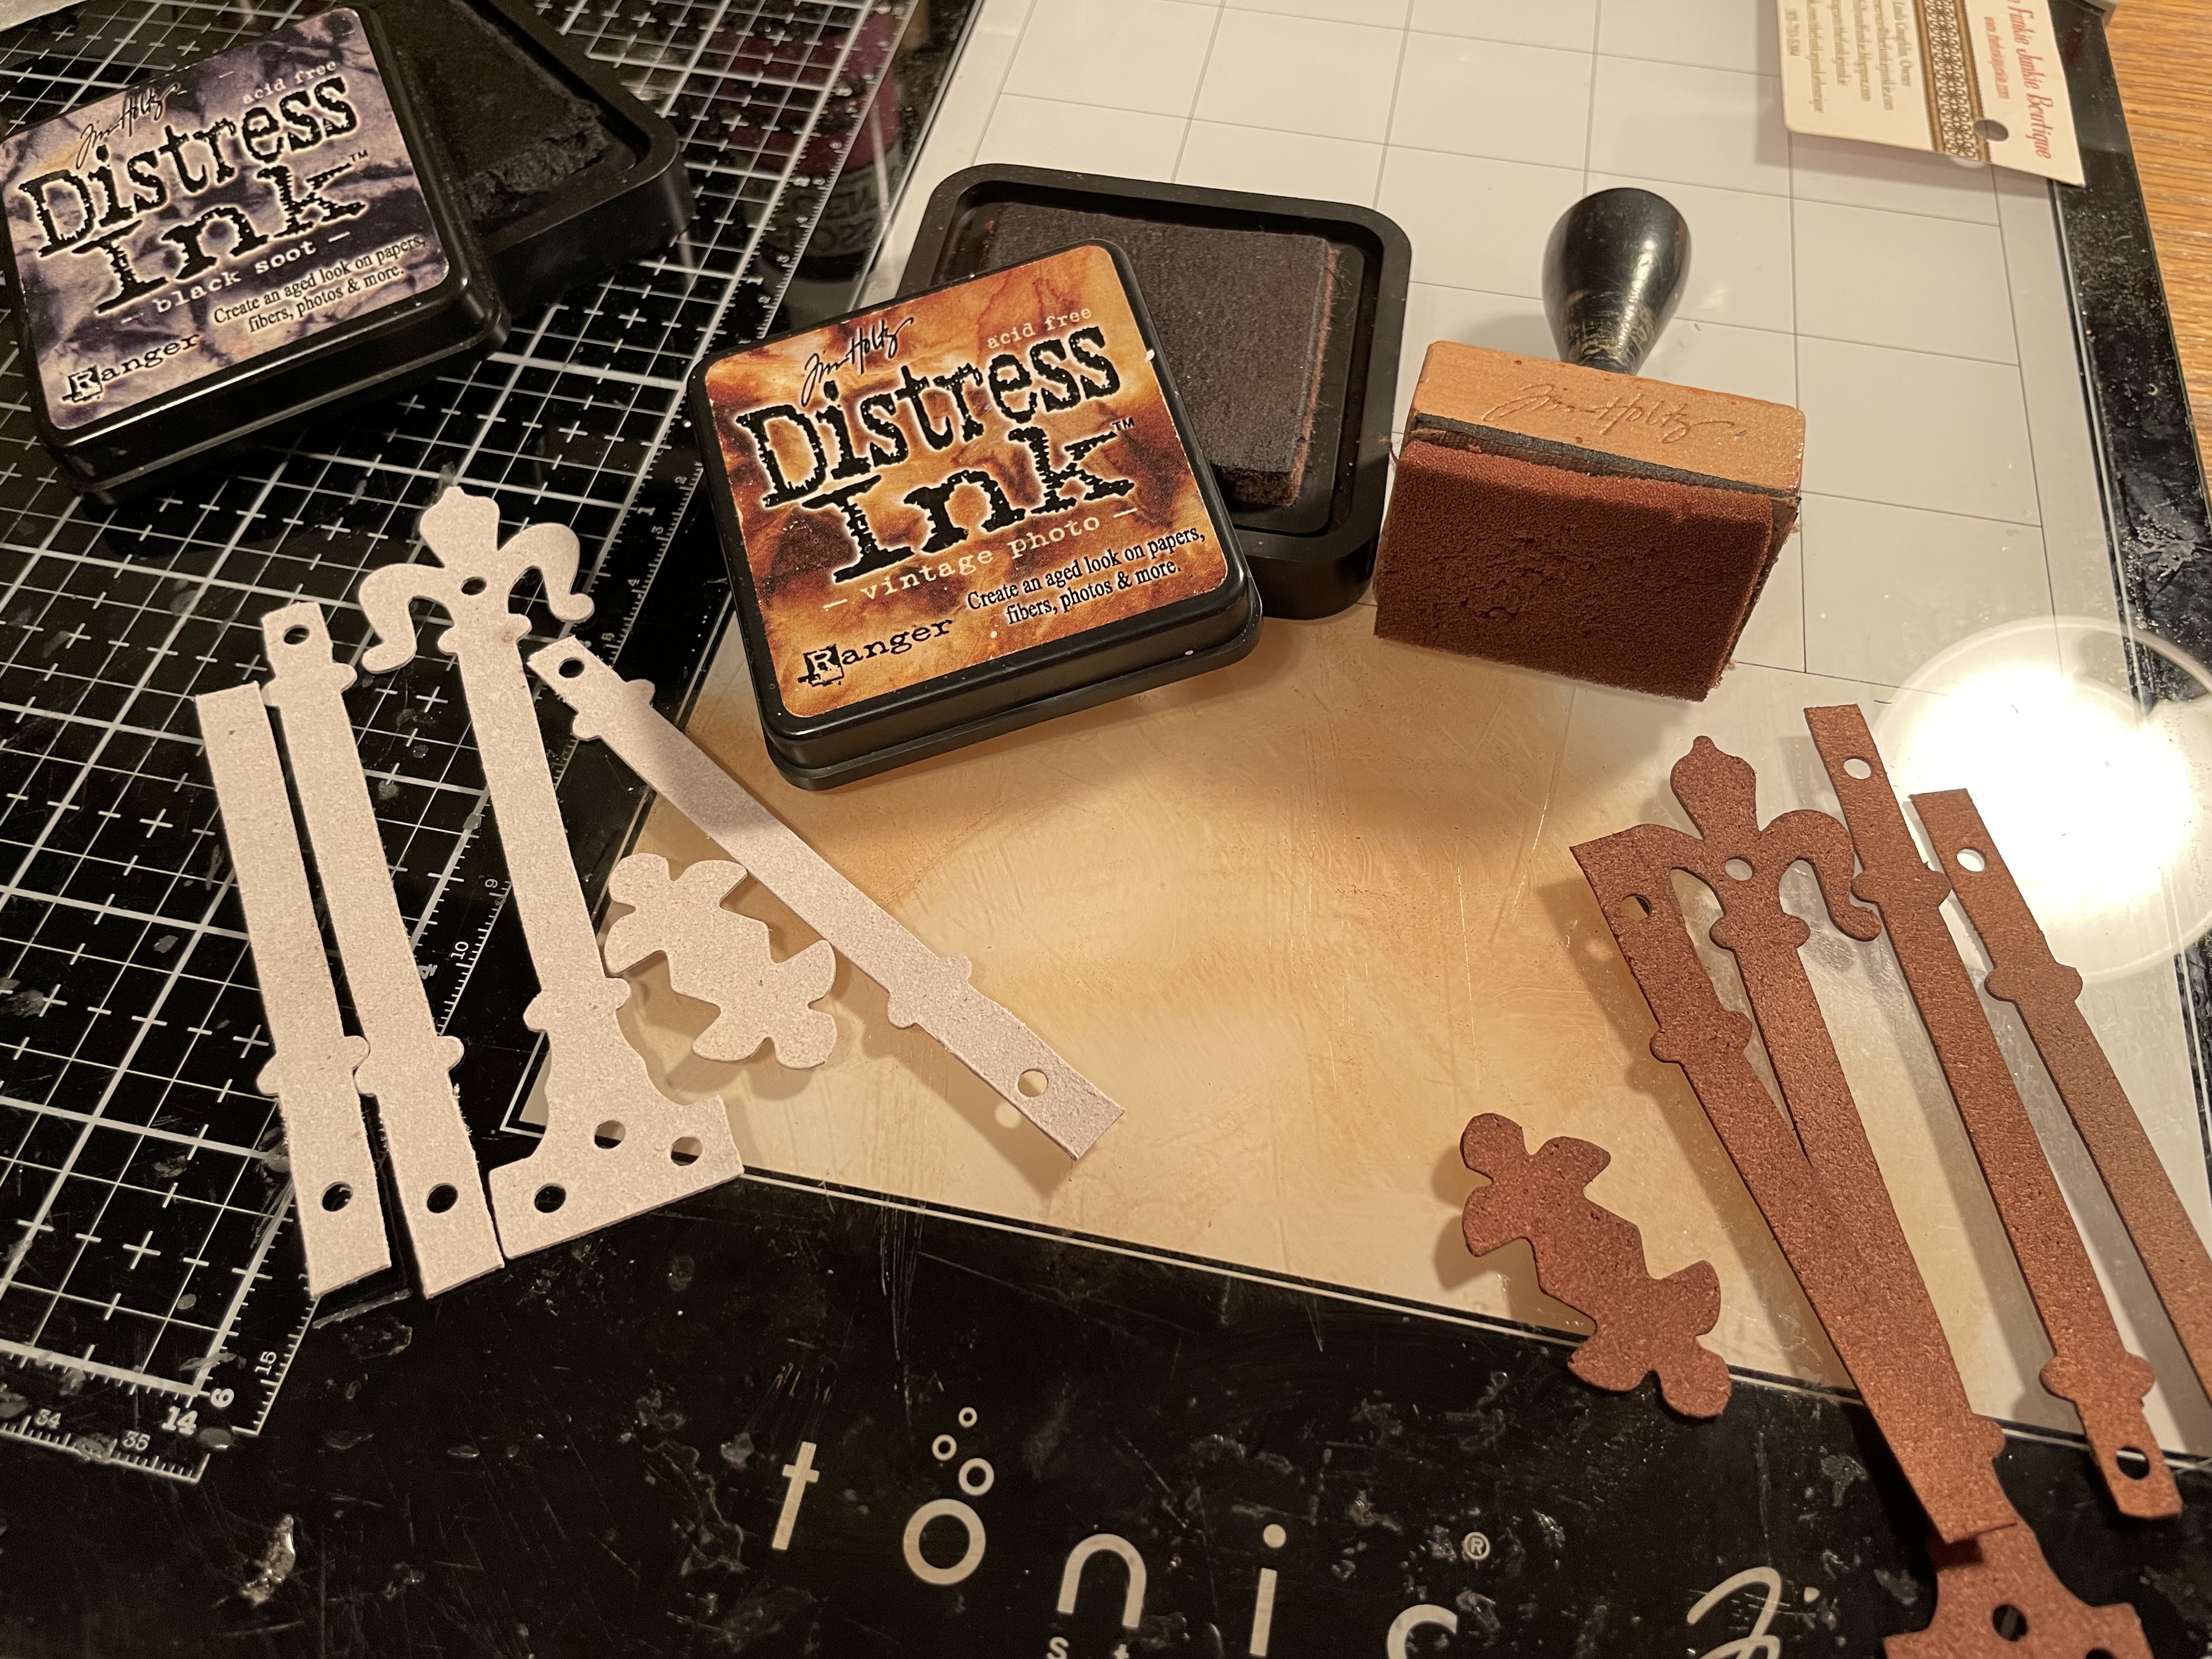
Getting some Distress Ink onto the pieces- and two little side handles, with 
some Vintage Photo and edged with Black Soot.

We're coming on to the GOOD part now: those beautiful little packages 
tied with inked Crinkle Ribbon (center of photo) that Linda makes up
when you order loose embellishments.

And here they are- in all their glory!
The Seaside Charms are the bee's knees to me!

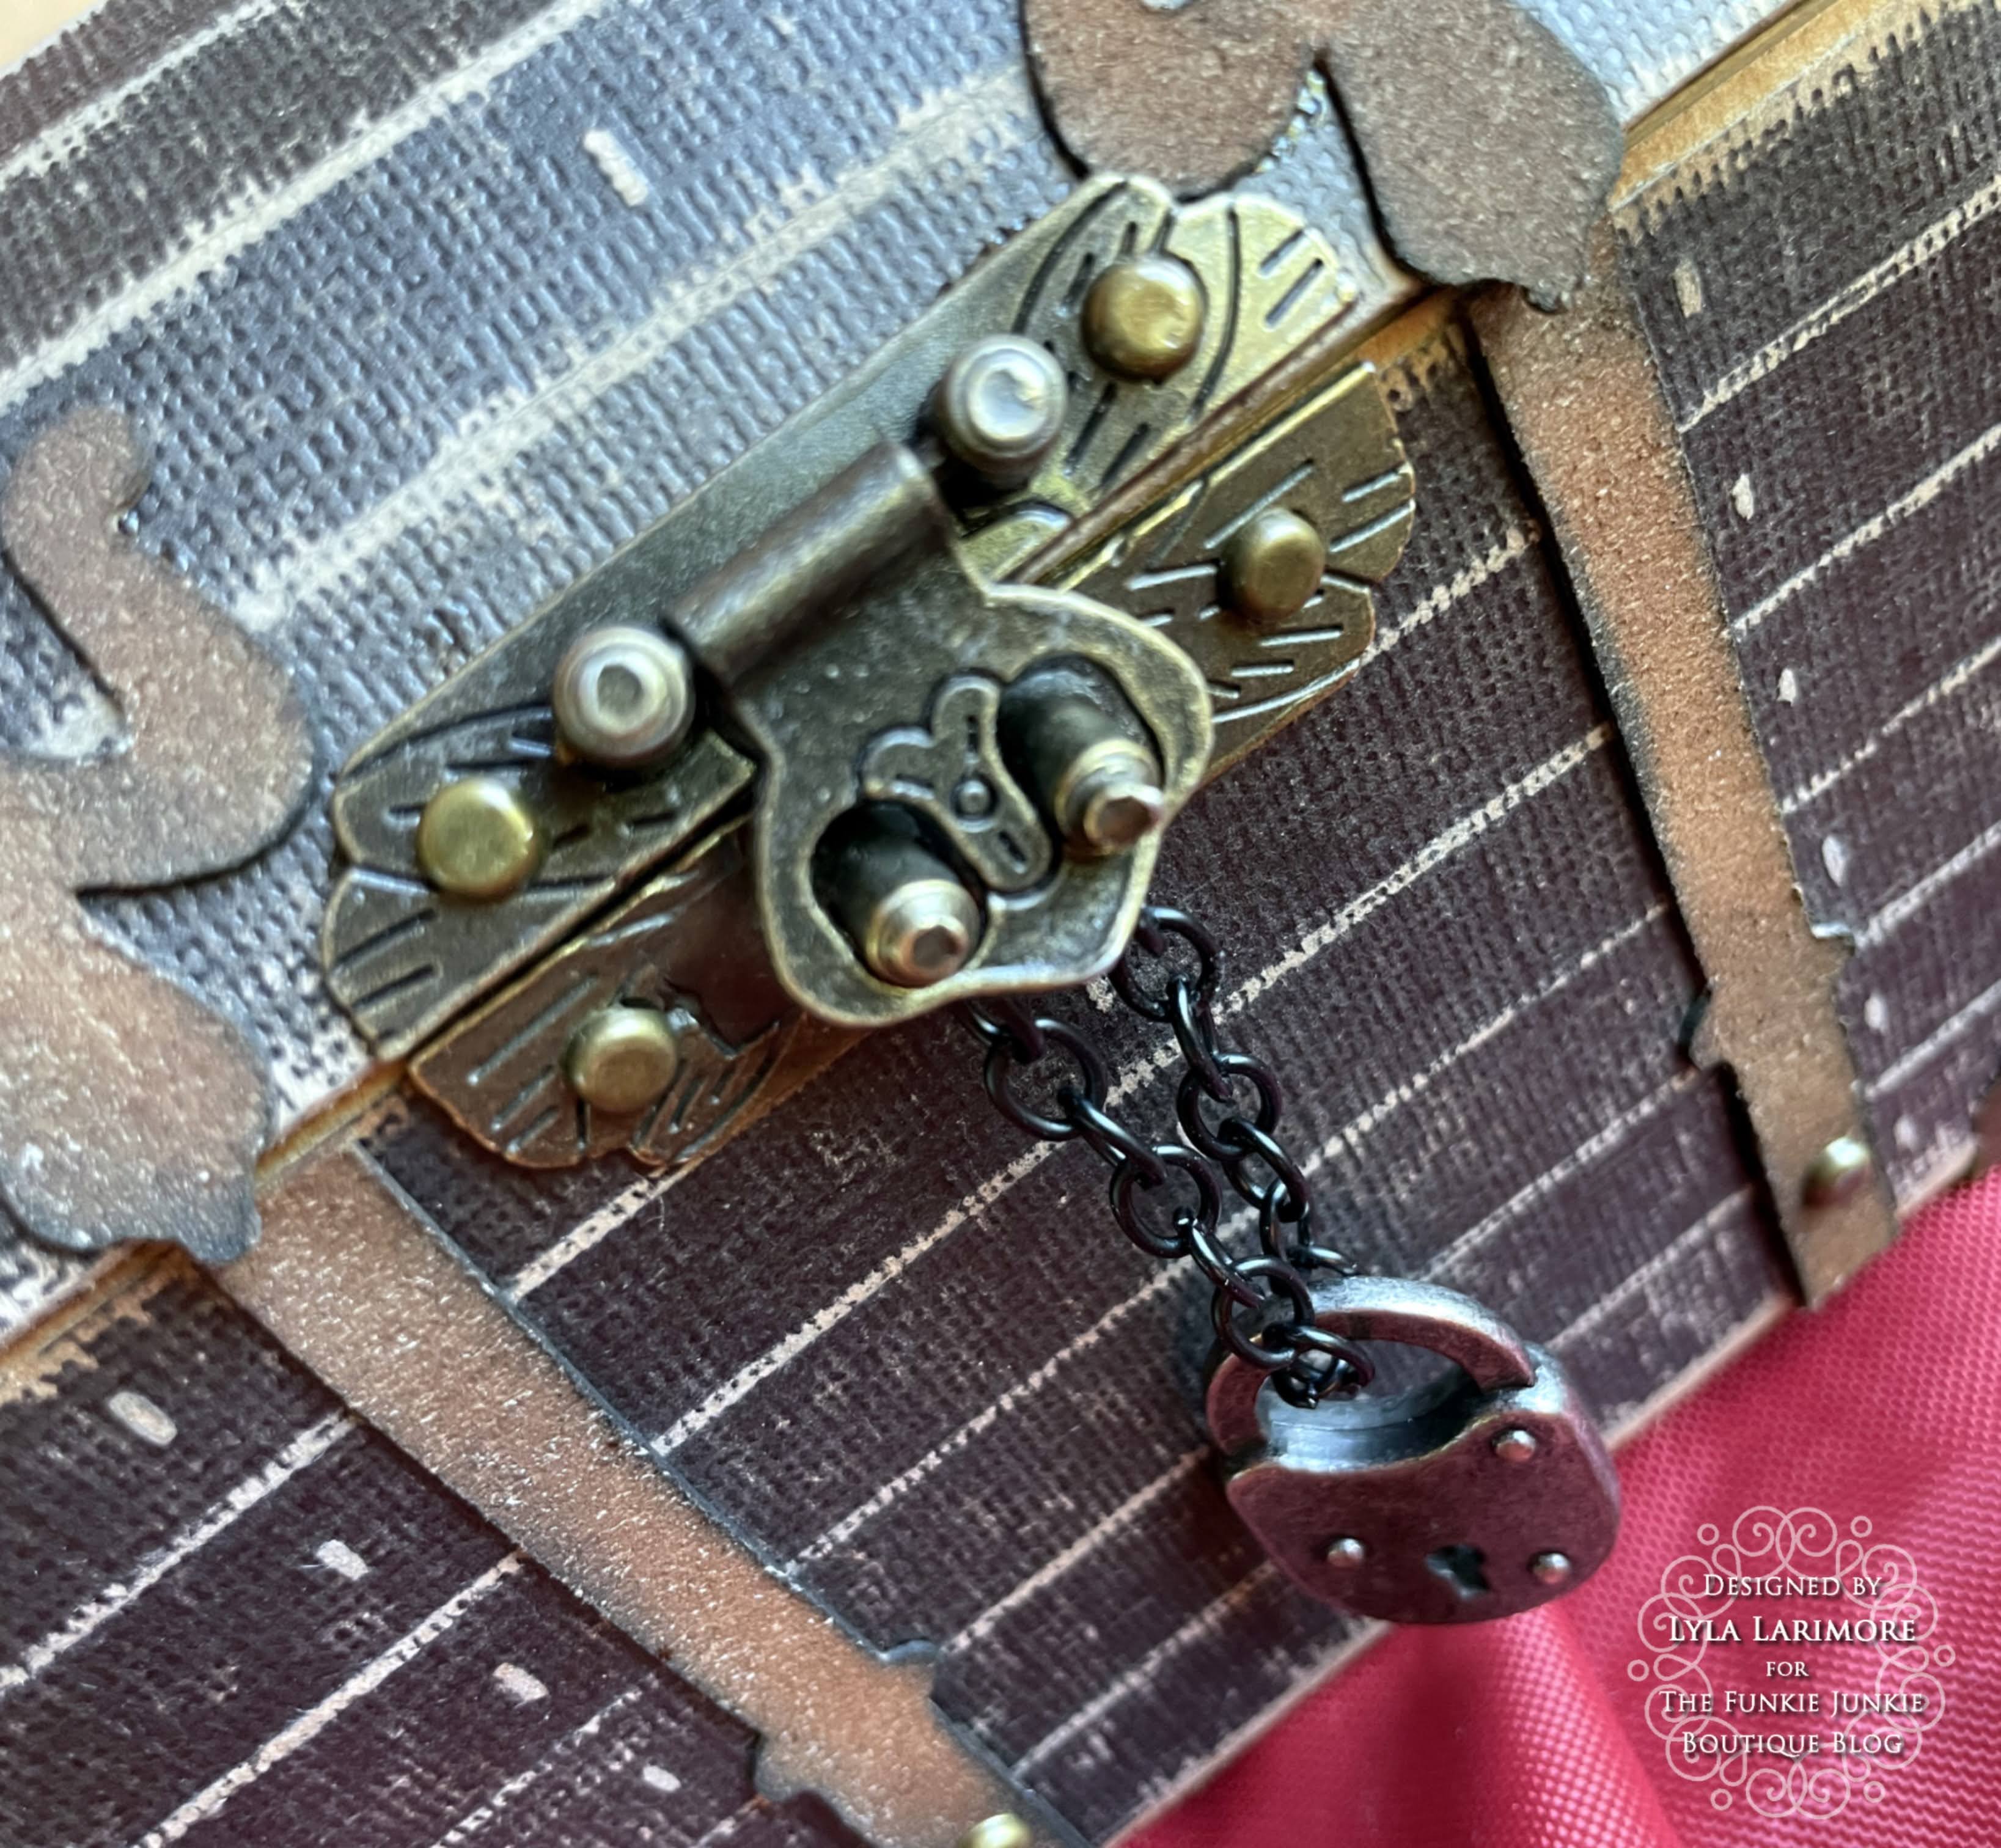
The Antique Bronze Decorative Box Latch
 and Bronze Tone Hinges (Set of 4)
 fit PERFECTLY with the die cut GrungePaper faux leather!!

I was able to choose the Hinges inside or outside of the faux leather and I 
decided on putting them tucked inside on the lid and outside on the bottom. The look was so realistic!

I did use both TH IdeaOlogy Long Fasteners to attach all the hardware,
as well as using Glossy Accents- all hidden under the Black Kraft Stock.

I guess I wasn't thinking when I put the outside of the matchbox drawers together.
I ended up peeling the outsides apart to reverse the patterns to show INSIDE.
That meant the plain white was up against the Black Craft Stock.
Now, when I took out a drawer, I could see the map pattern.
Otherwise, it would have just wasted the pattern.

No problem: with the use of the TH Remnant Rub Tool,
I was able to smooth down both layers (Christmas Box and the very GOOD paper of 
Tim's Backdrop paper) and simply just rescore the other way.

This was an idea in the works for some time.
How to make gold coins?
It began with a bag of flat quarter-sized metallic confetti in gold and silver.
 I went through all my embossing folders and the best one that looked like a coin-
TH retired very long ago- used the number 13... a great number for a pirate!

So, I ran some through. And then ran more through. And then had to run MORE through...
you get the idea.

It turned out that to make them feel like thick coins, I needed to have one 
embossed on each side, with two flats in the middle. To make 24 coins.
I went to get another new Glossy Accents bottle, and found this stuff
I bought ... who knows when??... that contains acetone.
My first thought was "EEK; my nails!"...

...my second thought was: "ALLLL RIIIGHT!!"
See how that acetone bubbled up the plastic of the gold?
Now THAT looks like a gold coin!

I'm ready to assemble the finished chest together.

By using the acetone glue with flat confetti, I give it a background, without
having to make so many thicker coins not showing all the way.
Then pile up the thick coins on top. 

The Seaside Charms had a plan, too. I wanted a bracelet to wear.
I took out the palm tree since there were 10 charms and an uneven number looked better.

I used a lot of stash tools and items that probably you won't find the very same thing of.
But crafters know very well how to improvise with their own!

Click on the links to help you find items I've used.


This is what it looks like:


GOLD!!!

Or can there be other treasure in that chest?

When the 2 older Grandbabies were with us in Florida,
we filled bottles with sand and tiny seashells.
I happened to take one more: of the water.
Not so sure if I am going to keep the water- while it was crystal clear in May,
sitting in the sunlight on my desk kinda did something to it...??


The bracelet with the Seaside Charms turned out VERY SWEET!
 I made both with the very same sailor knots I use on my sailboat.
It's a must to know your knots!


We also picked up larger seashells, but I went alone before we left Florida
to head back for the Indiana summer and found tons of natural puka shells!

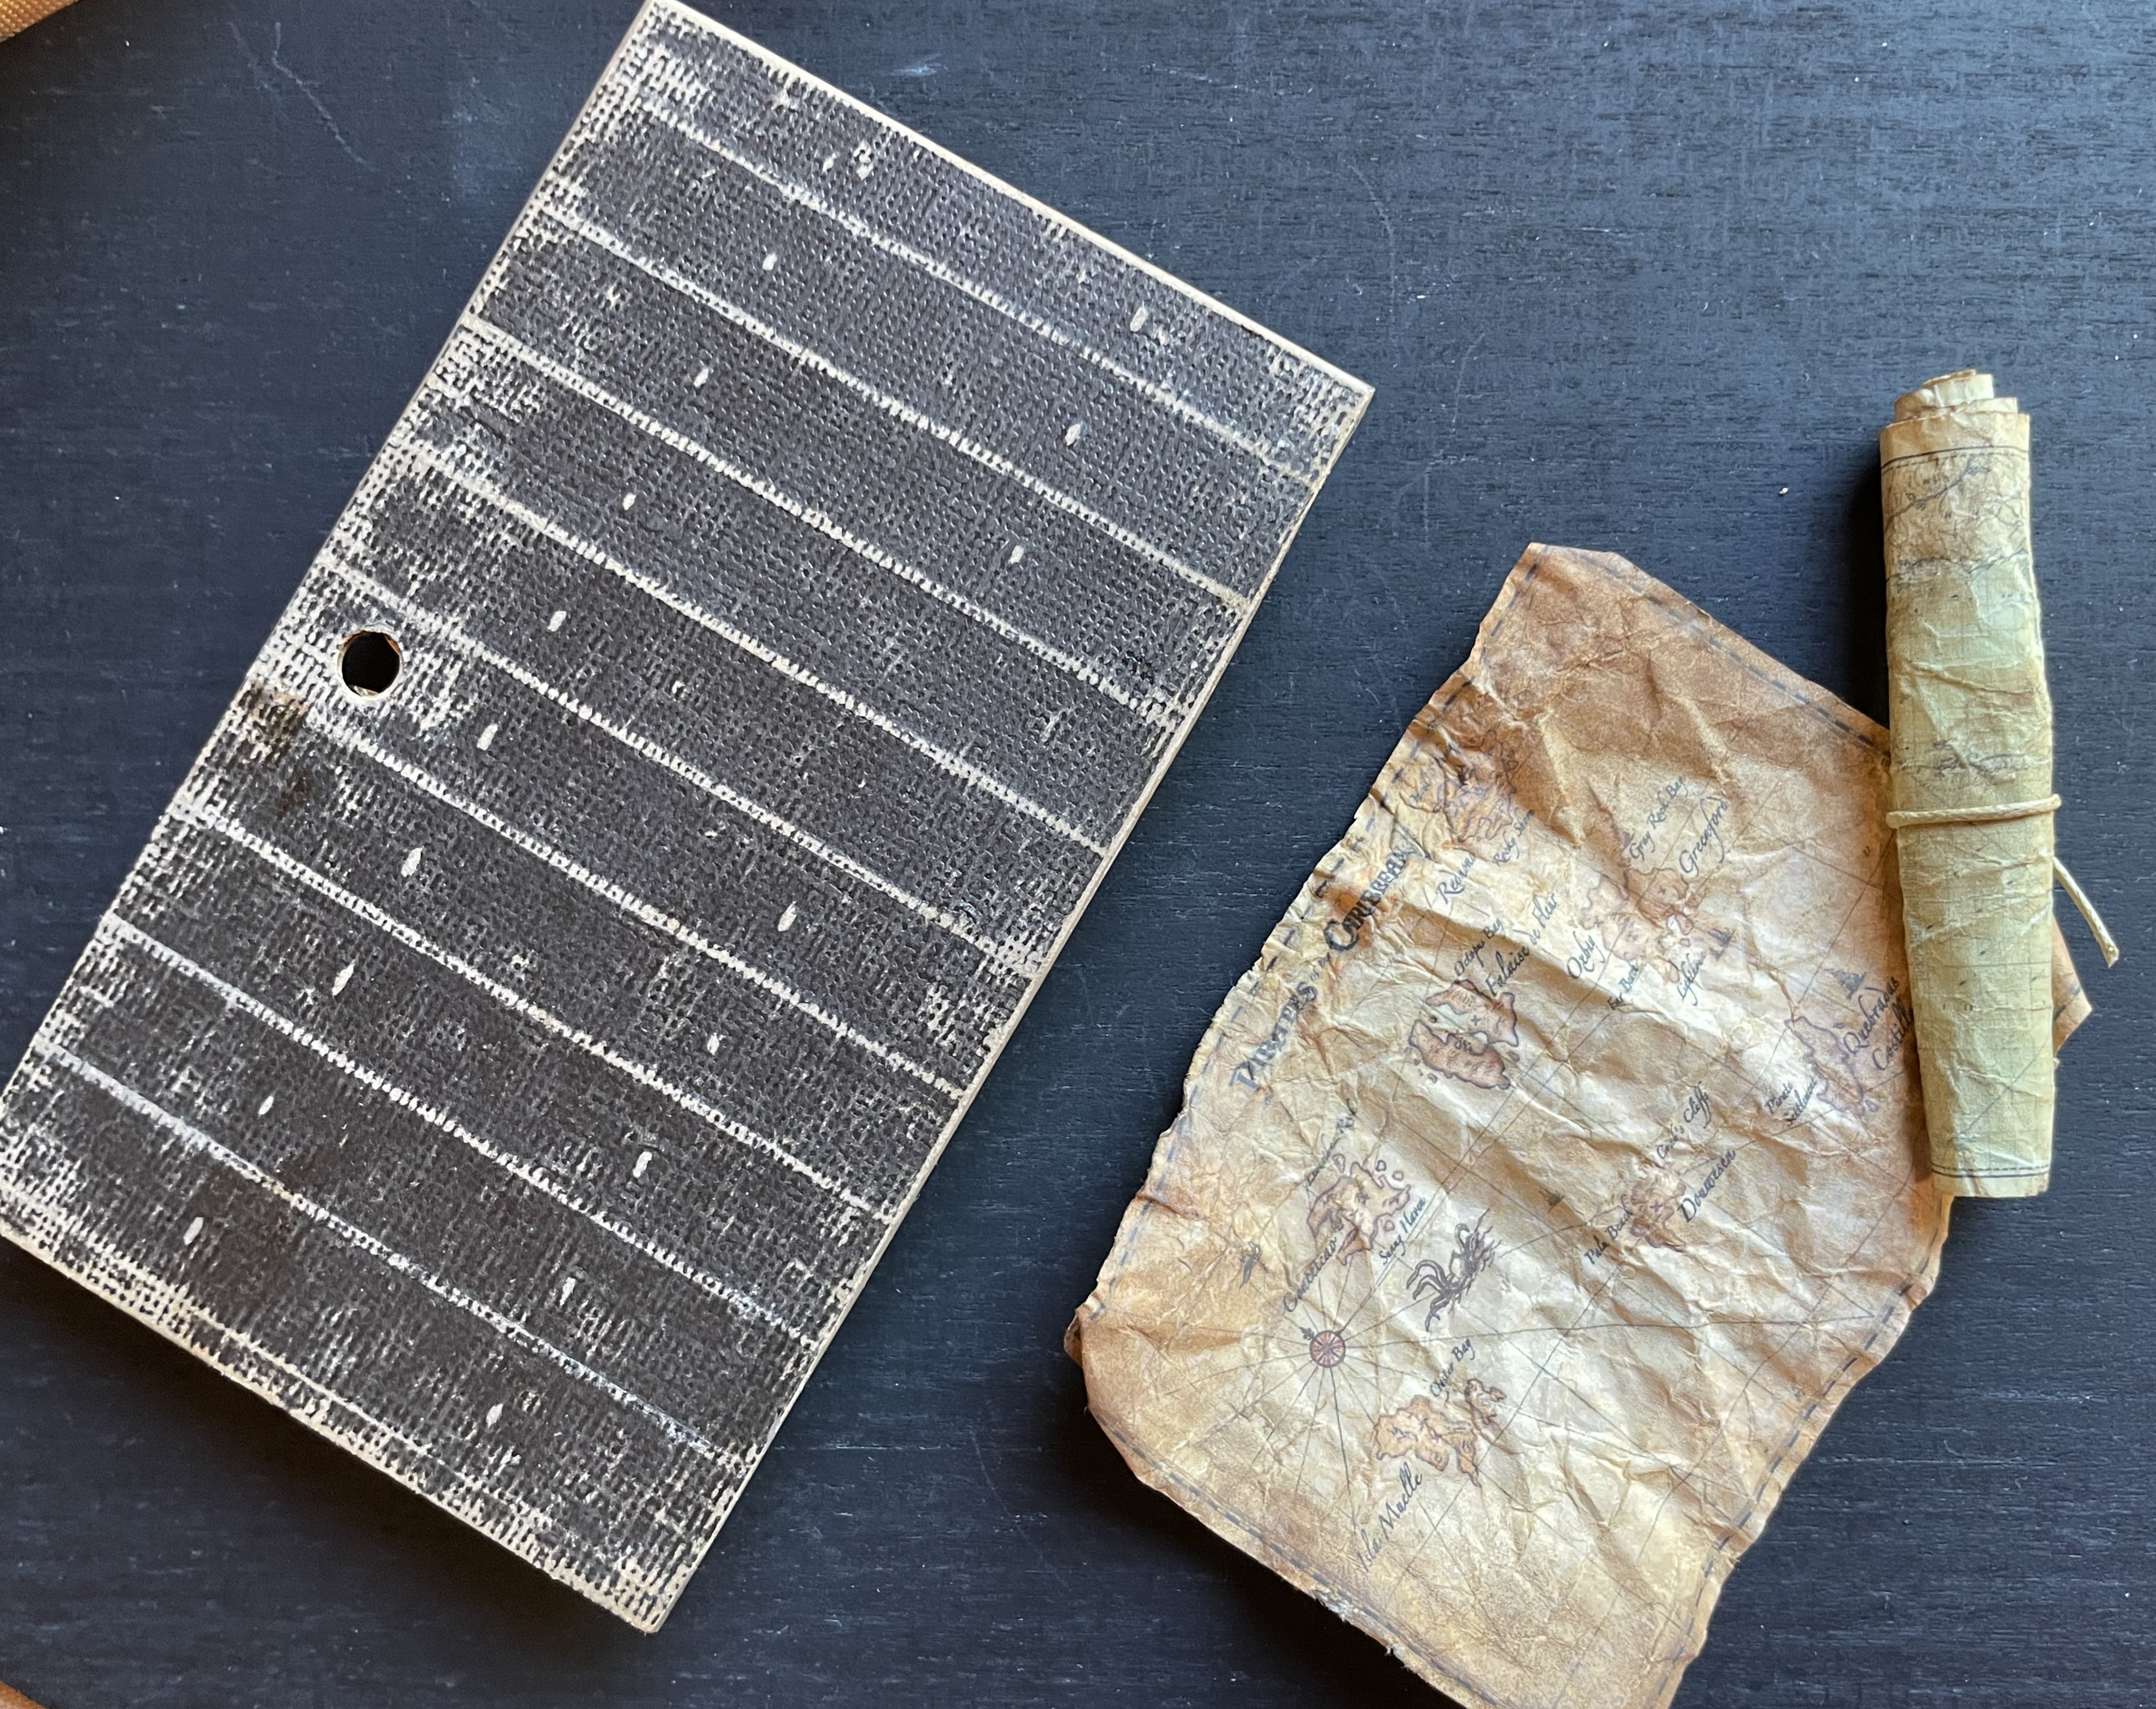
A simple printed out pirate's map set completes the box.

This is the backside of the coins. The pallet does look real!

THANKS! for joining us once again for us on
Saturday Showcase!
Come browse through
and join in on the fun of our latest challenge.
Then come on over to 
 to find those supplies you want to round out the perfect entry for the challenge!

Have a wonderful- and Safe Holiday!
HAPPY BLOGGING!!